Channel
What is a Channel?
A Hyperledger Fabric channel can function as a network inside a network. When two or more users want to create a separate environment where they can interact without involving other parties on the network, they create a channel. A channel is an essential entity of a blockchain network and the only way to communicate within the network.
Channels are one of the main reasons why Hyperledger Fabric is considered one of the best private blockchains.
If you create a channel inside a Hyperledger Fabric network, other network members will not know of its existence. Each channel has a separate ledger which the channel members maintain. All transactions inside a channel are added to this ledger. Only the members of a particular channel can read or write transactions to the ledger of that channel. The possibility of creating channels gives more granularity and flexibility to the Hyperledger permissioned blockchain.
How to Create a Channel?
Creating a channel on Hyperledger Fabric requires in-depth knowledge of the Hyperledger Fabric architecture and knowledge about the different required elements. However, Catalyst Blockchain Manager makes it extremely easy to create a channel. Even if a non-technical person wants to develop their solution on top of Hyperledger Fabric, all they need to do is follow the documentation’s instructions.
To create a new channel on Catalyst Blockchain Manager, select the Channels tab on the navigation bar. It will display all of the channels that you participate in or have created. Then click on the "Create channel" button.
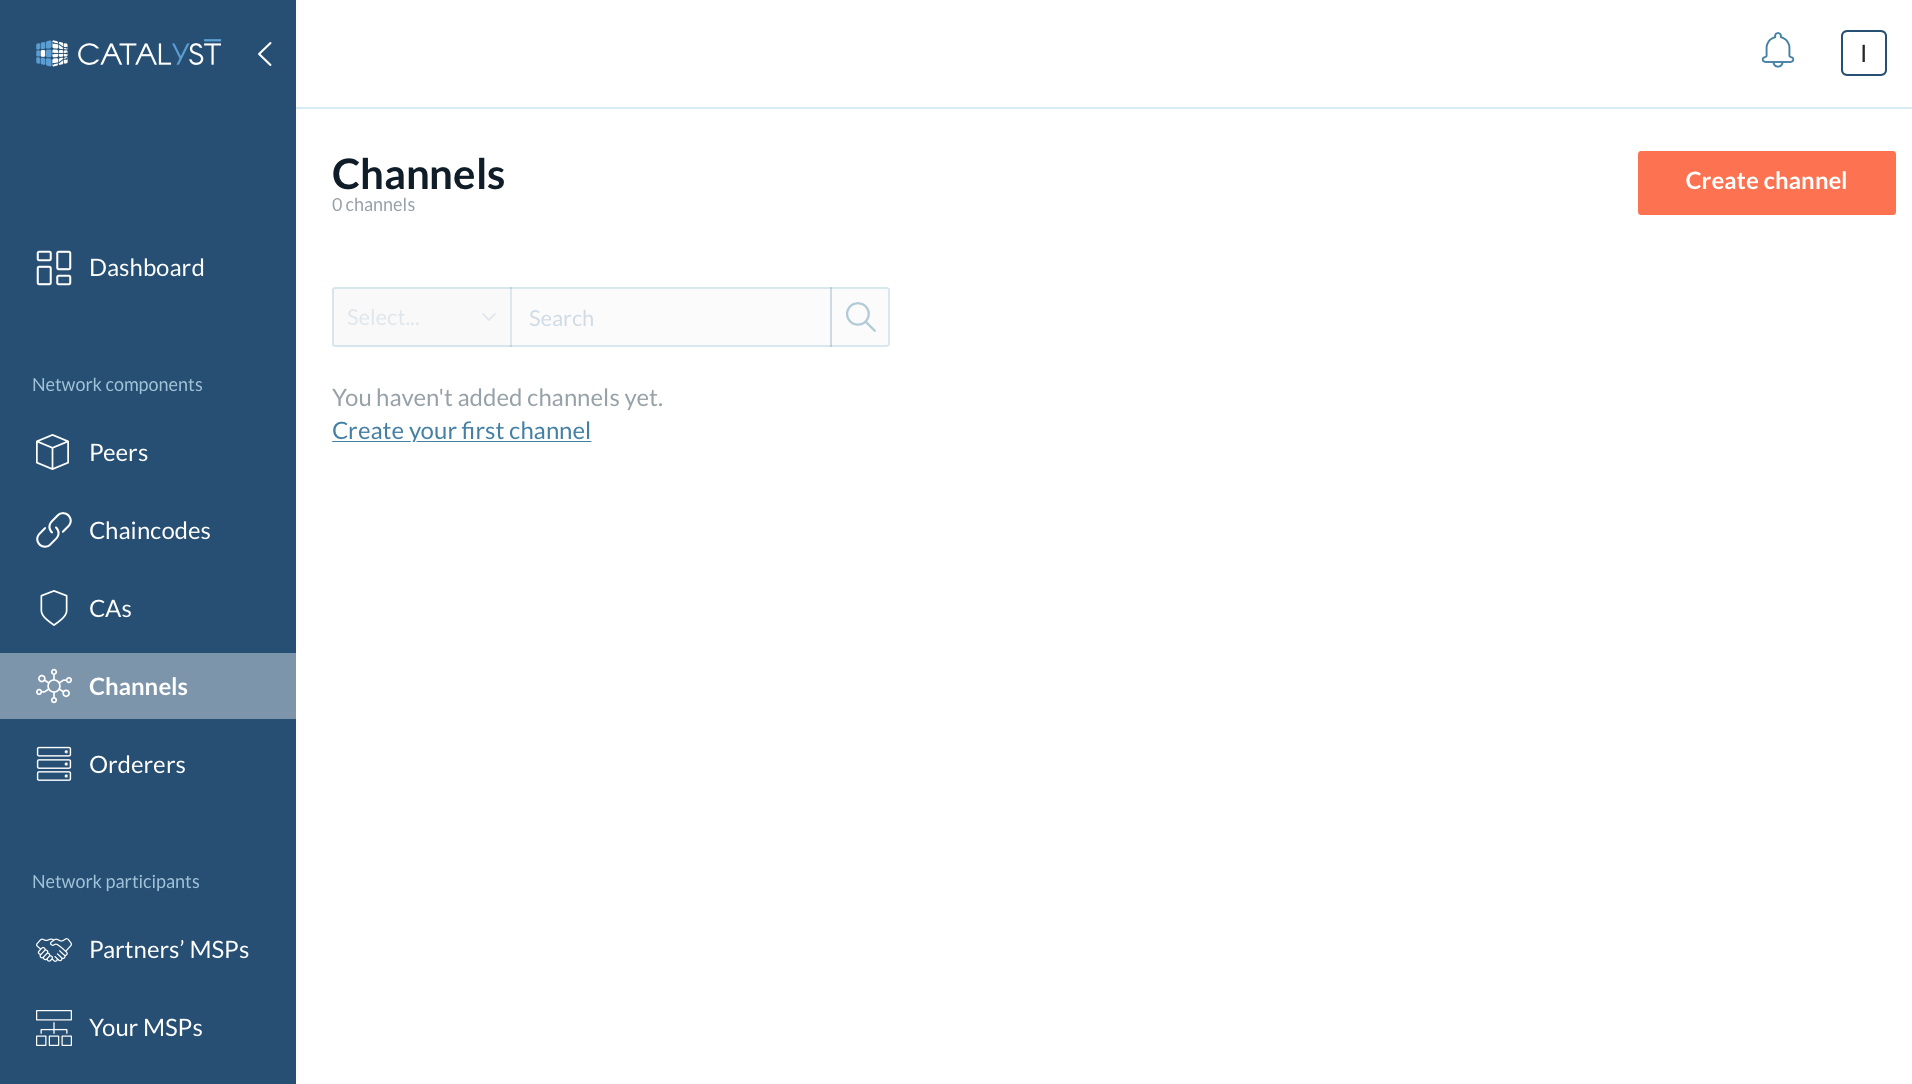
It opens a new window that allows you to create a new channel with your preferred customizations.
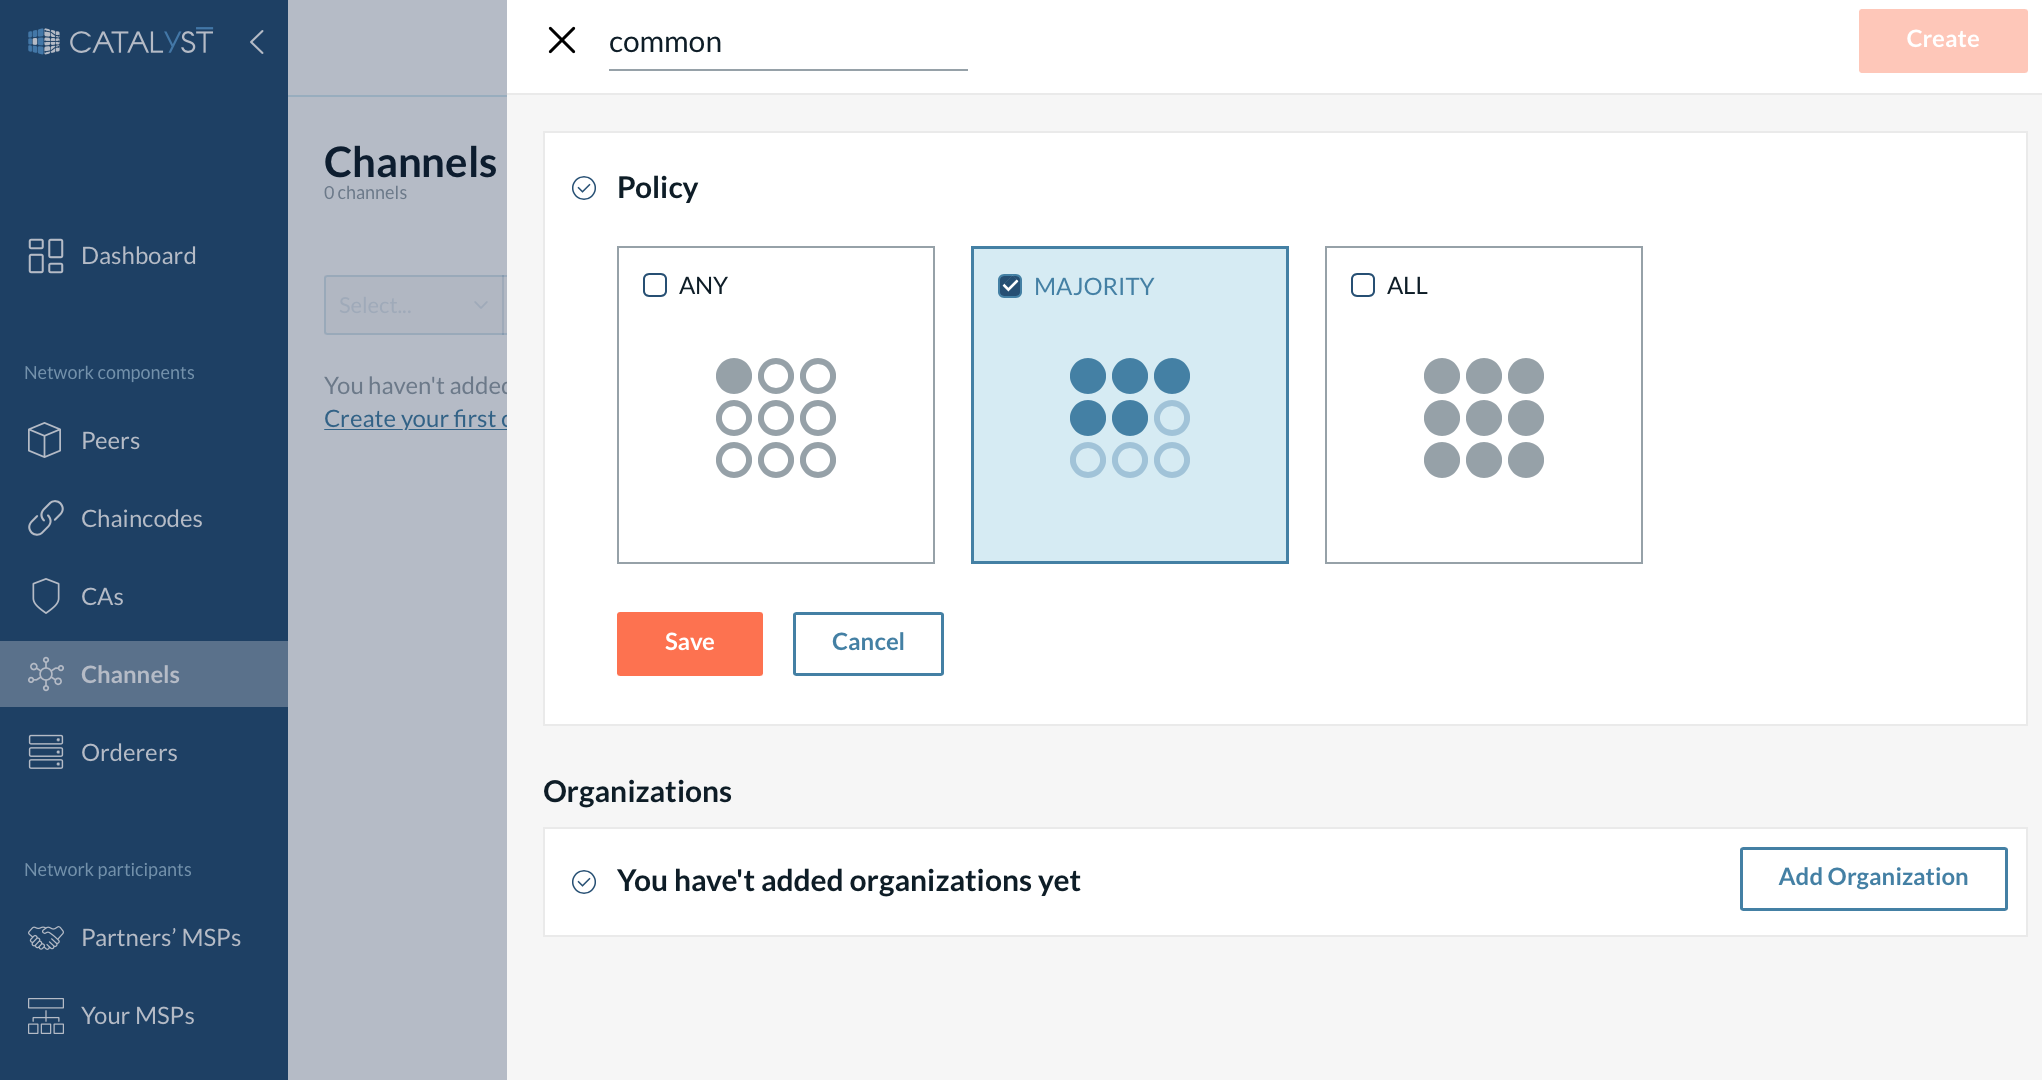
Name
When naming a channel, keep in mind that every channel will have a unique name on the platform.
| Sometimes you cannot create a channel with a new name because other organizations in your network already used that name for a channel on which your organization does not participate. |
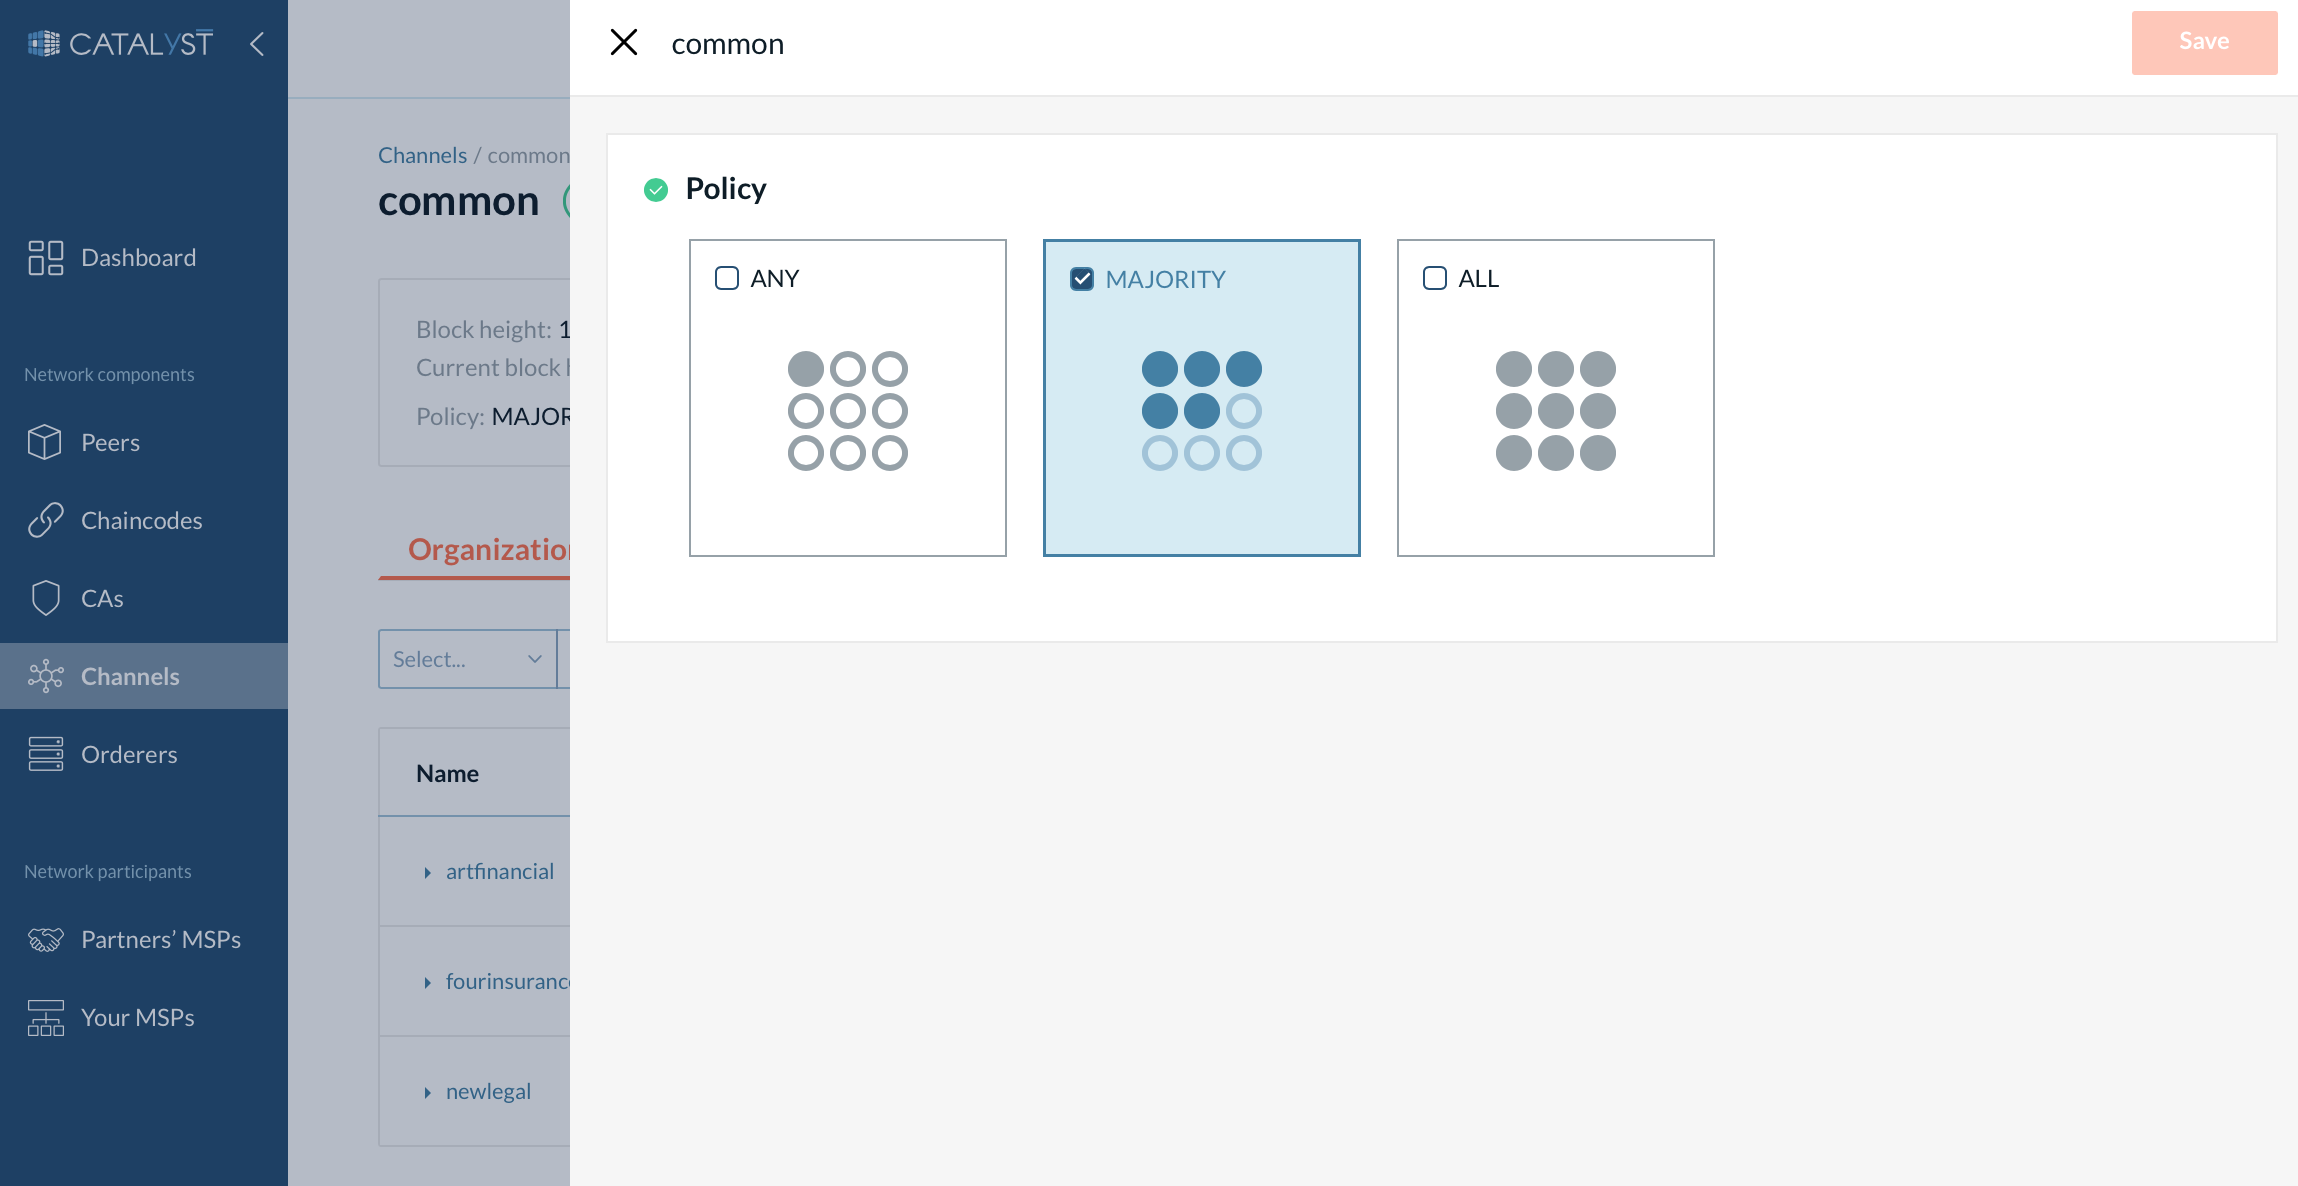
Policy
The channel policy is the governing model for a channel. Activities such as validation of a transaction, addition of a new organization, and chaincode-related actions are all executed according to the channel policy.
Organizations
Then you need to add organizations to a channel. At least one organization is required at the time of the creation of a new channel. You can add new organizations later as well.
| Only consortium members can create channels and be added to the channel during creation. Other organizations that are required can be added to the channel at a later point in time. |
In this section, you must define the following parameters:
-
Organization - You can only add organizations to the channel that are already members of the consortium.
-
Anchor peers - You add anchor peers for peer discovery. It is important to note that this is not a specific peer, rather it is just a role. Every organization must have at least one anchor peer.
-
Joined peers - This is the list of peers that belong to the user’s organization. You can select all or specific peers to join the channel. If you are adding an organization, you can not add their peers, but just the system channel’s consenters.
| You can add peers only for your organization. Other organizations should add their peers by adding them to a channel later. |
-
Consenters - These are the subset of the ordering nodes that are part of the system channel, responsible for ordering the transactions on a given channel. At least one consenter must be added for the particular channel.
|
Starting from Catalyst Blockchain Manager v. 2.3.0 you can join an organization to a channel even if it doesn’t host any ordering node. In this case, you can skip adding its consenter. Please, refer to this section to read more. |
-
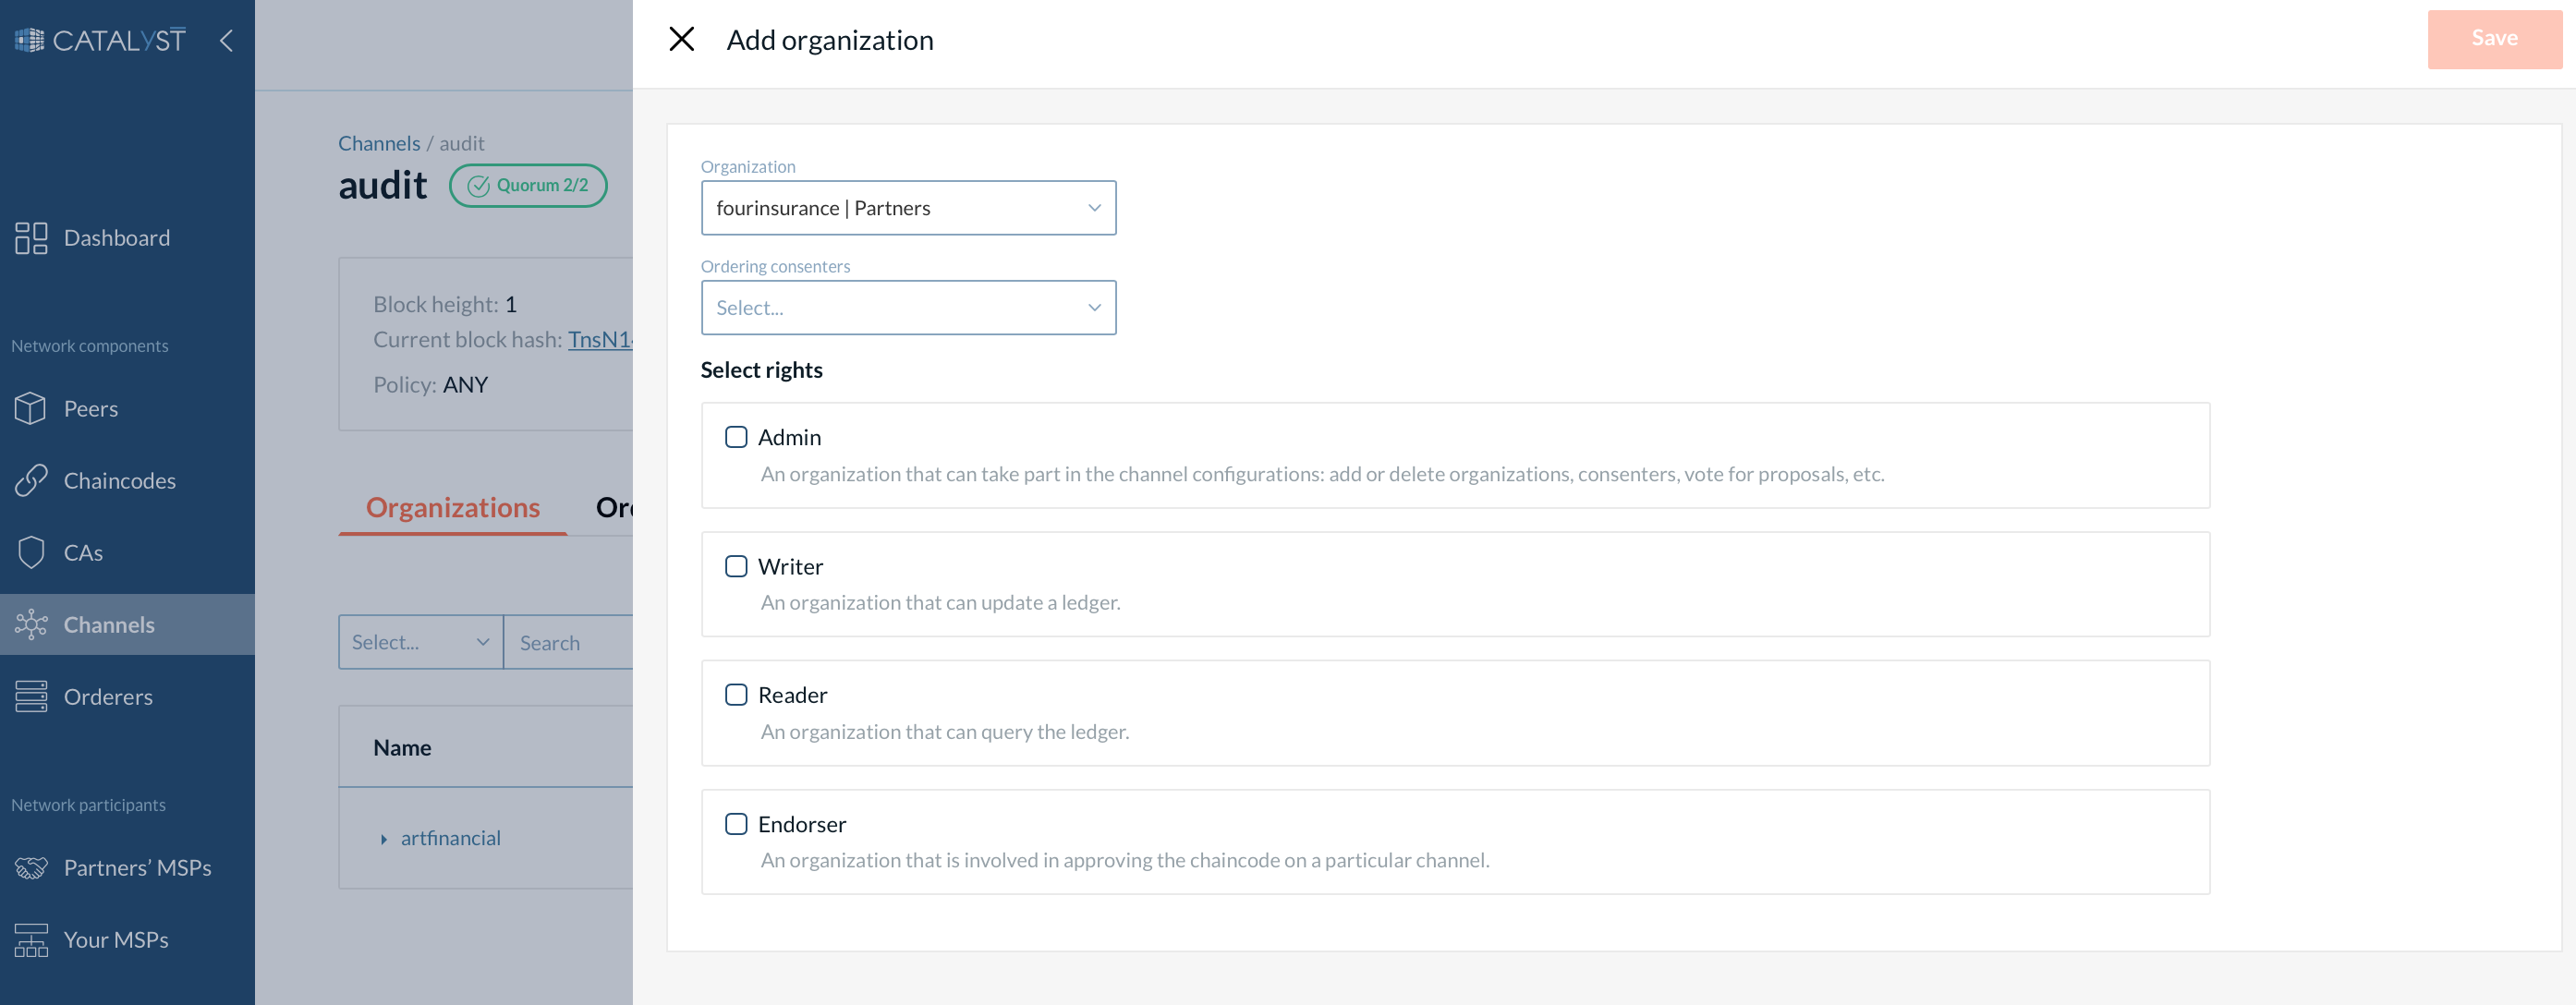
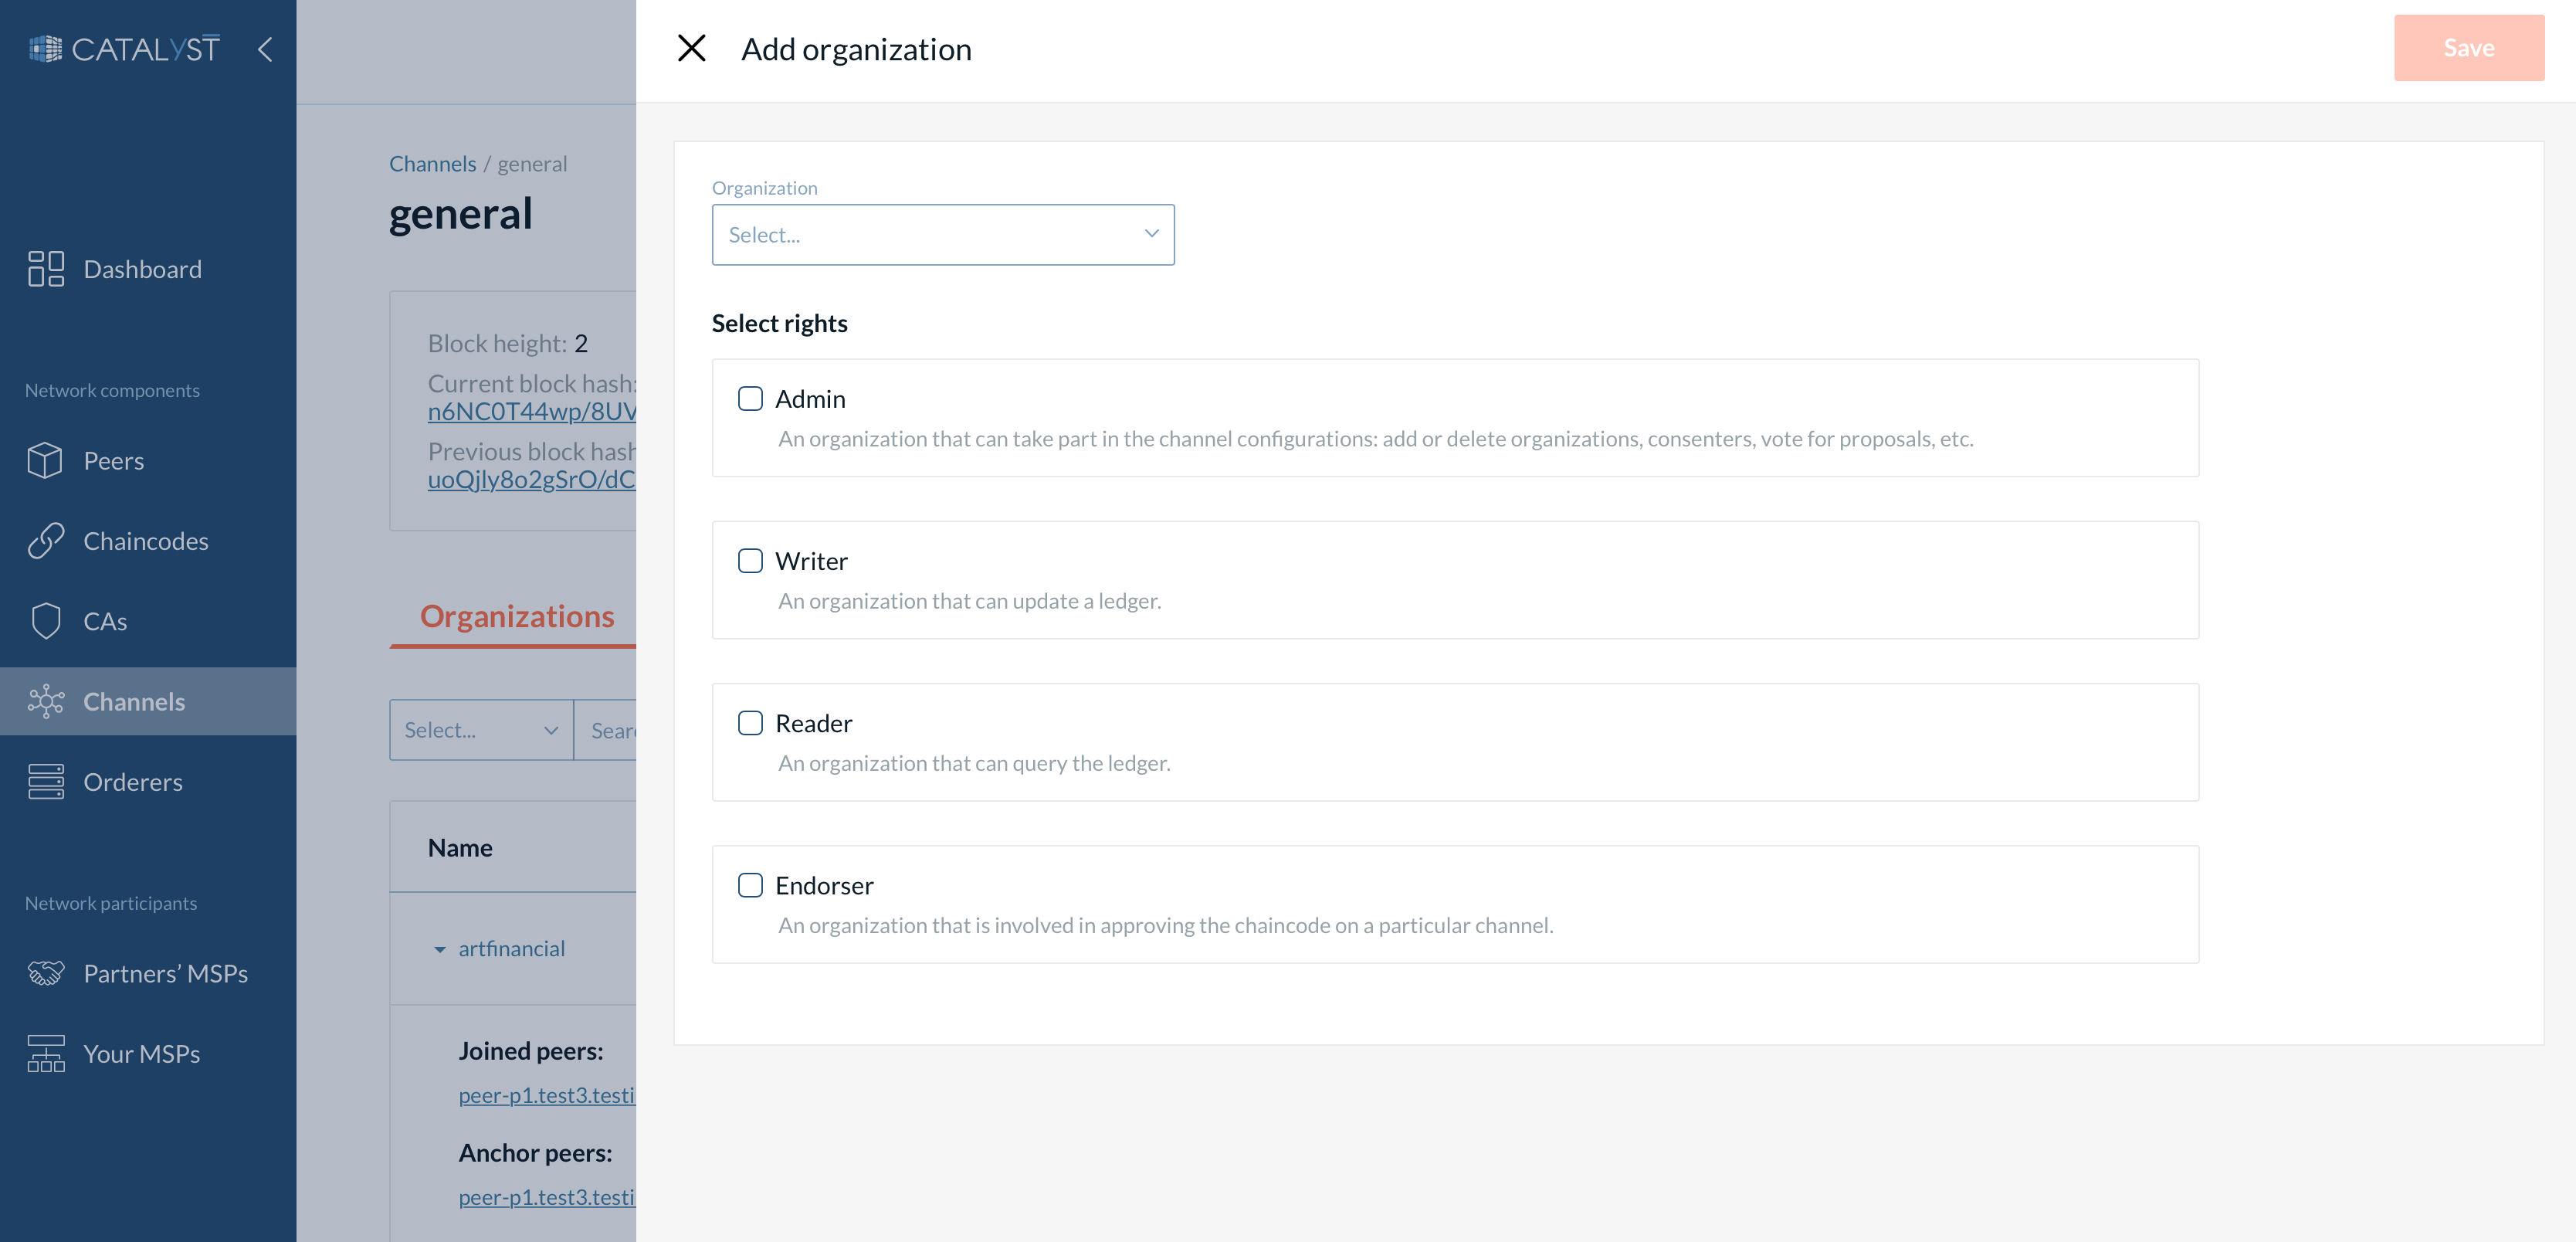
Select rights
-
Admin - An admin organization takes part in the channel configurations.
-
Writer - A writer organization can update a ledger.
-
Reader - A reader organization can query the ledger.
-
Endorser - An organization that is involved in approving the chaincode on a particular channel.
-
| You need to assign the role according to your business needs, but each role should be covered by at least one organization while creating a channel. |
Click on the “Create” button after entering all of the details and your channel will be created.
The channel will appear under the “Channel” tab only after at least one peer has been added. To know more about adding a peer to the channel, please refer to this section
Channel Configurations
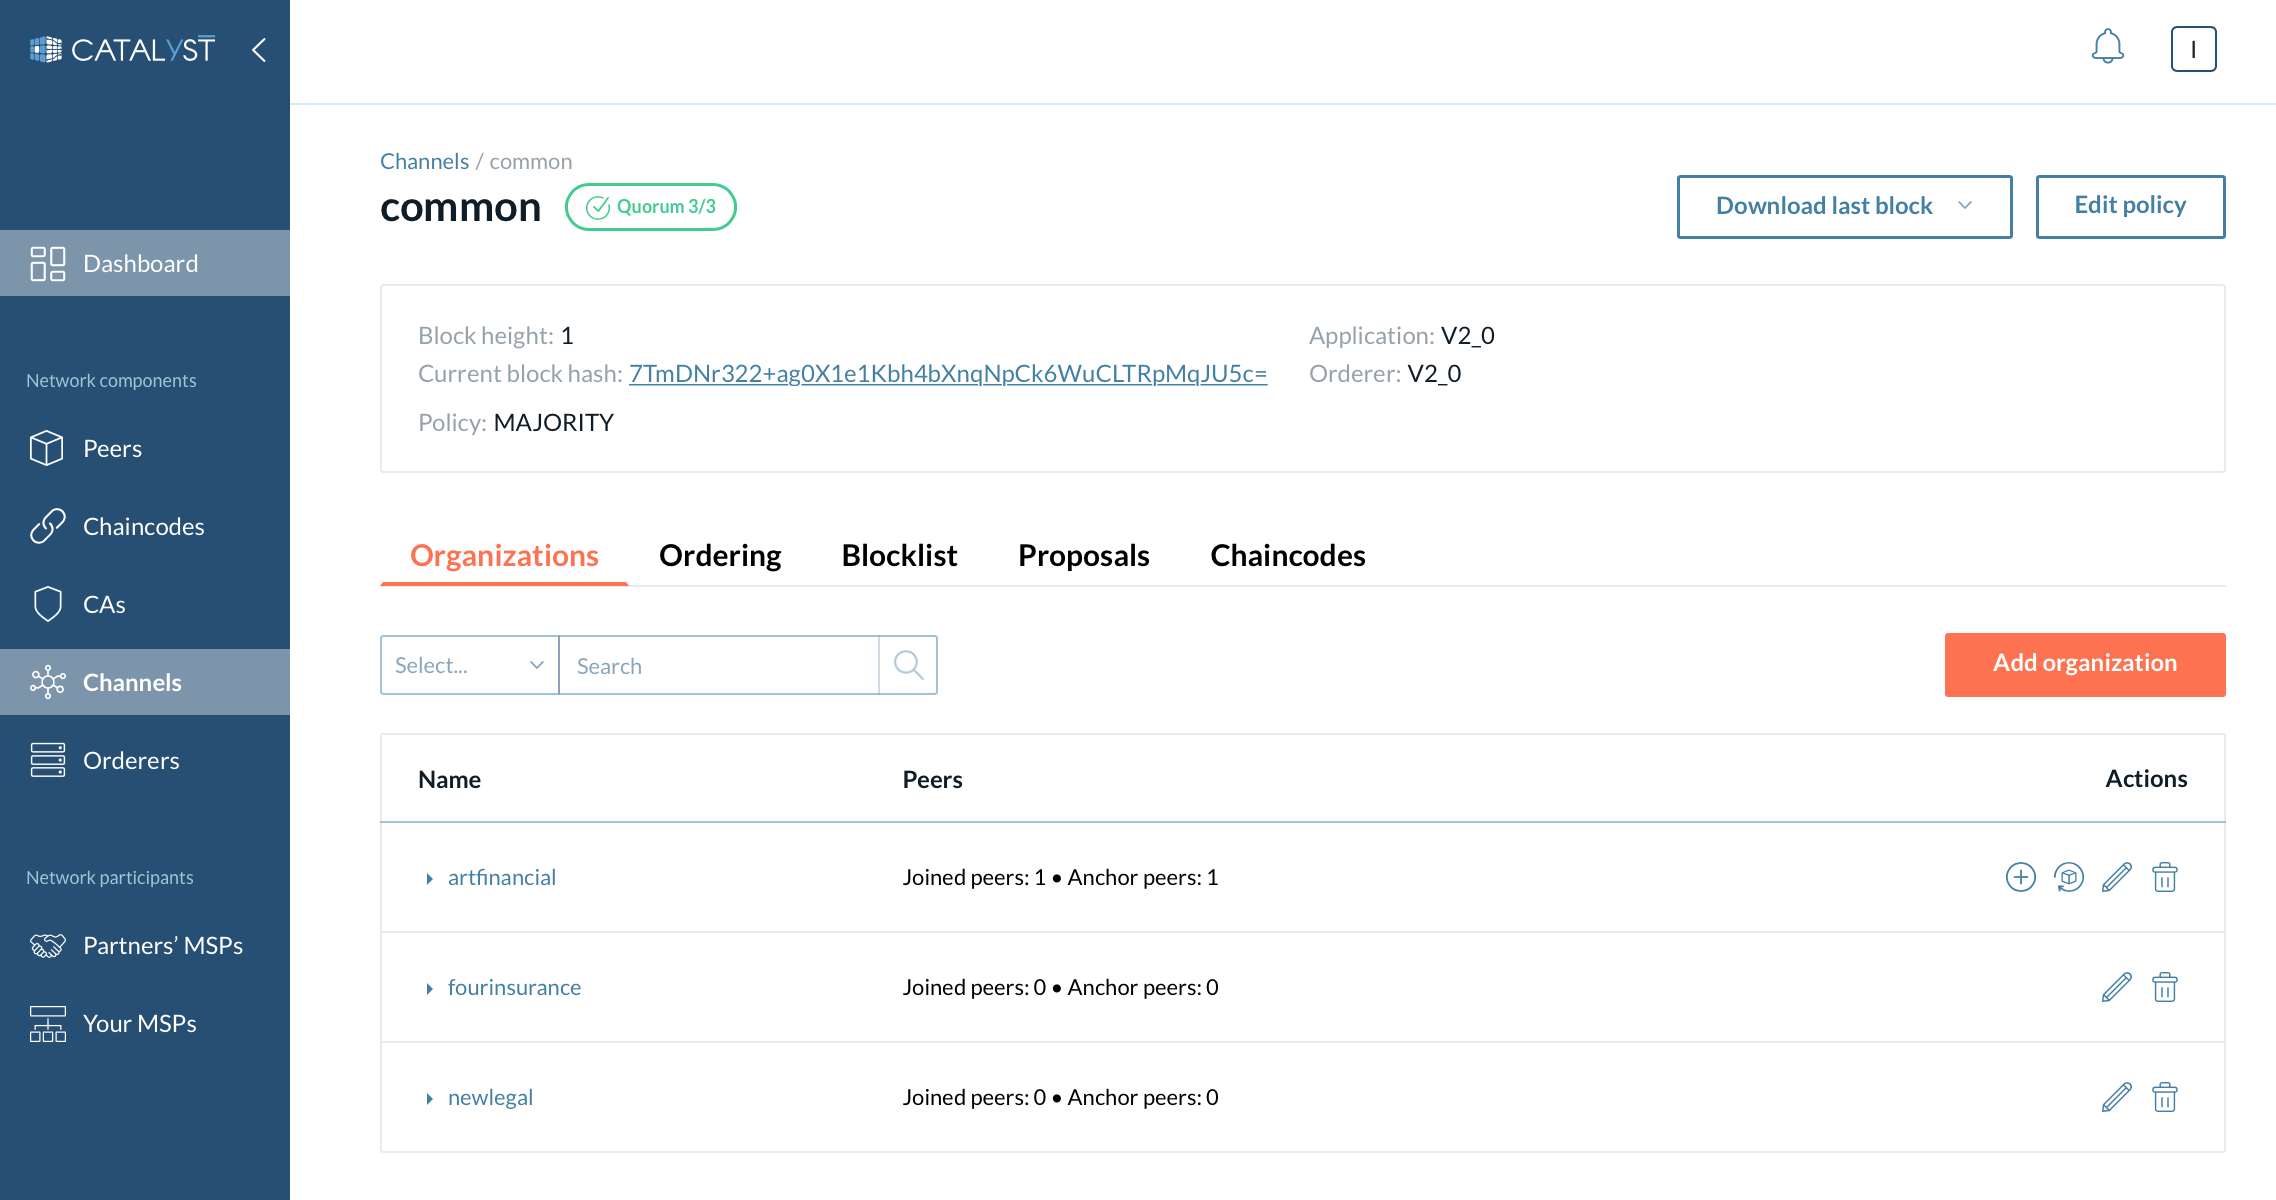
After you have successfully created or joined a channel, you can configure it under the “Channels” tab. Click on the name of the channel you want to configure and it will expand the channel box. The information displayed on the screen consists of two sections.
|
If you cannot see the channel name you need under this tab, it can be because no peer was added to that particular channel |
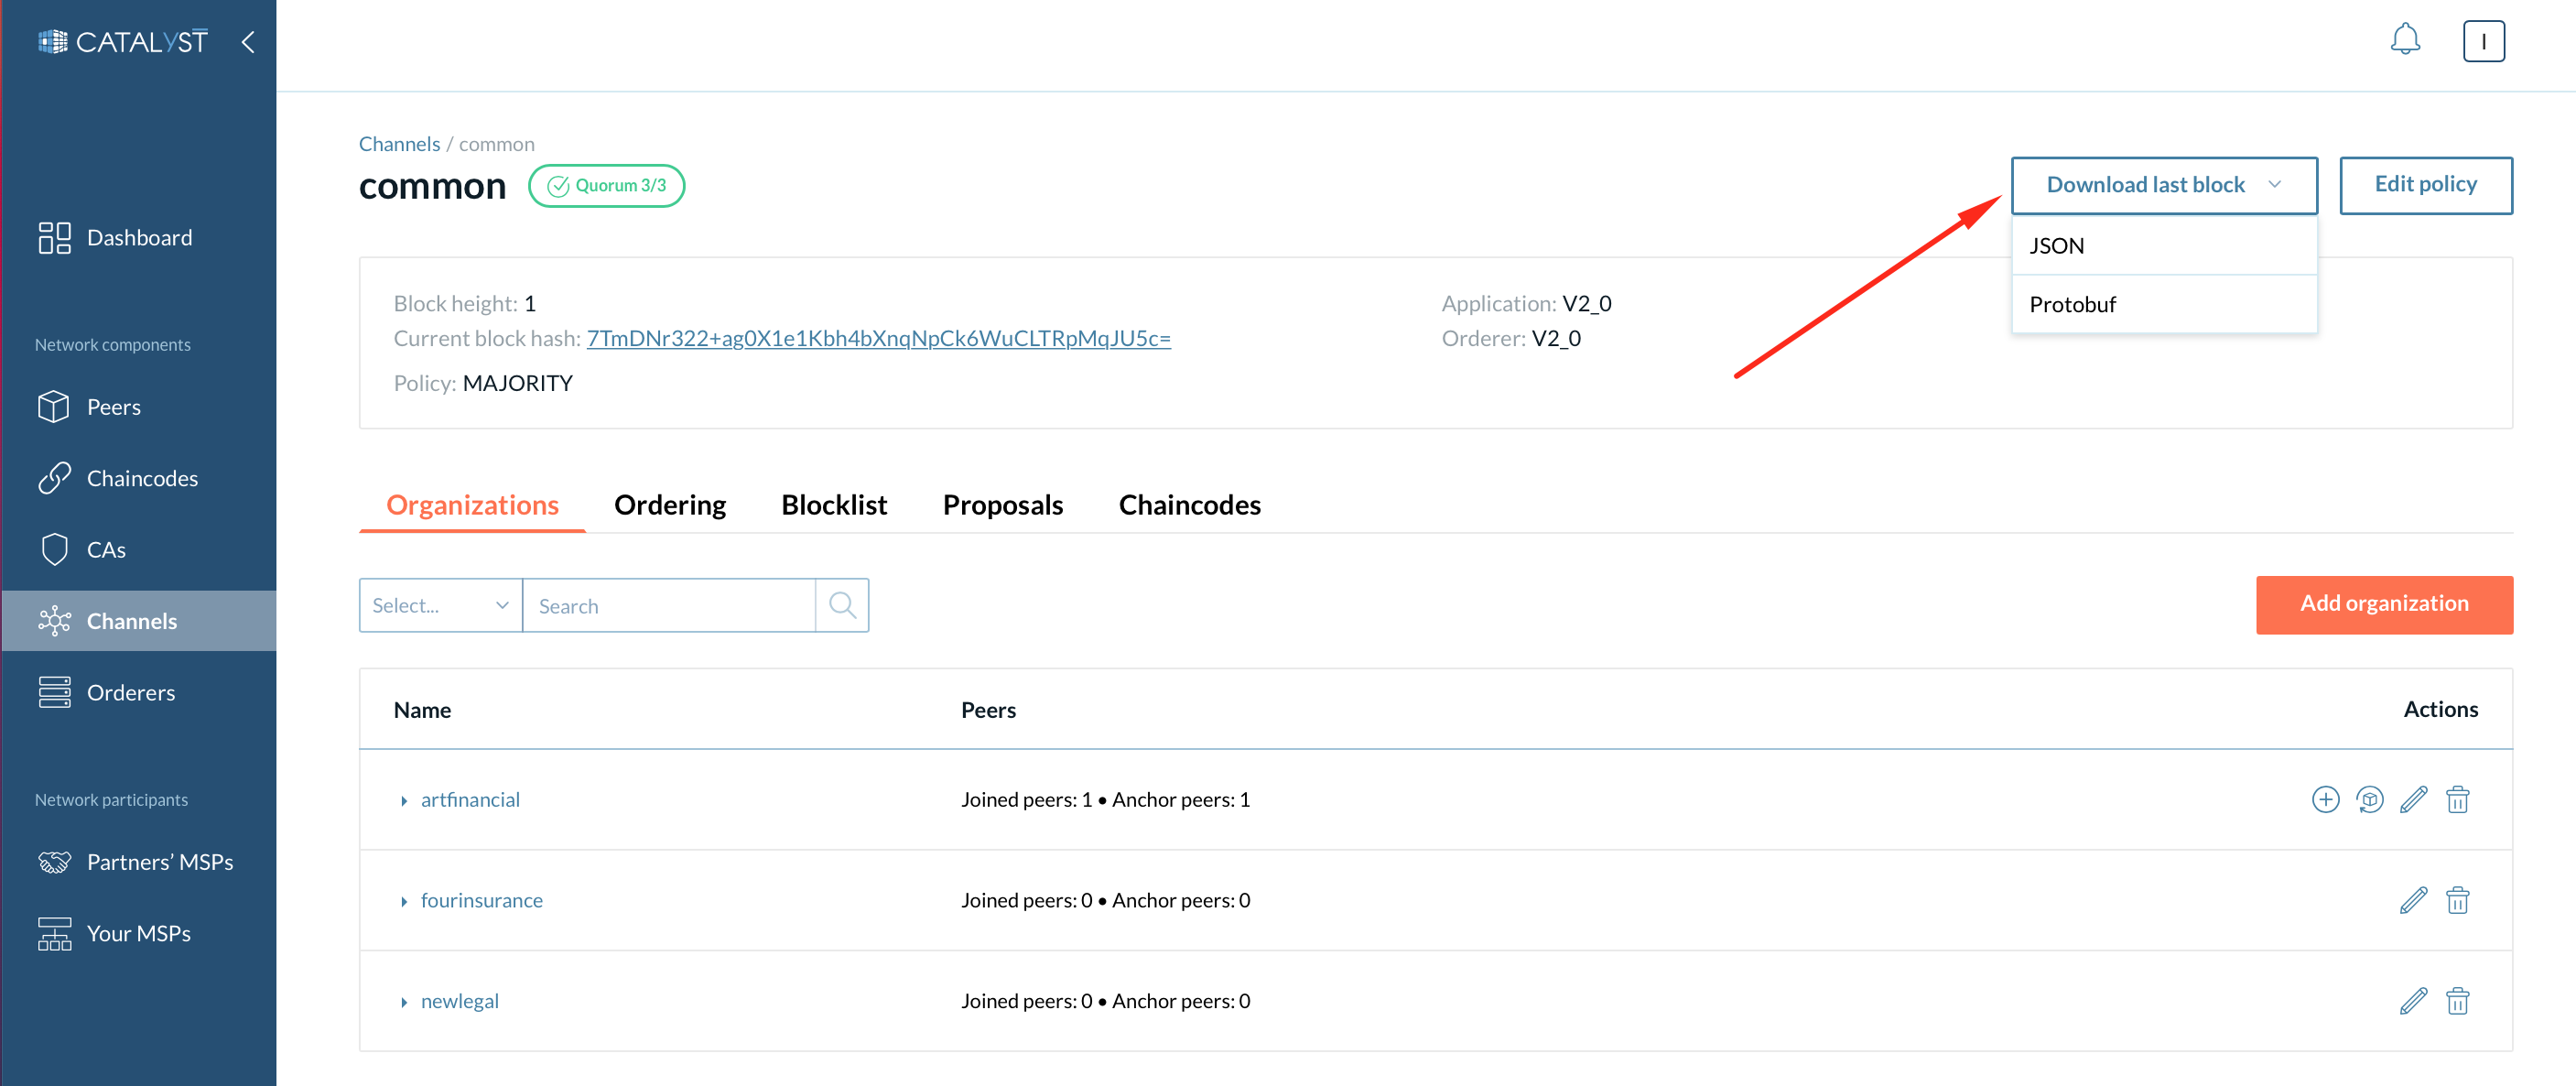
General information
Section one contains the general information about the channel, such as the block height, current block hash, previous block hash, policy, capabilities, and status.
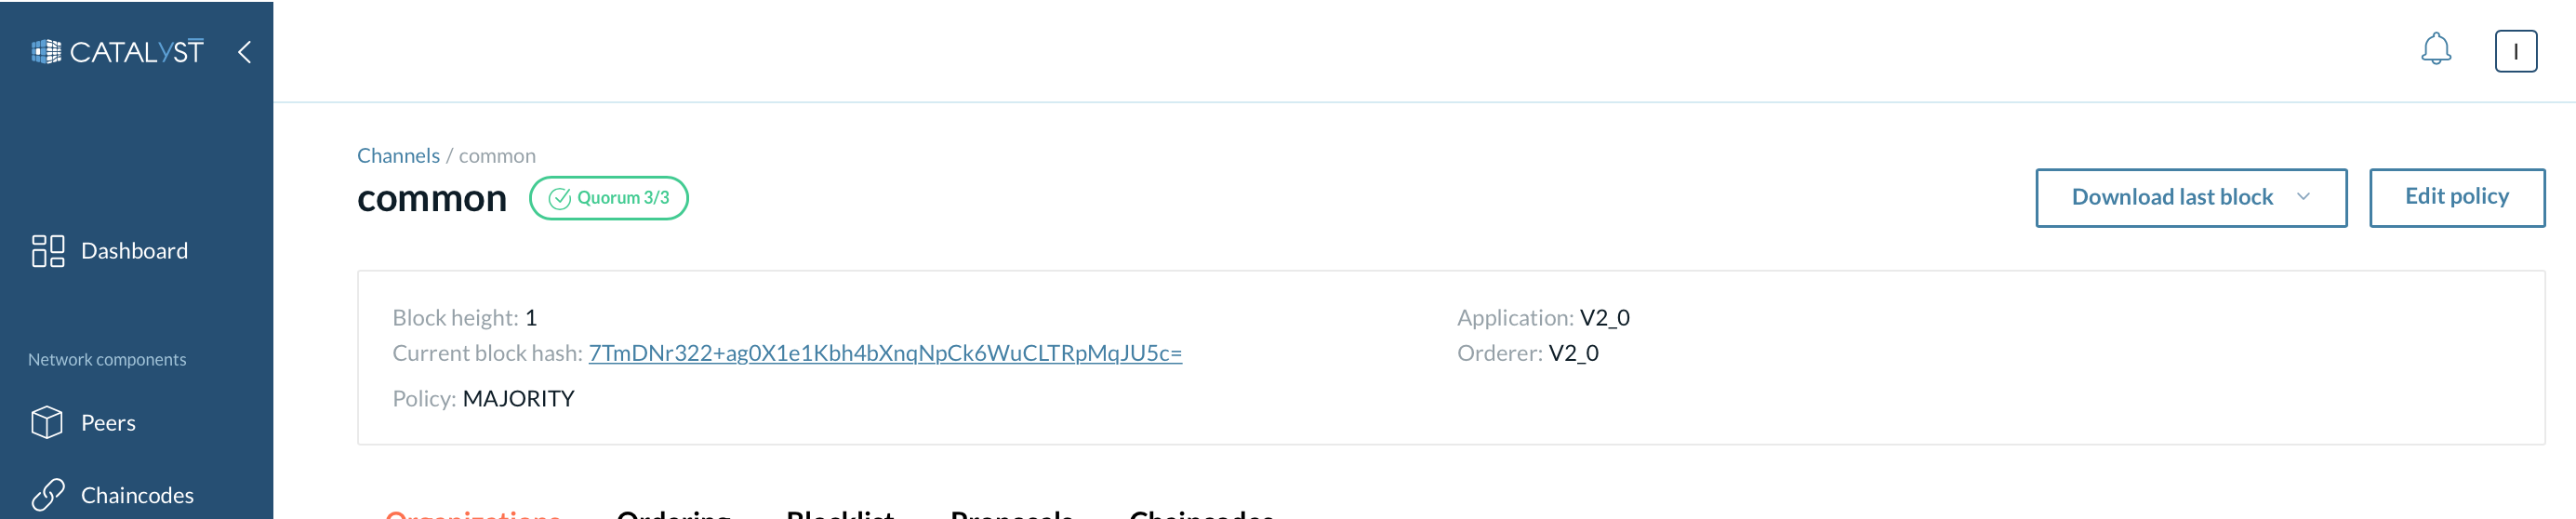
The “Edit policy” button allows you to change the channel’s policy.
Only a channel’s admins can edit the channel’s policy. If you don’t have admin rights on the channel, you can still perform this action using our UI. In this case, a proposal will be created. This proposal will appear at the Proposals tab on the particular channel and has to be voted and completed by an admin organization (the number of votes needed depends on the channel’s policy and amount of admin organizations on the channel). to read more about proposals.
| You can check organizations’ rights at the Organizations tab. |
The "Download last block" button allows downloading a channel configuration in JSON or protobuf formats.
The second section in the lower part of the screen constitutes five tabs.
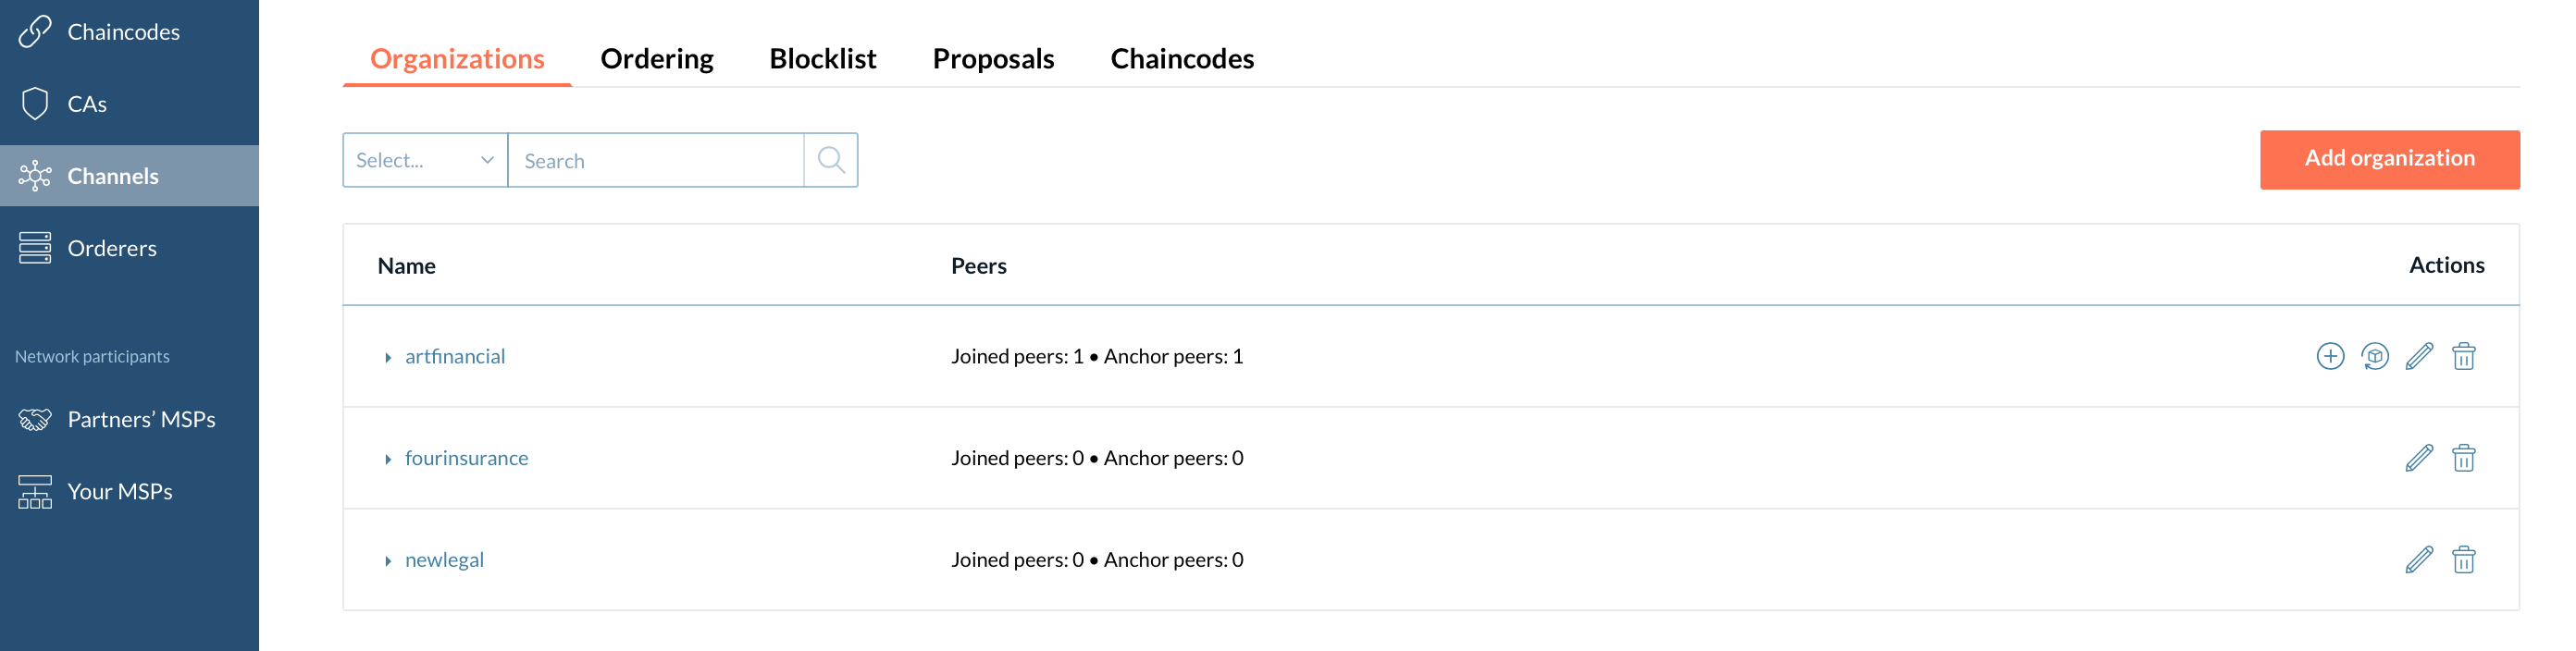
This tab shows organizations with their rights and peers that are a part of the selected channel. This section reflects an application part of a channel configuration.
Add an organization to a channel.
By clicking the “Add organization” button, you can add an organization to a channel. This organization should be added to the partners’ list first.
| Only one consenter can be added. This consenter should also be present in the consenters list on a system channel. You can skip adding a consenter if the organization is going to use an external orderer. |
|
This action may create a proposal first. Please refer to the Proposals section to read more. |
Remove an organization from a channel
The Remove organization action removes the organization along with its consenter.
Because of Raft specific, you cannot remove an organization with more than one consenter belonging to this organization added to the channel. To be able to remove an organization with two or more consenters, please remove its consenters from the channel.
|
This action may create a proposal first. Please refer to the Proposals section to read more. |
| You can initiate removing your organization from the channel yourself. In case this action creates a proposal first and you have admin rights on the channel, you can approve the proposal. But do not commit this proposal to the channel by your organization. Instead, this proposal should be committed by another organization in the channel. |
Edit an organization’s rights
The Edit organization action edits the organization rights on a particular channel. In some cases, this action may create a proposal first. Please refer to the Proposals section to read more.
Add a peer and update an anchor peer
You can also add more peers to the channel or update anchor peers for your organization. You cannot update peers belonging to other organizations.
| We recommend having at least one anchor peer for the organization for service discovery. |
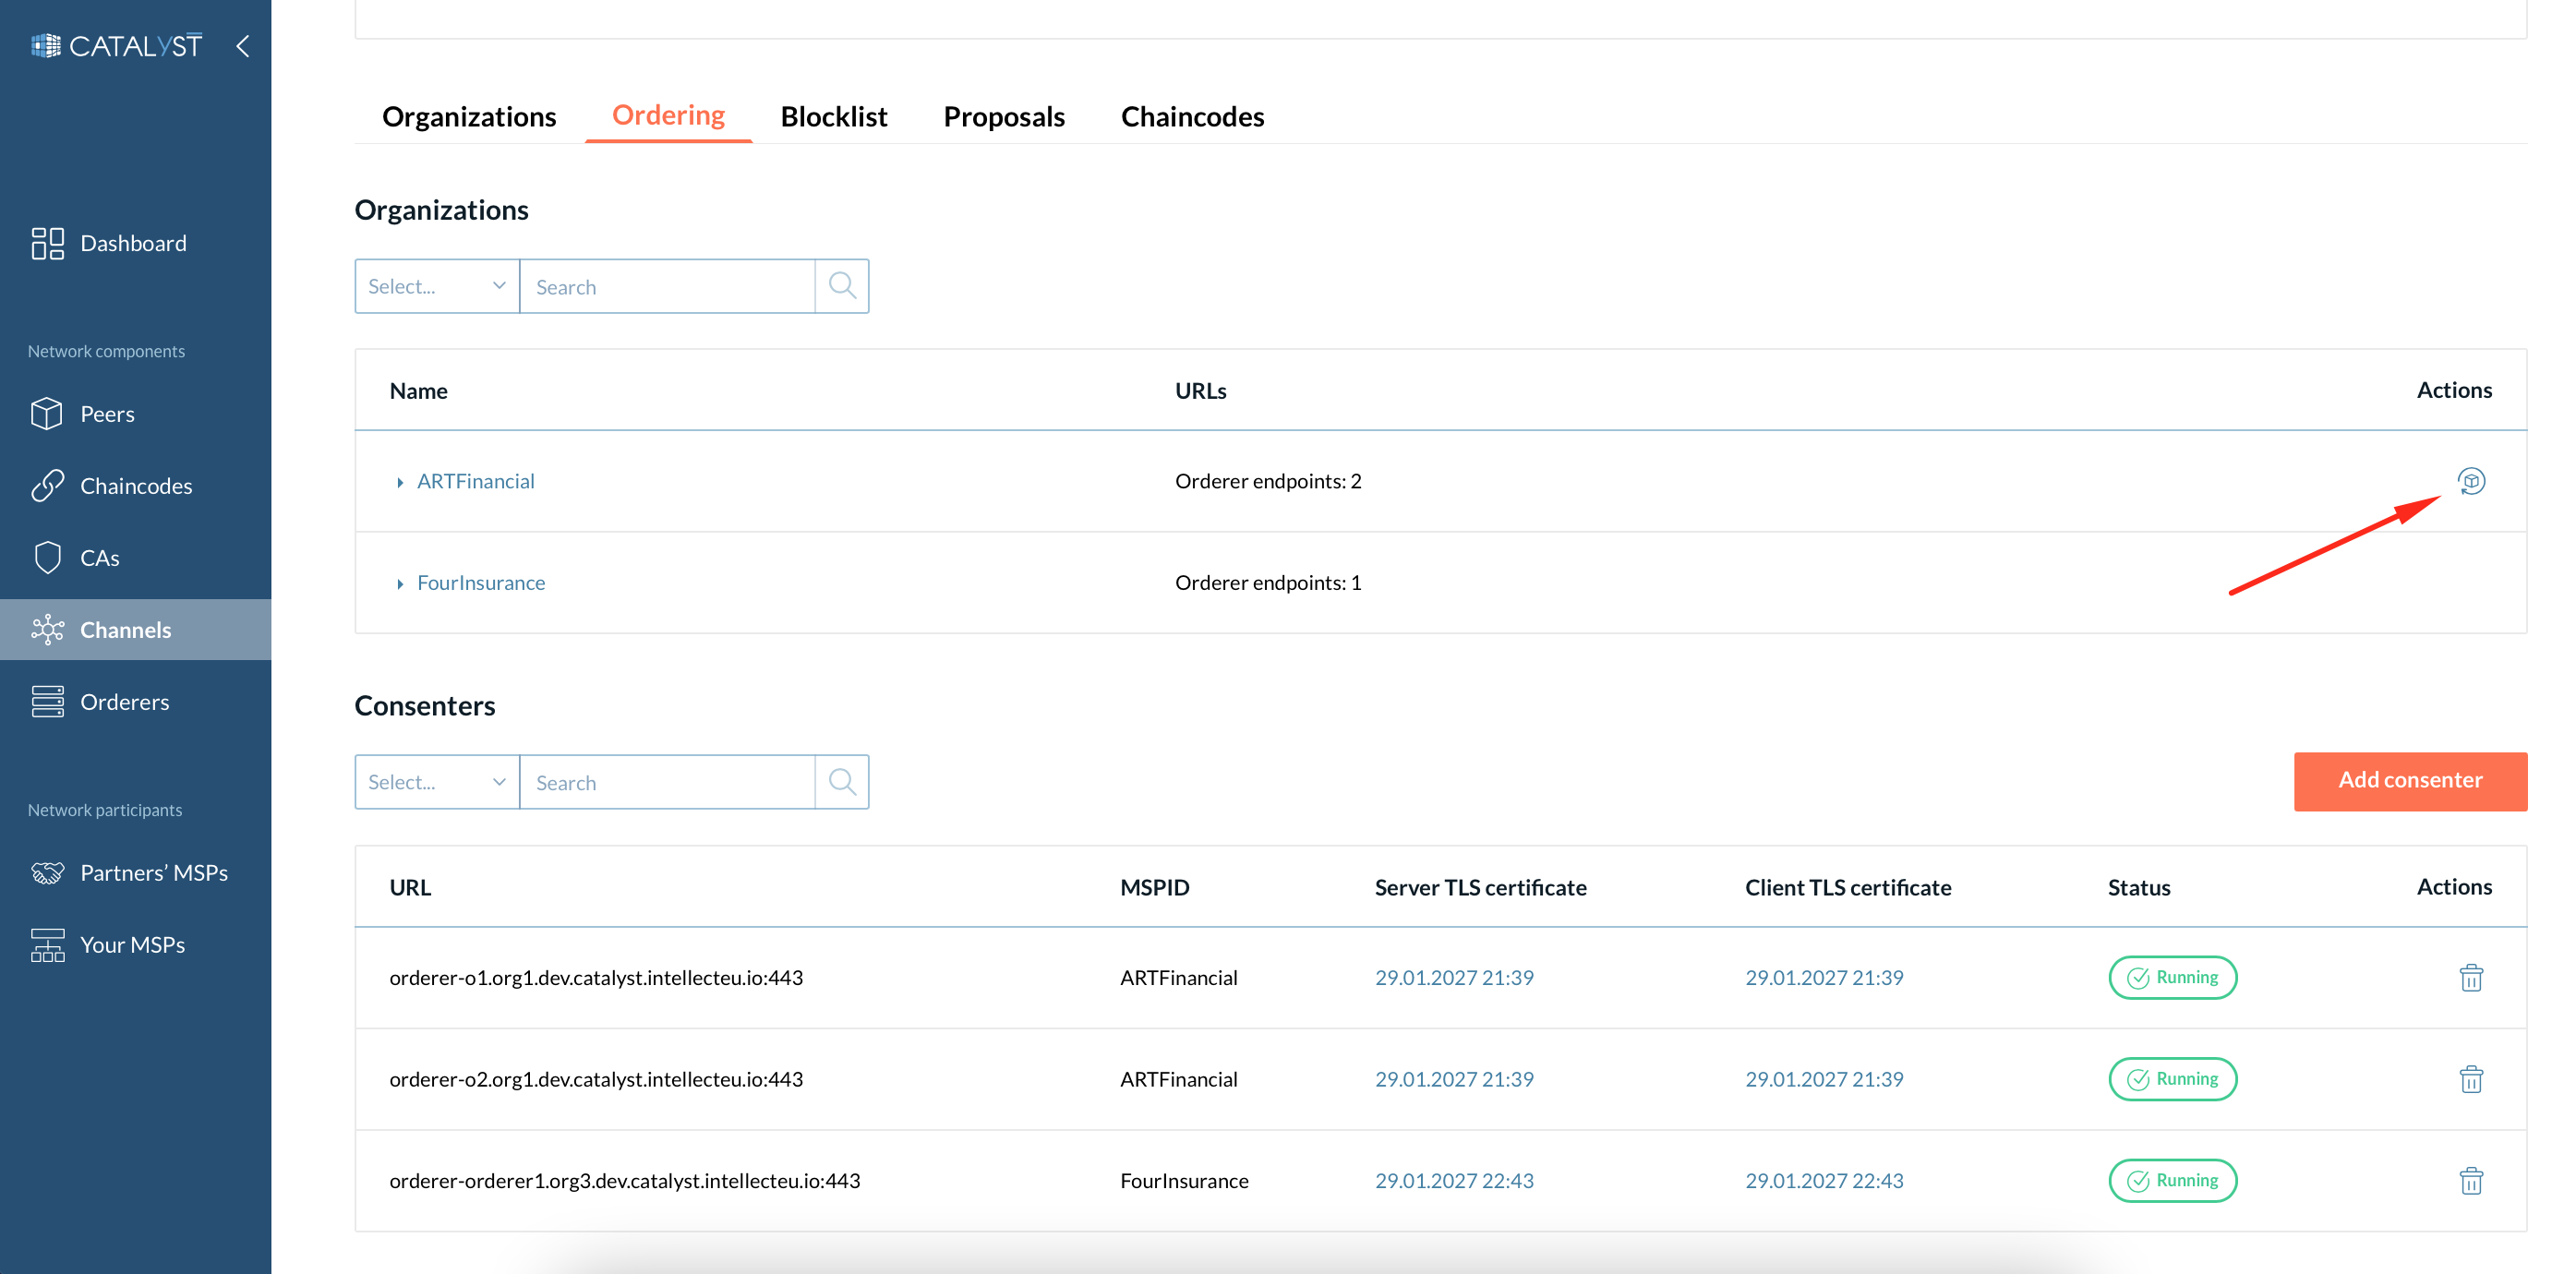
Ordering
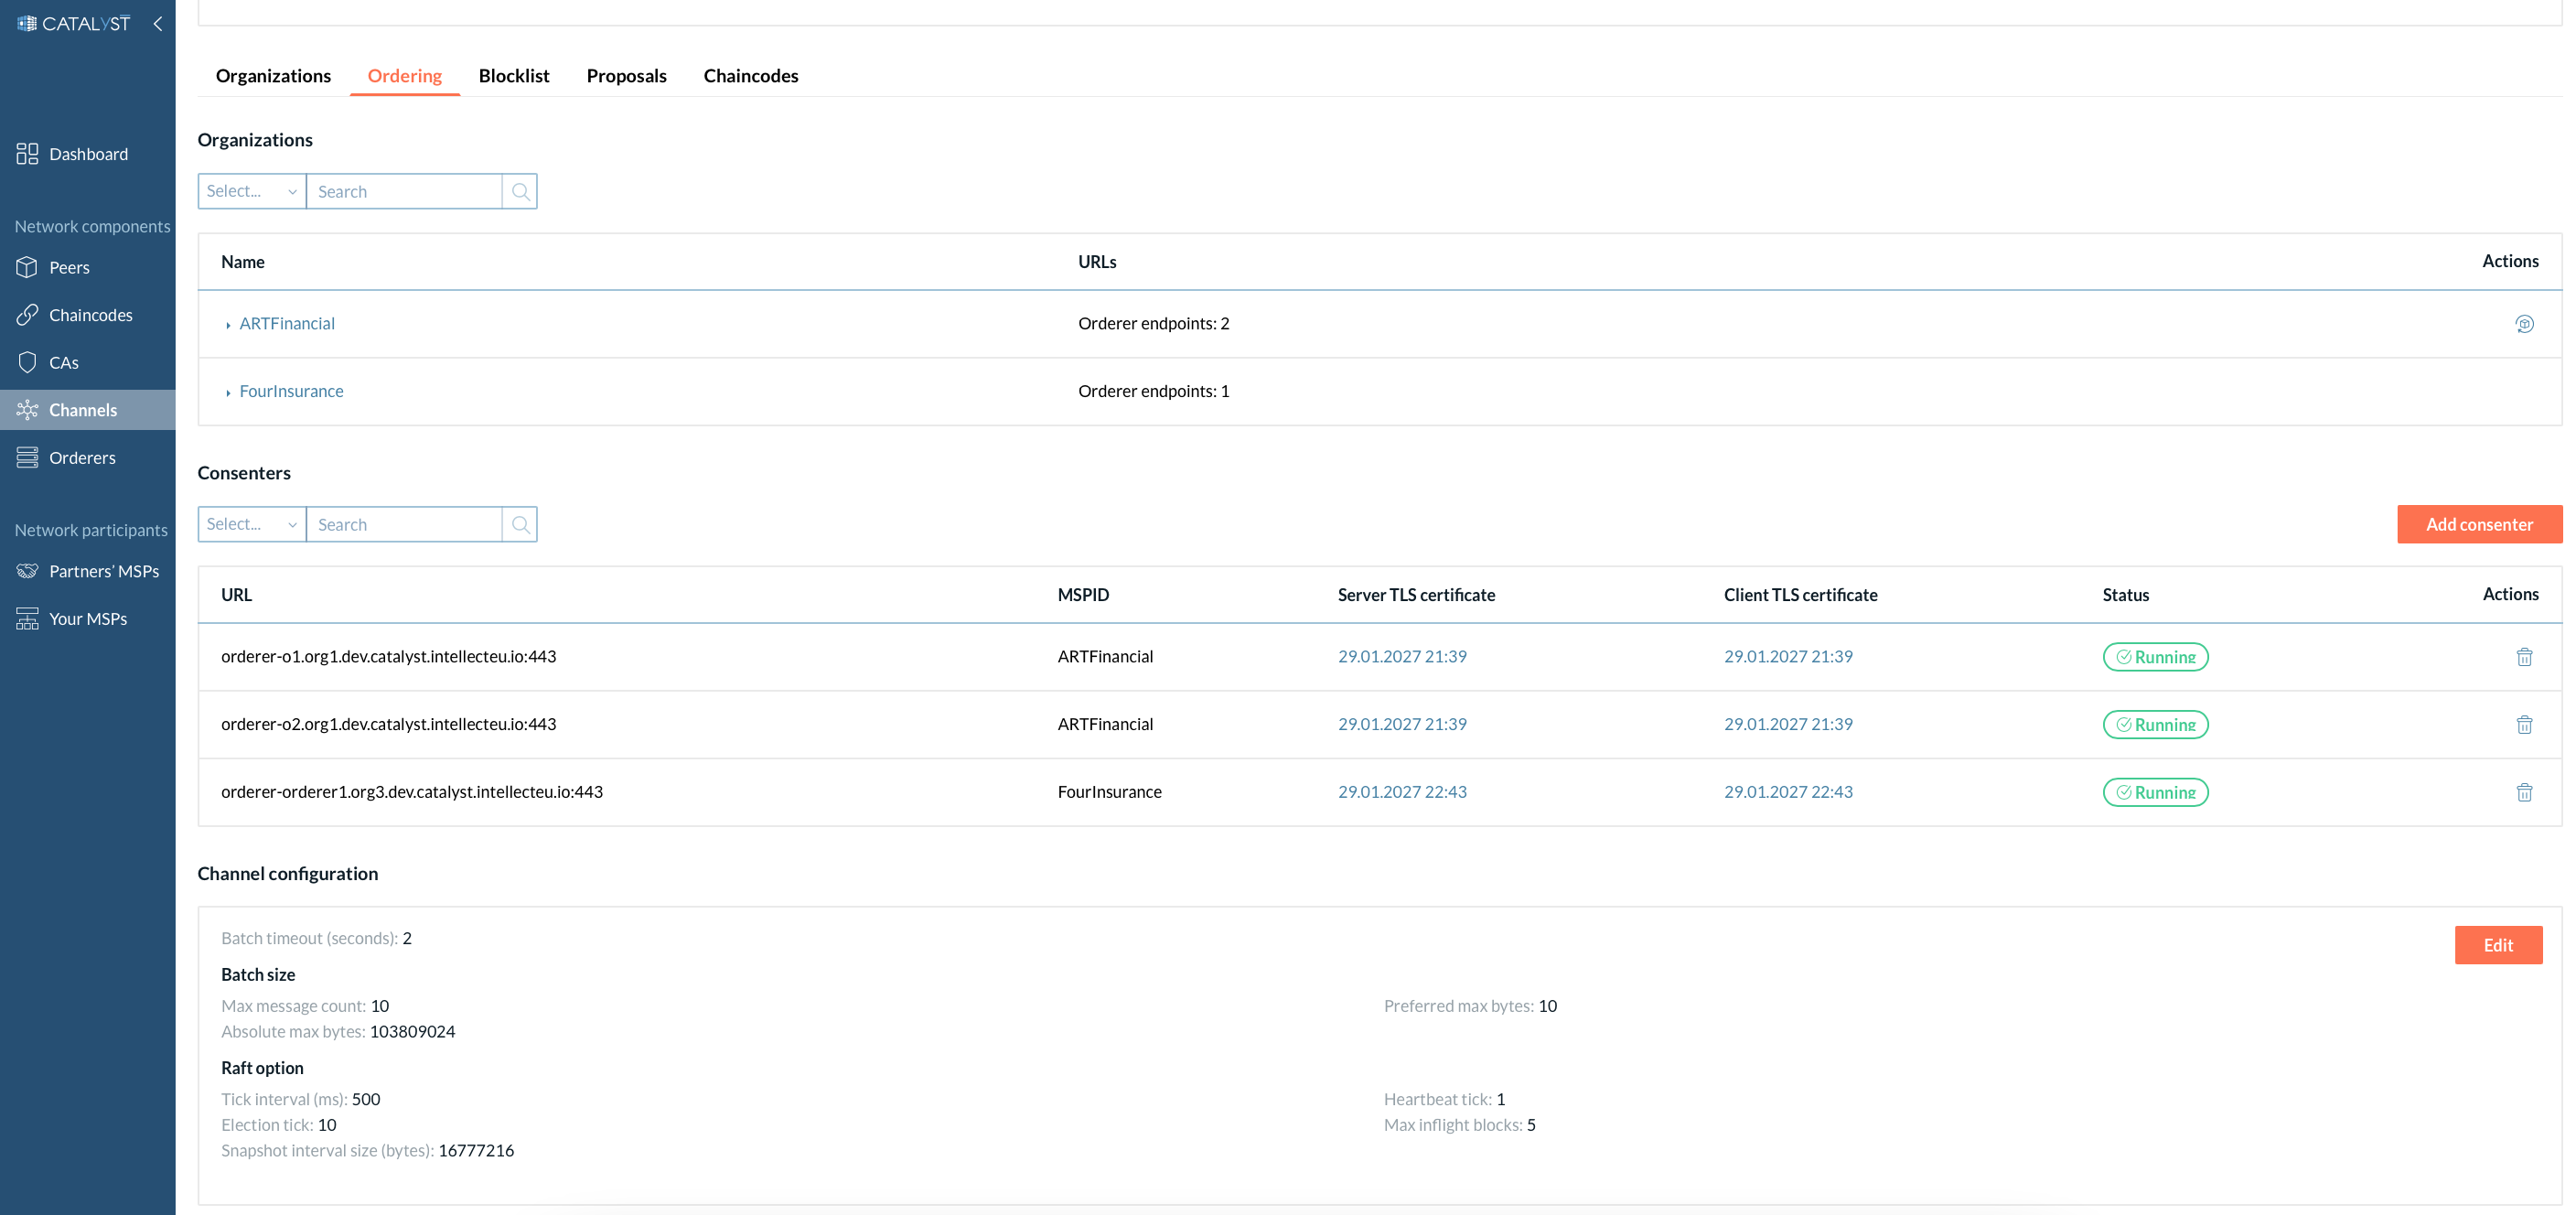
Organizations
Here you can find the list of organizations that host consenters for the particular channel.
You can see the orderer endpoints here by clicking the particular organization. Then, click the "Update ordering" endpoints button to change the endpoints set. You can specify as many endpoints as needed and select no endpoints.
| We recommend keeping your orderer endpoints synced with the list of your consenters in the channel. If you see “No consenters” in the “Consenters'' block, check if each of your consenters is reflected in the orderer endpoints list. |
When you add or remove a new consenter, its orderer endpoint is automatically added/removed to/from the orderer endpoints set. If your consenter was added or removed by another organization, you should add/remove its orderer endpoint manually.
Consenters
In the Consenters block, you can view the MSPID of the consenters, TLS certificates, and perform specific actions such as adding or removing a consenter.
You can see a consenter’s status on a particular channel.
|
The Raft ordering service facilitates the addition or removal of nodes dynamically, meaning that a node can be added to the channel while the channel is being serviced. However, you can do this if only one node is added or removed at a time. For more information, please refer to the official documentation here. |
| We do not recommend removing your last consenter from the channel. In this case, we recommend removing your organization instead of removing the consenter as described in the section before. This action will remove your organization along with your consenter from the channel. |
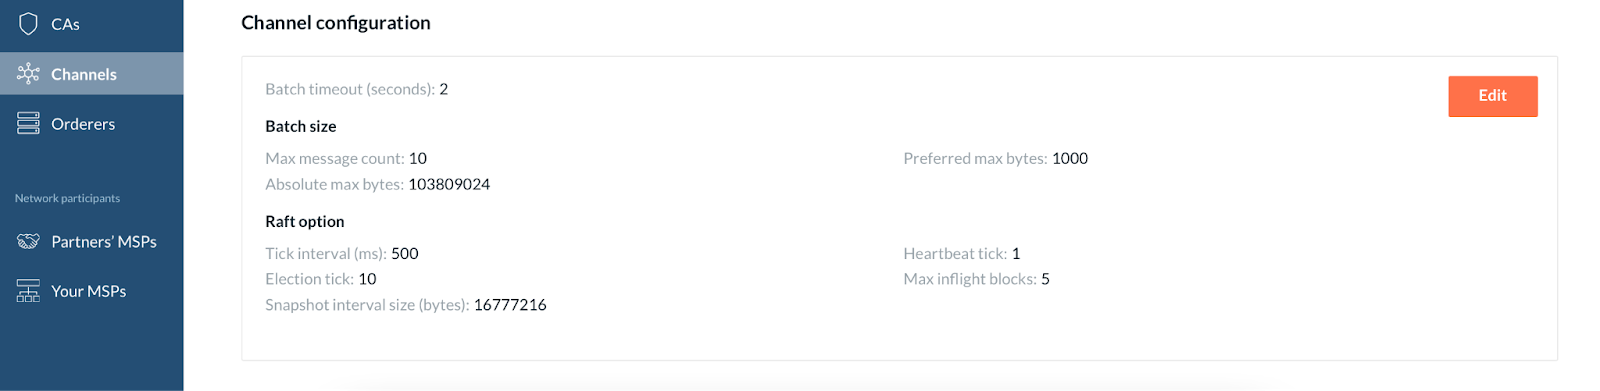
Channel configuration
Here you can see the information about the channel genesis block configuration along with the "Edit" option.
Blocklist
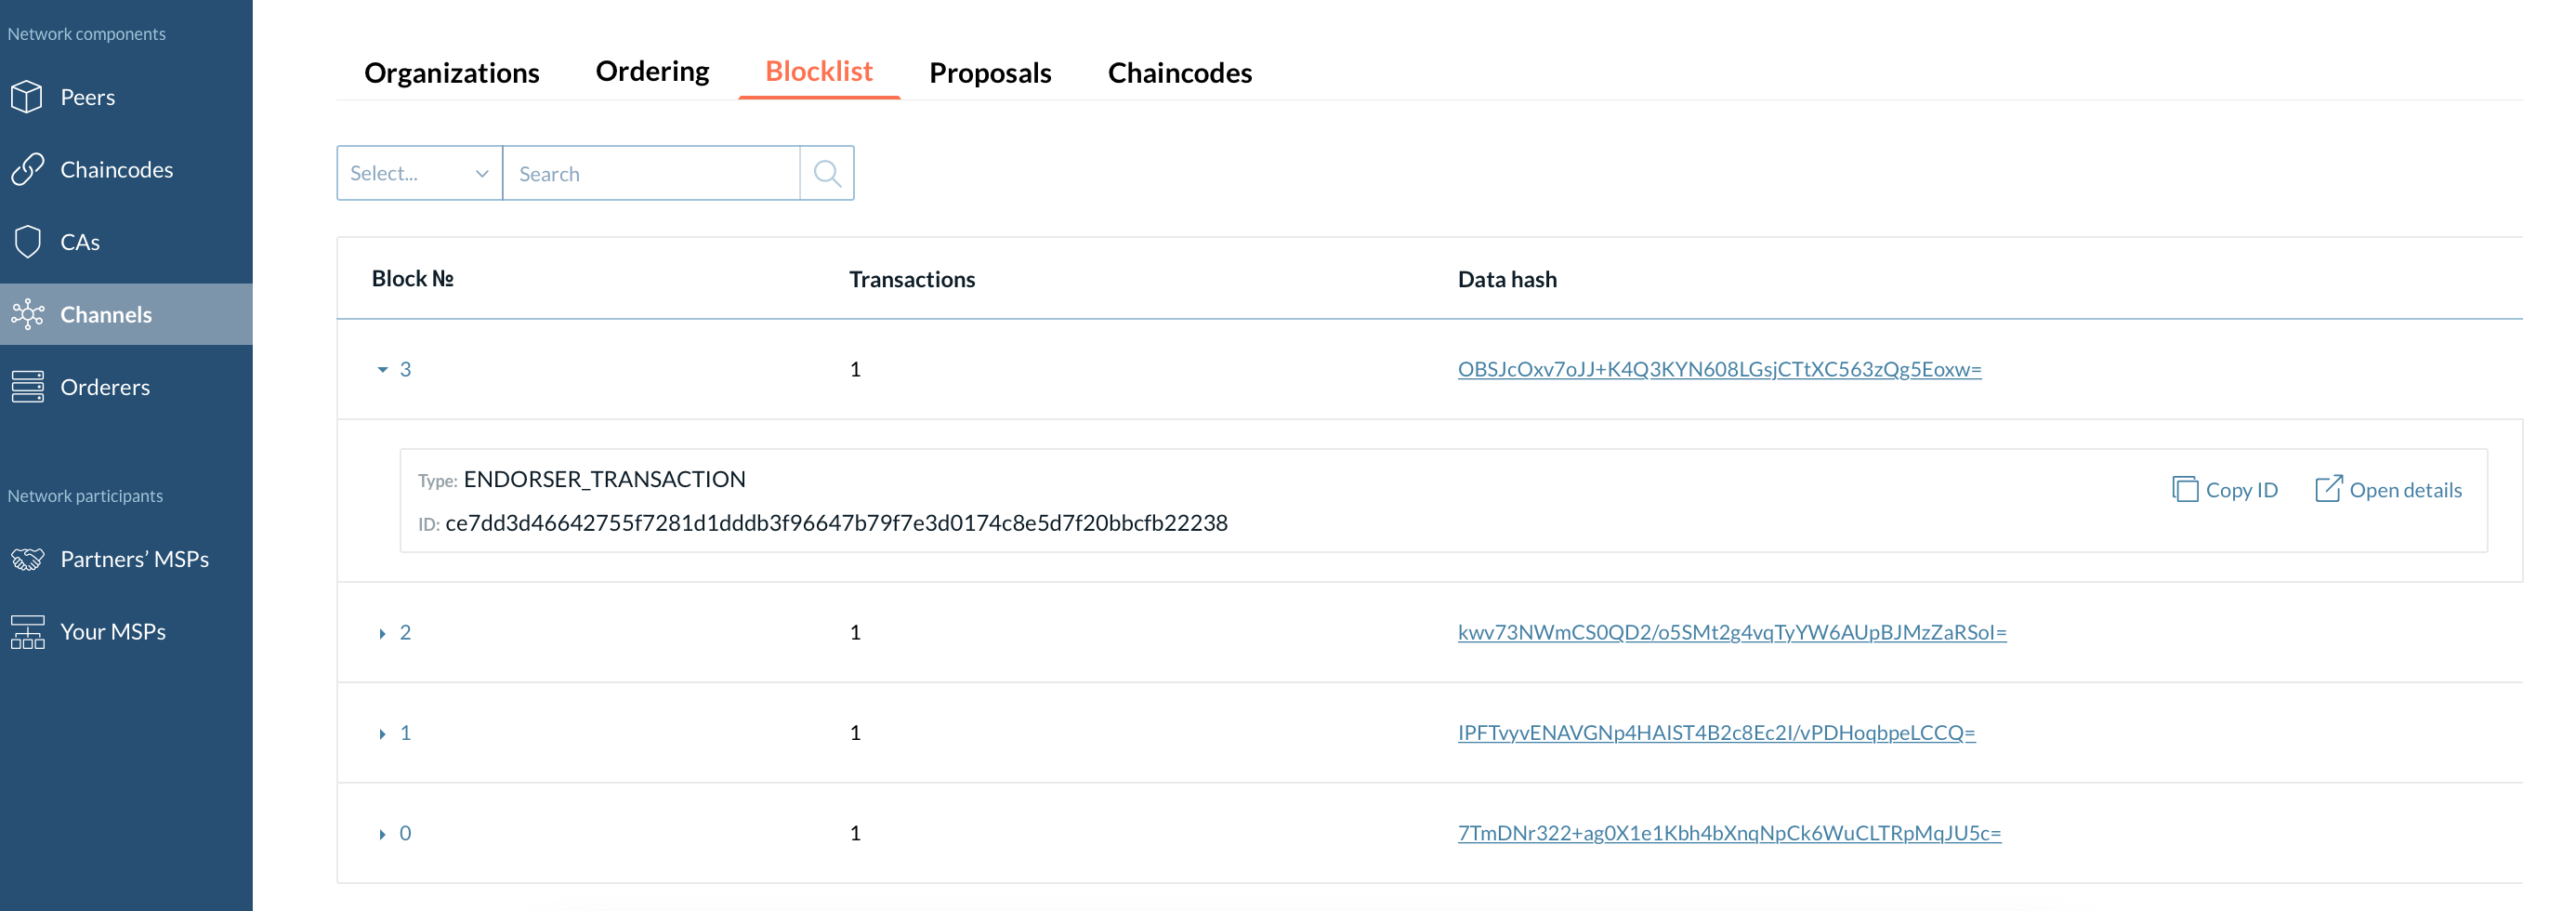
At this tab, you can see blocks representing transactions that have happened sequentially over the channel. In addition, you can see the number of transactions inside a block, which shows the type of all transactions and transaction details upon clicking the "Open details" button.
Proposals
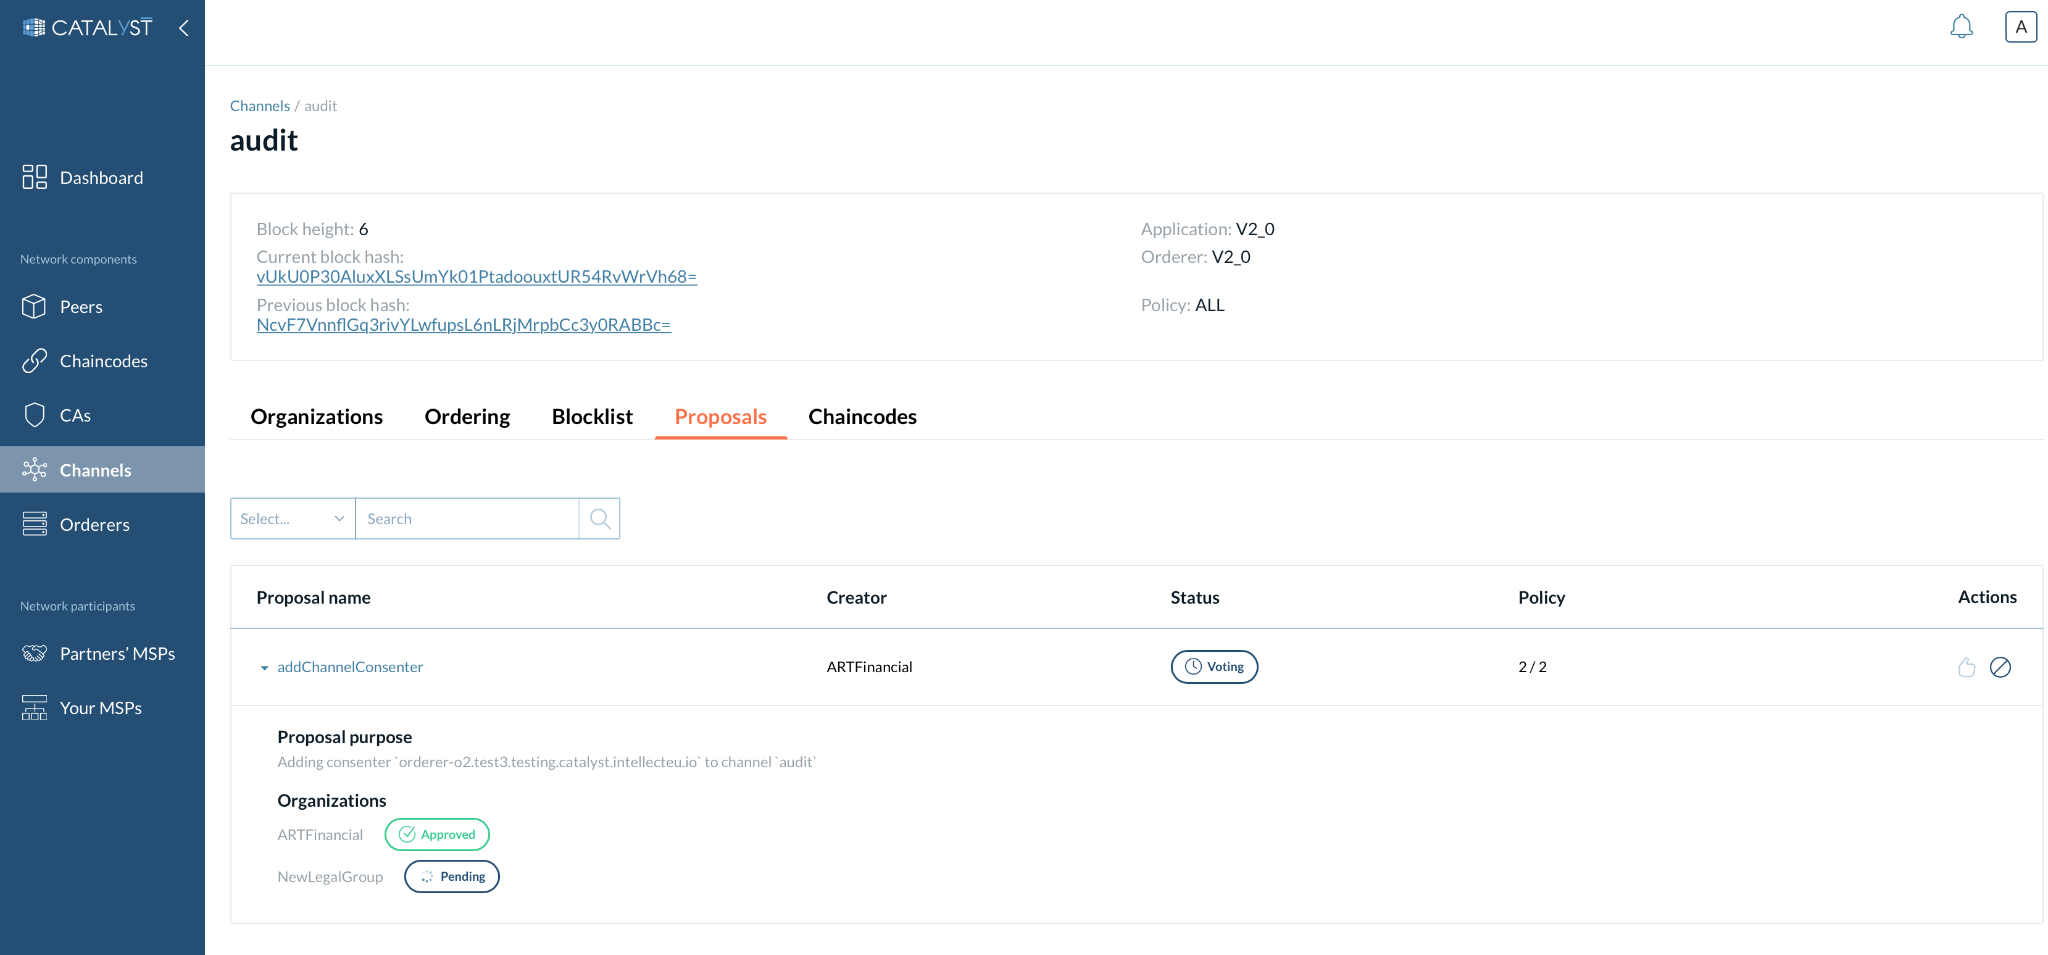
These are the transaction proposals that are validated according to the policy of the corresponding channel. The proposal is created automatically when an organization submits an action that affects the channel configuration, such as adding an organization or adding a consenter, in one of the following cases:
-
A channel has a MAJORITY or ALL policy, and there is more than one organization with admin rights on the channel.
-
An organization without admin rights on a particular channel initiated the action, and therefore it needs to be approved by the admin organization(s).
Proposals can be approved or rejected only by organizations with admin rights. The details of a proposal are displayed in this block through the following fields:
-
Proposal Name
-
Creator
-
Status
-
Policy
-
Action
While most fields under the proposal block are self-explanatory, it is imperative to understand the “Status” field. The proposal can be in the following possible statuses at any given time:
-
Created - The proposal is ready to be voted on.
-
Voting - The proposal is voted by at least one organization, but the policy is not satisfied yet.
-
Voted - The proposal has been voted on and the channel policy is satisfied, so the proposal can be completed.
-
Completed - All needed approvals were done, and the proposal was successfully completed.
-
Canceled - The proposal was canceled.
You can vote with the “Vote” button present in the “Action” field. The organization, which initiates this proposal, or any admin organization can also cancel this proposal.
| A new proposal cannot be initiated until the existing proposal is complete or has been deleted. A channel snapshot is always taken when a proposal is created. |
|
These proposals (voting functionality) are implemented as a system chaincode and are integrated into the peer images. Therefore, we recommend using the IntellectEU Hyperledger Fabric peer image. If any other peer image is used, the proposals will not be available. You can choose a peer image while creating a peer set (see details here). |
Chaincodes
Under the Chaincode tab, you can perform the following actions:
-
Approve chaincode - A chaincode needs to be approved by an organization with endorser rights according to the channel policy. For more details, please refer to the chaincode lifecycle official documentation
-
Commit chaincode - Organizations having endorser rights according to an endorsement policy can commit chaincode to a channel. In addition, an organization can commit a chaincode if the required number of organizations have approved it. See more about how to commit a chaincode in the Chaincode Section. or the chaincode section.
| Only that organization that previously approved the chaincode can commit it to the channel. |
You can view the chaincodes approved by your organization or committed to the channel. Parameters such as the ID, version, sequence, status, and action are present under this tab. The Status field allows you to view the chaincode status on that particular channel and what approvals are needed for the chaincode to be committed.
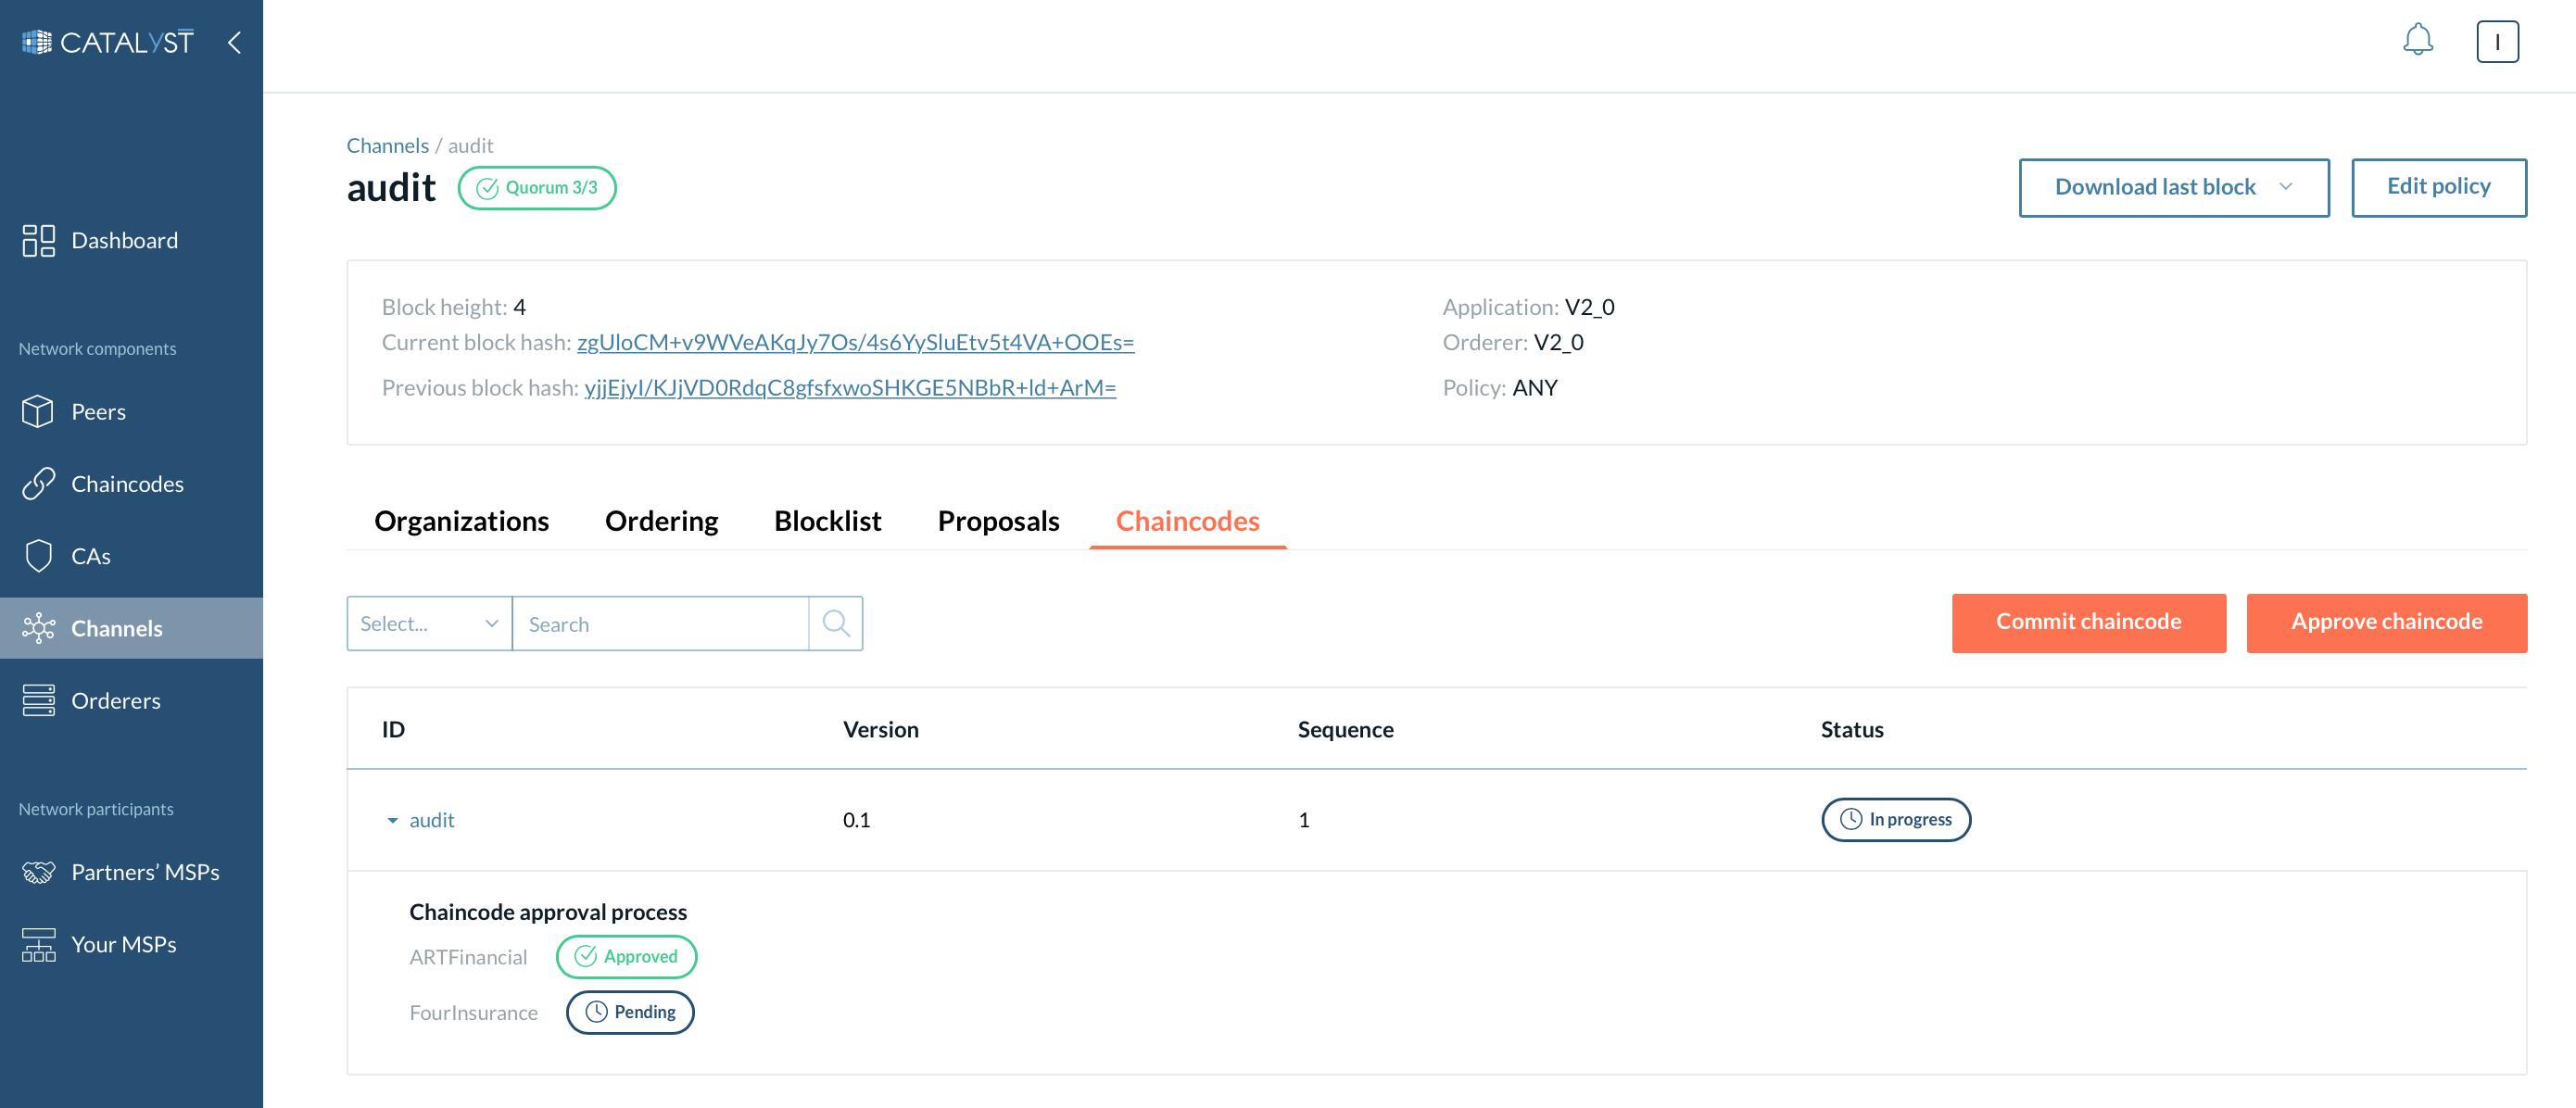
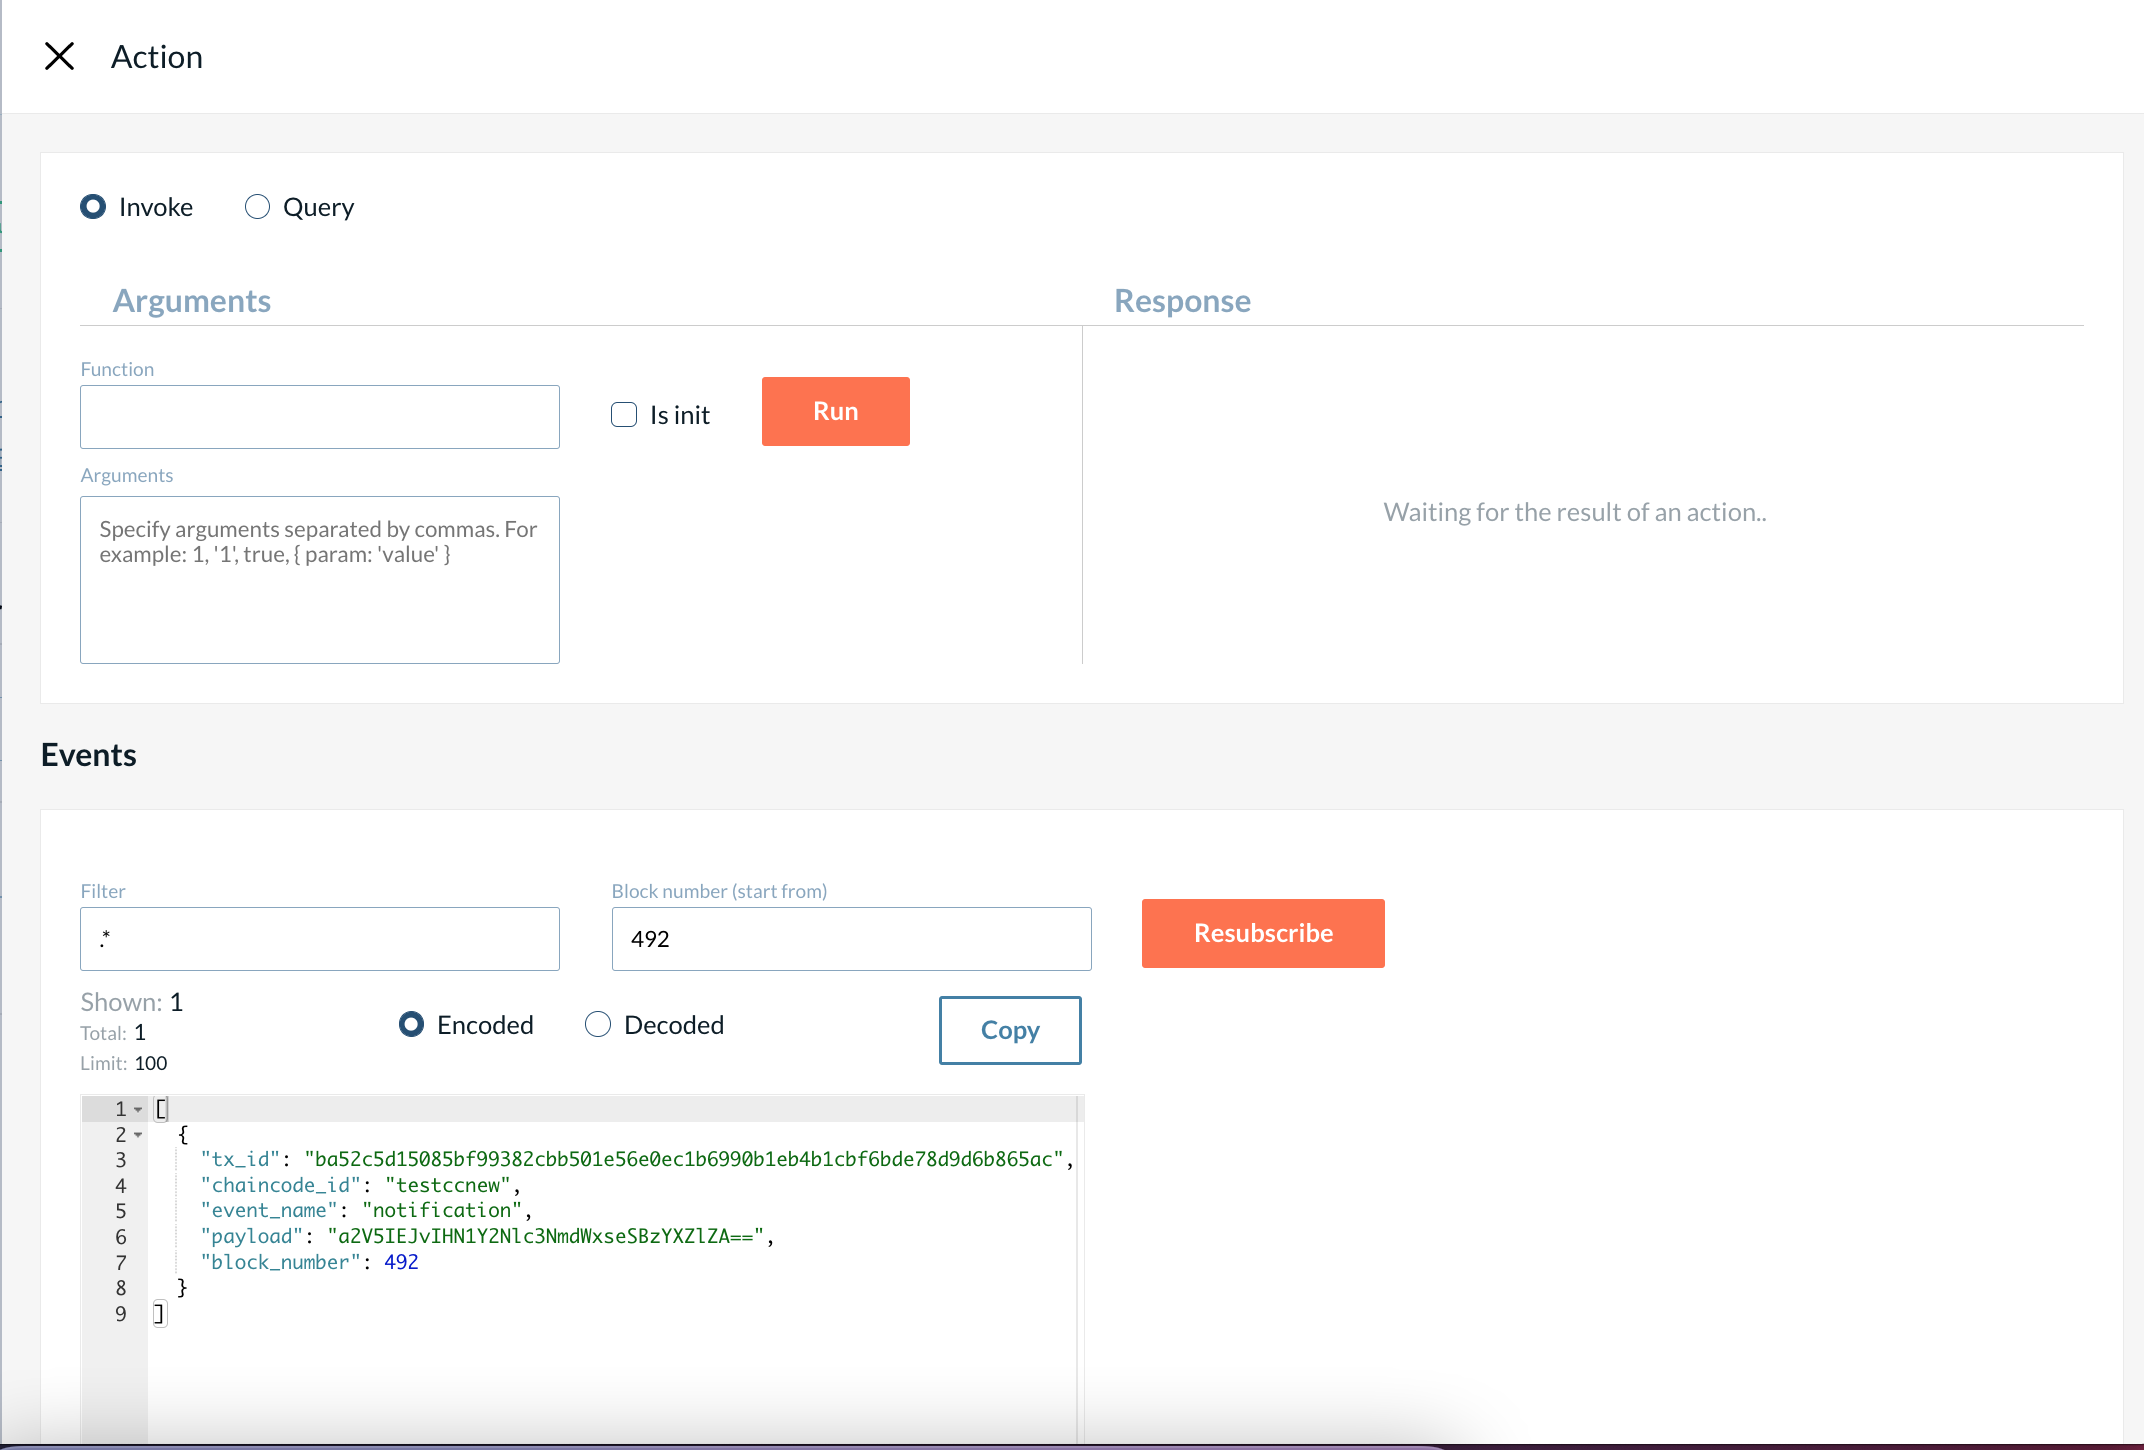
In the "Action" field, you can test your chaincode using query or invoke methods or subscribe to the chaincode’s events after the chaincode is committed to the channel. You can view the chaincode approval process details by clicking on the particular chaincode.
How to Join a Channel?
1 - Organization 1, which has already joined the channel, should add Organization 2 through the “Add organization” button, which opens a new side window.
A drop-down menu is available here, which displays the consenters that belong to Organization 2. Organization 1 needs to select at least one of these consenters and then select the desired rights before clicking “Submit.”
| You can skip adding a consenter if the organization is going to use an external orderer. |
2 - Now, Organization 2 must go to the peer section and click “Join to channel.” After this, it is required to type the channel’s exact name and click "Join." The channel name is case-sensitive. Please note that there is no option to select channels to join from the dropdown menu due to security reasons.
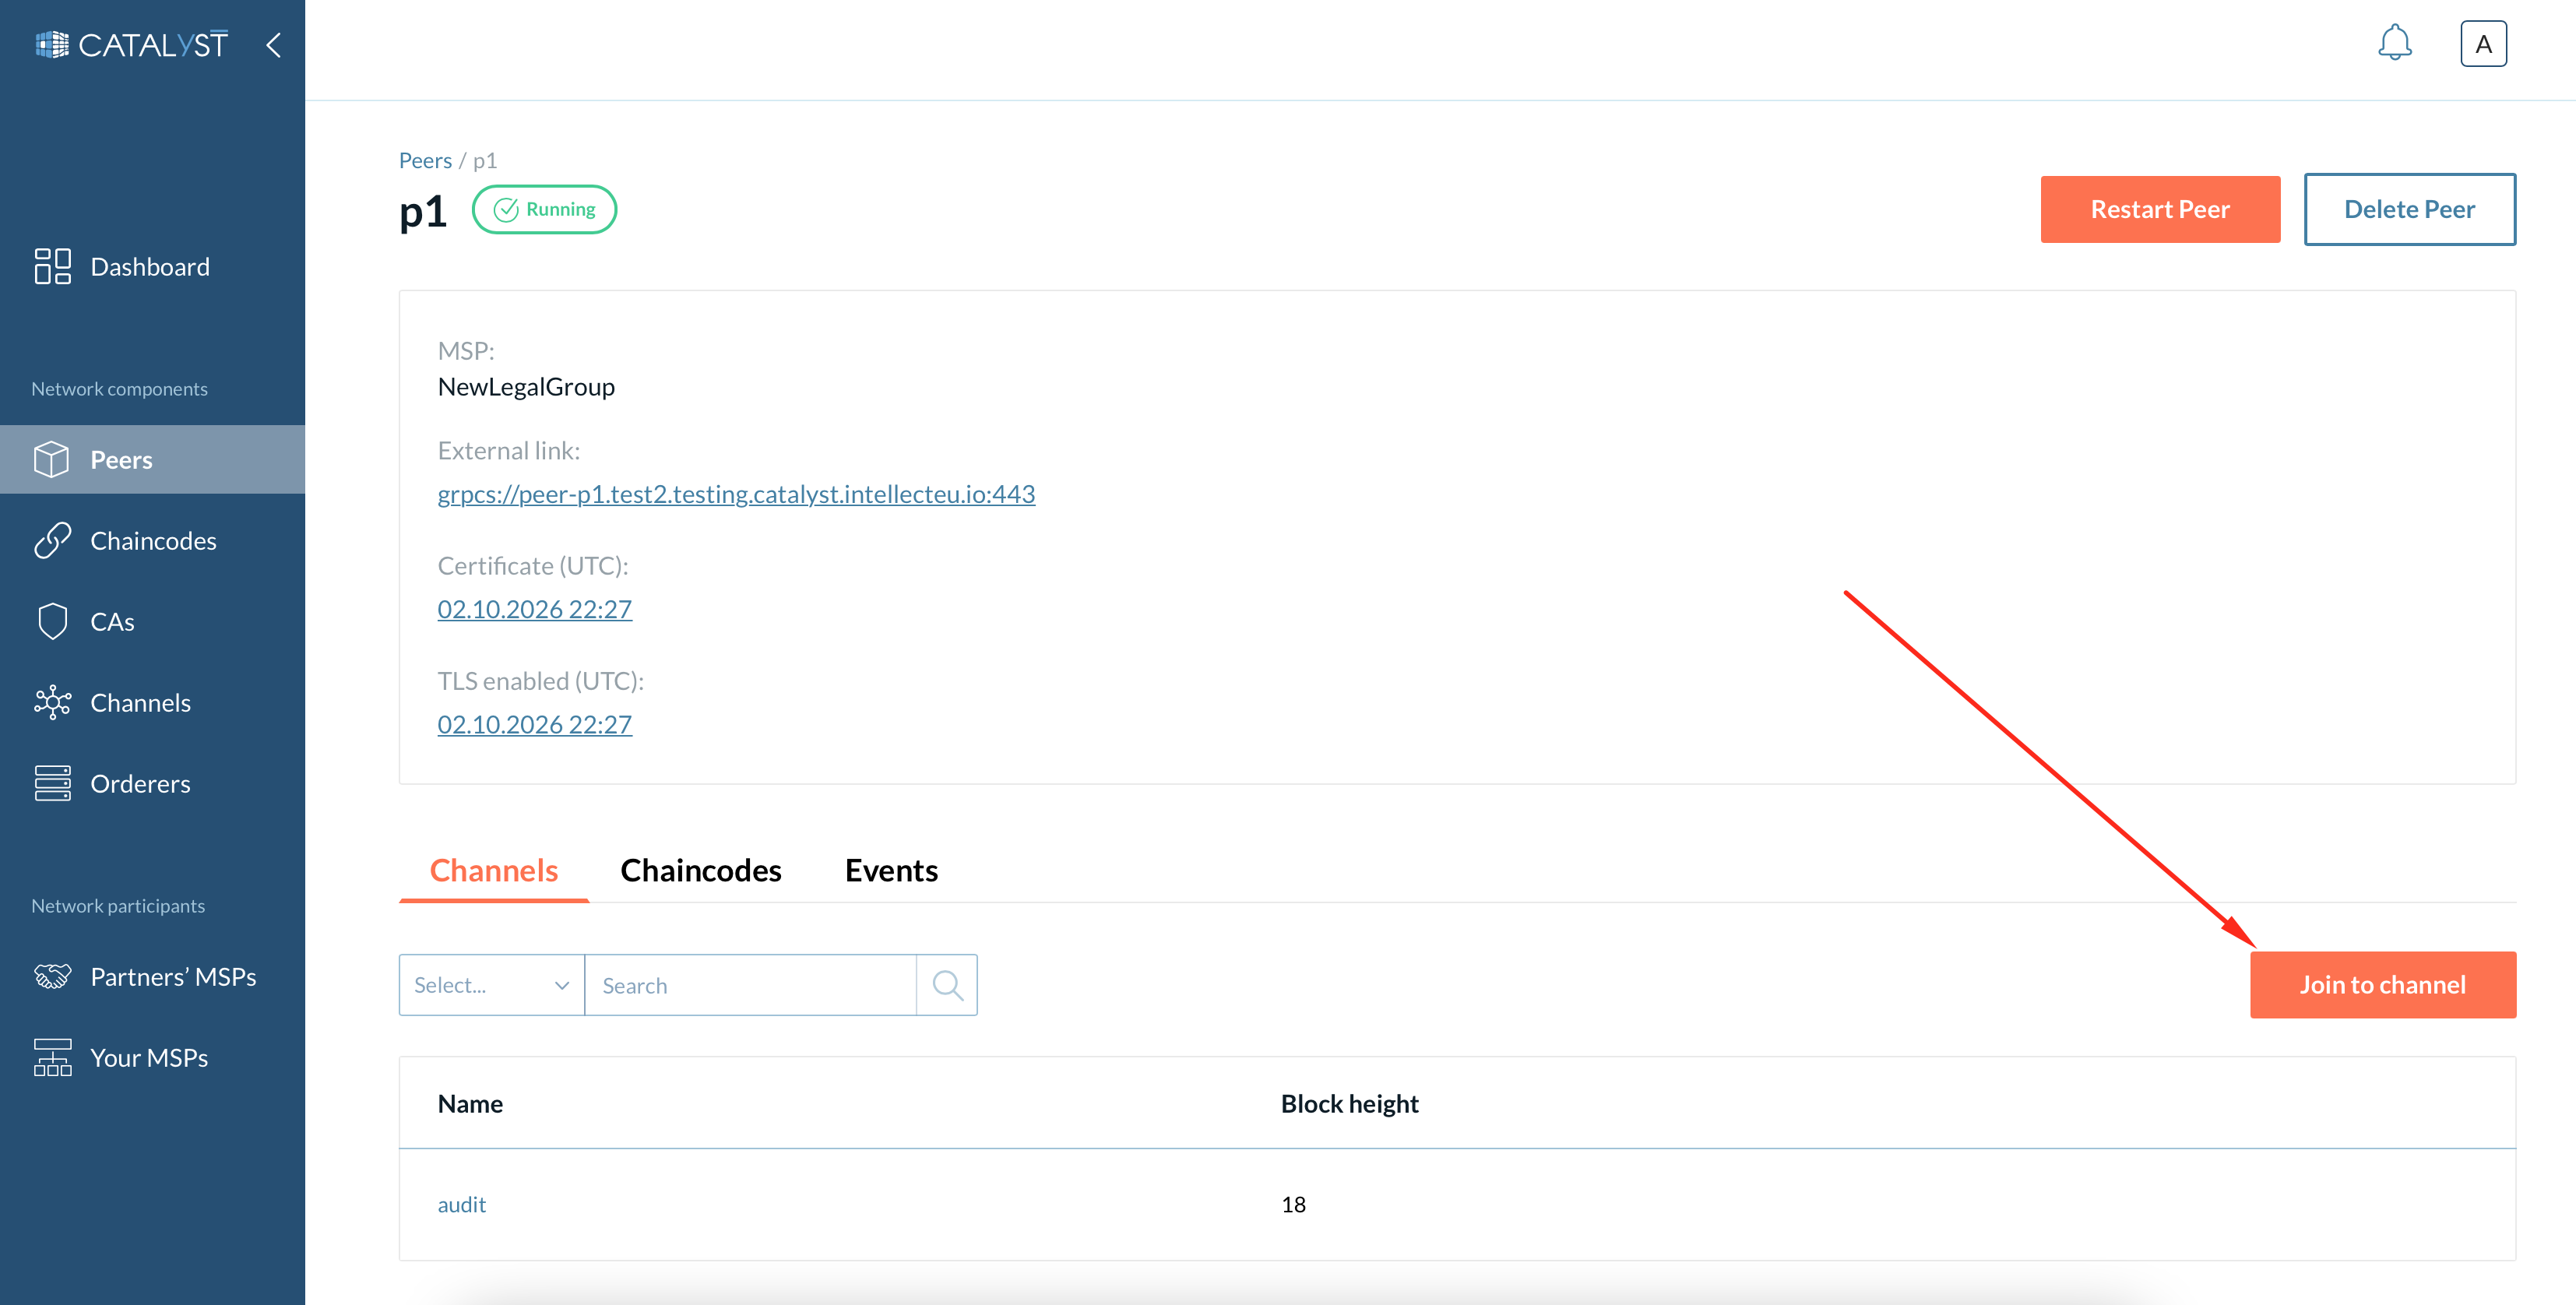
| Sometimes, you need to wait for a few minutes after being added to a channel before a peer can join the channel. |
After Organization 2 has successfully joined the channel, the channel will appear under the “Channels” tab. Here, Organization 2 can update the anchor peer for this channel, add other peers to the channel, add or delete consenters, and more.