Certificate Authority
What is a Certificate Authority (CA)?
Certificate Authorities (CA) issue digital certificates that identify users or authorize user activity in the network.
Being a permissioned protocol, every actor in the Hyperledger Fabric network needs a specific identity from an authorized entity. Every time a user or entity performs an activity in the network, they do so by authorizing the use of their identity. Digital certificates issued by a CA make this possible.
Encryption keys allow users to sign their transactions digitally, while digital certificates provide identity to users on the network. Both are important components of the Public Key Infrastructure (PKI) that allows secured communication between participants on a blockchain network. An additional mechanism, known as TLS inclusion, establishes highly secure communications between two entities on a network.
Each of these features work together to make Hyperledger Fabric highly secure, making it suitable for enterprise use cases where confidentiality is paramount.
A CA is responsible for issuing certificates, both for identities and TLS communication. It issues participants with digital certificates of the X.509 standard. You can see more information here
For an identity to be verifiable, it must come from a trusted authority. A membership service provider (MSP) is that trusted authority in Hyperledger Fabric. The MSP identifies which CAs are accepted to define the members of a trust domain by listing their members' identities or by identifying which CAs are authorized to issue valid identities for their members. To know more about MSPs, please refer to this section.
What are Root and Intermediate CAs?
Certificate Authorities come in two varieties: root CAs and intermediate CAs.
Root CAs contain a self-signed root certificate. Intermediate CAs have their certificates issued by the root CA or another intermediate authority. This leads to a chain of trust in which each intermediate CA is authorized by either the root CA or another intermediate CA.
If an intermediate CA is compromised, only a small number of identities issued by that CA would be exposed. On the other hand, if the root CA is compromised, all network identities will be compromised. See more about the chain of trust.
How do I create a CA?
To create a full functioning CA within the network, you need to do the following:
-
Create a CA.
-
Sign a CA (in case it is an intermediate CA).
-
Enroll an admin identity.
What steps should I follow to create a CA?
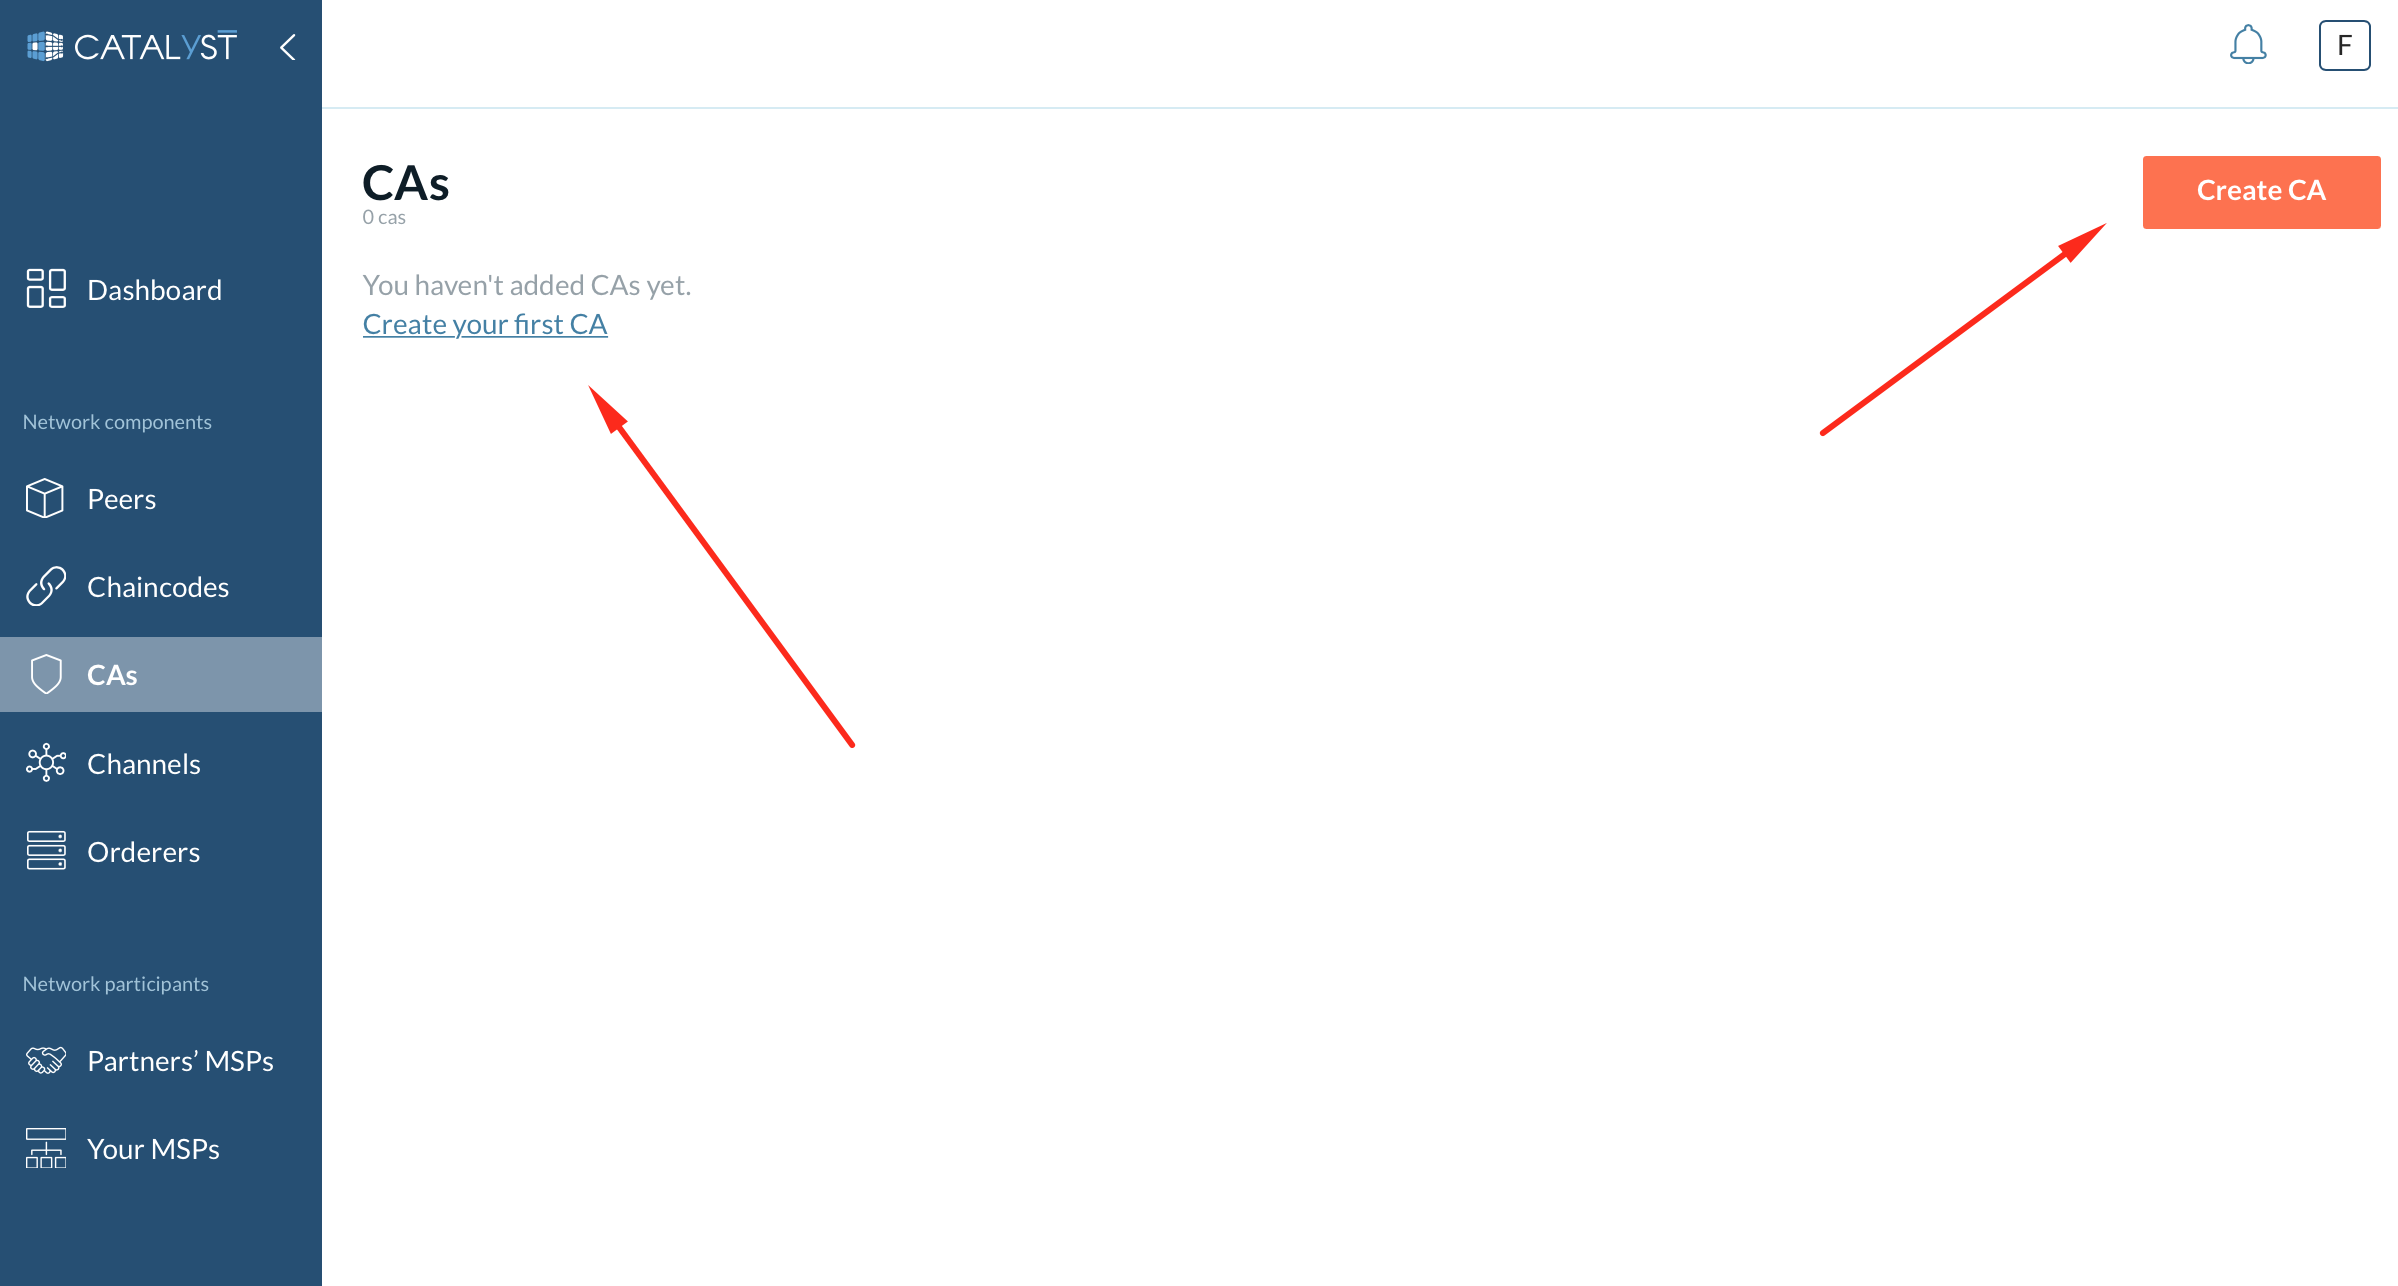
To create a CA, go to the CA tab and click on the “Create CA” button to open a side window.
-
1- Provide a CA name (required).
-
2- Fill in the general information.
-
Choose a CA type.
-
Provide data for the CA admin registration: the CA admin ID and the password.
-
| Note: You will need to provide the same CA admin credentials further when enrolling the CA admin. |
-
3- Customize the CA details (you can use predefined values):
-
Choose Enable debug logs in the CA logs file if needed.
-
Enable TLS if required.
-
Choose the CA image.
-
| Using a predefined image is recommended for compatibility issues. However, you can select your image if needed. If you want to use an image from a private repository you should specify an imagePullSecret (a server name, your login, and your password). You need to specify a secret only once and then select the secret from a drop-down list. You can create an imagePullSecret in your Kubernetes cluster and add the label "app.kubernetes.io/name": "image-pull-secret". After that, the secret will be available in the drop-down list. Note that after removing your secret from the list Catalyst Blockchain Manager won’t be able to use an image with this secret. In this case, you need to change the image/repository or create a new secret naming it the same. |
-
Resources allocation:
-
Requested CPU. Guaranteed CPU resources that will be allocated.
-
CPU limit. Maximum CPU resources that will be allocated.
-
Requested memory (MB). Guaranteed amount of RAM that will be allocated.
-
Memory limit (MB). The maximum amount of RAM that can be allocated.
-
Storage size.
-
-
You can add custom environment variables if needed.
-
4- Customize a CSR (certificate signing request) or use predefined values.
-
-
Provide distinguished names (Country, Locality, Organization, Organizational Unit, and State or Province) if needed.
-
Customize path length value - A maximum number of non-self-issued intermediate certificates that may follow this certificate in a valid certification path.
-
Customize root CA expiry.
-
5. Customize signing options - These values define an expiry of certificates for intermediate CAs, identities, and TLS, which will be enrolled with the particular CA. You can use predefined values. After clicking the “Create” button, the CA node will appear in the CAs list. You can check the node status and see the node’s events by clicking the status icon.
-
How do I sign an intermediate CA?
After a CA node creation, the intermediate CA has the "Waiting for certificate" status and cannot perform functions (sign a CSR, enroll or register identities). To be able to do that, the CA must have a signed certificate. This certificate should be signed by any other CA (so-called “parent CA”).
| You can choose either an intermediate or a root CA as a parent CA. |
To sign a CSR with a CA created by Catalyst Blockchain Manager do the following:
-
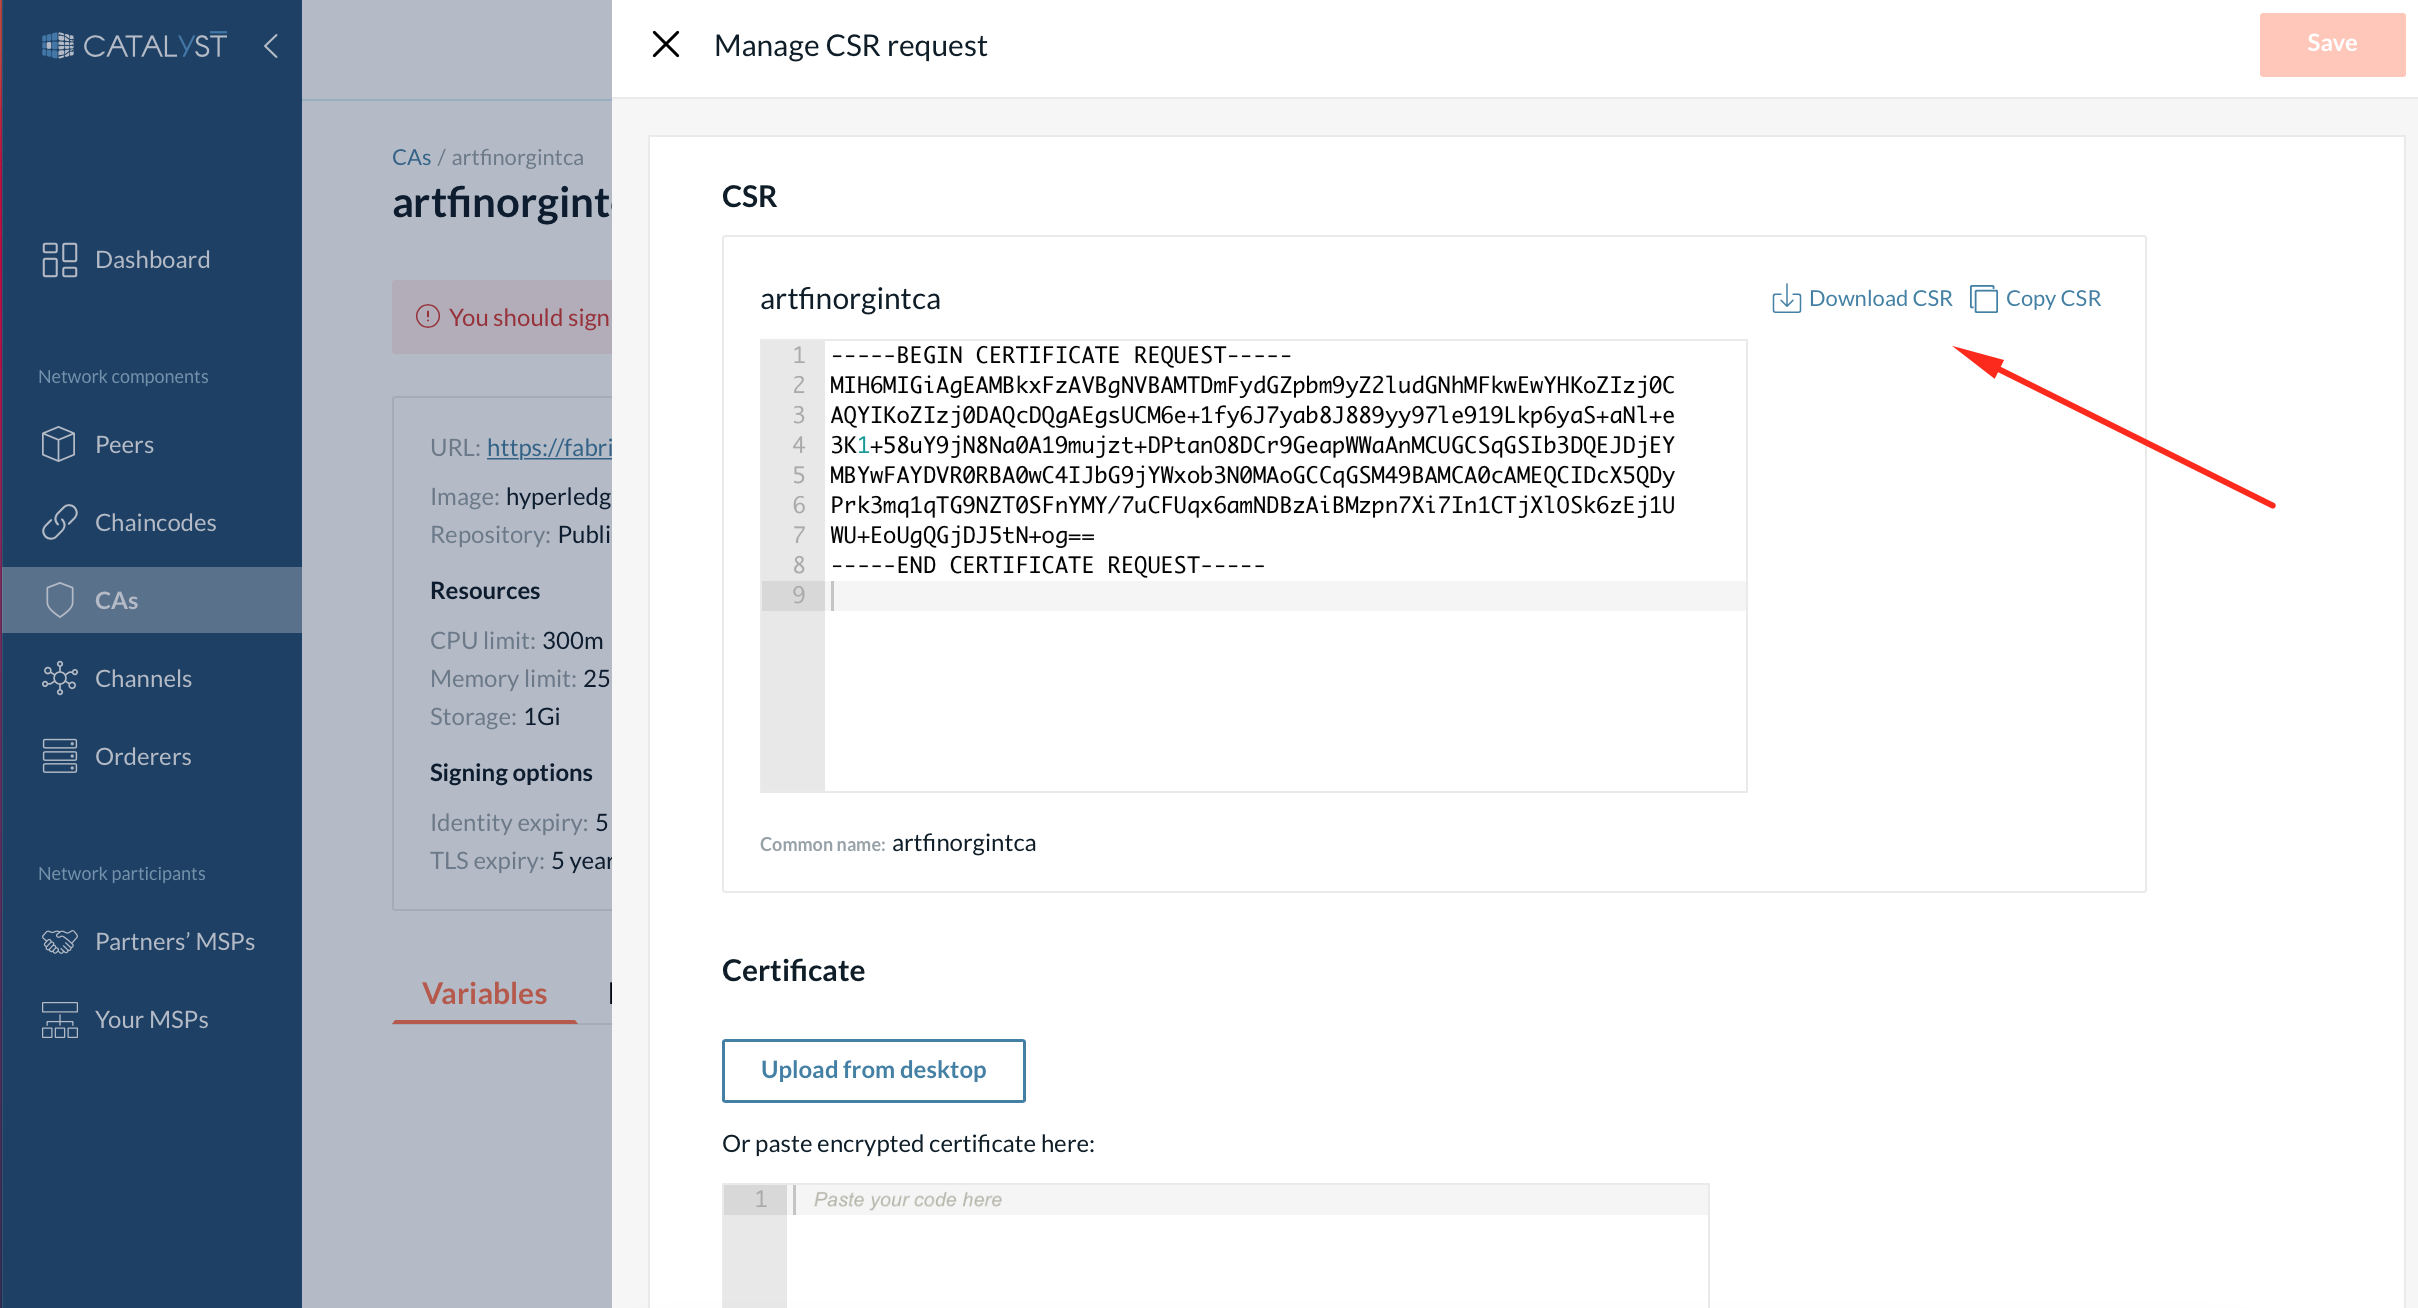
1. Export the CSR.
-
Go to the intermediate CA’s details page.
-
Click “Manage request”.
-
Then click “Copy” or “Download”.
-
-
2. Register an identity for the intermediate CA.
-
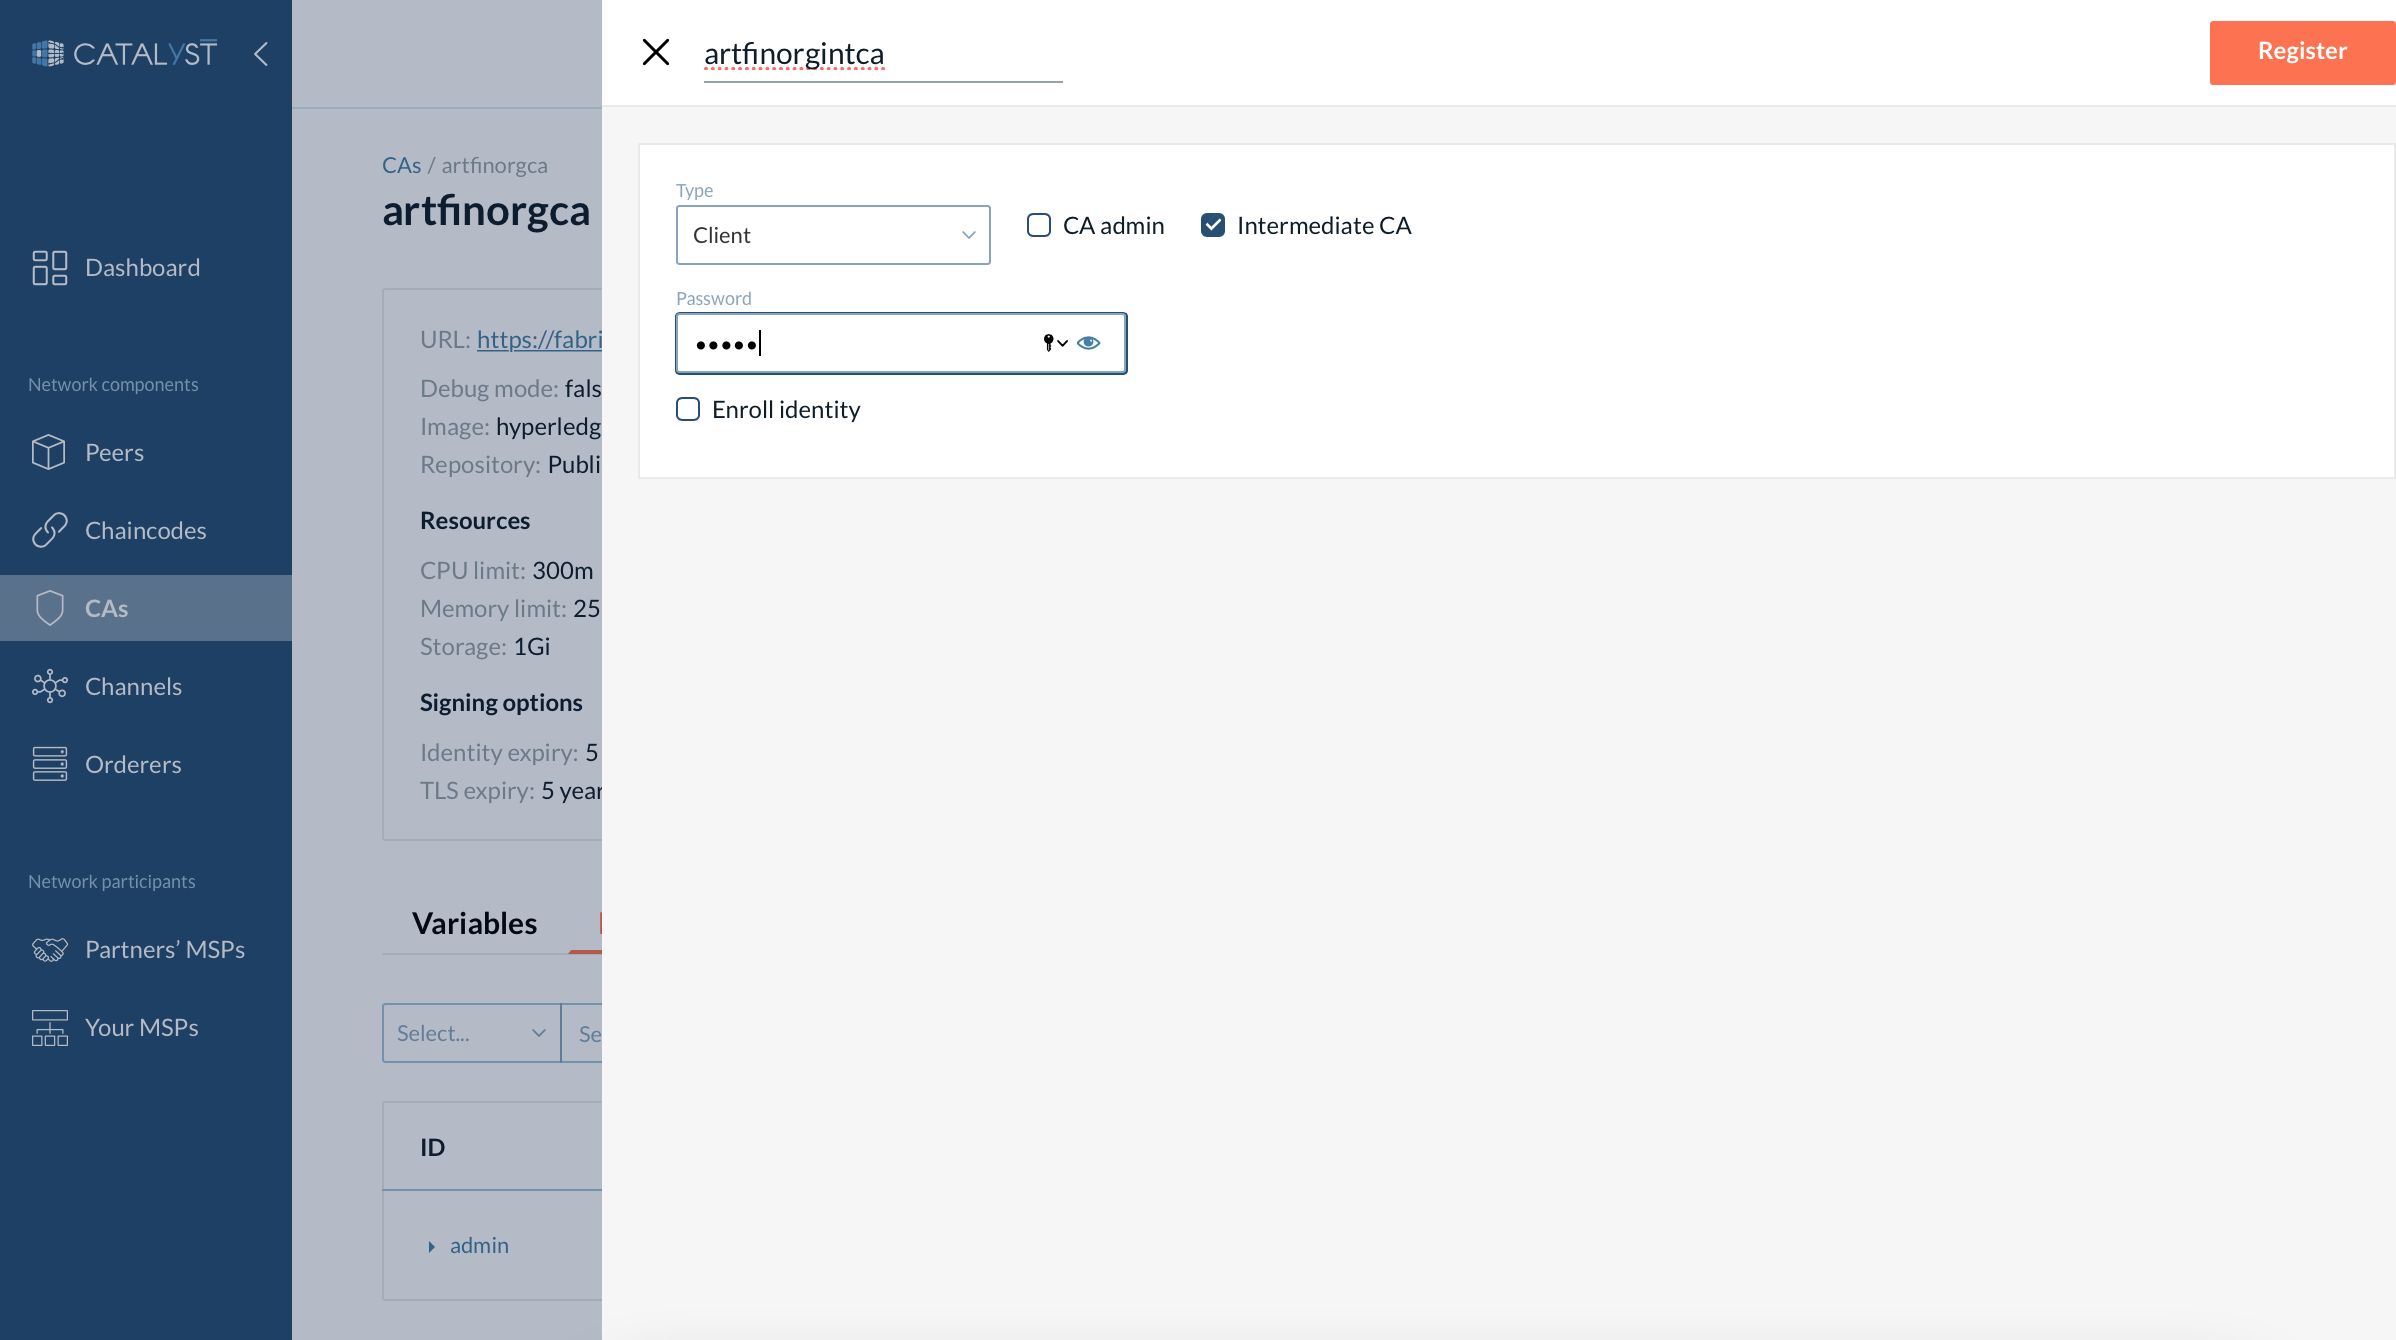
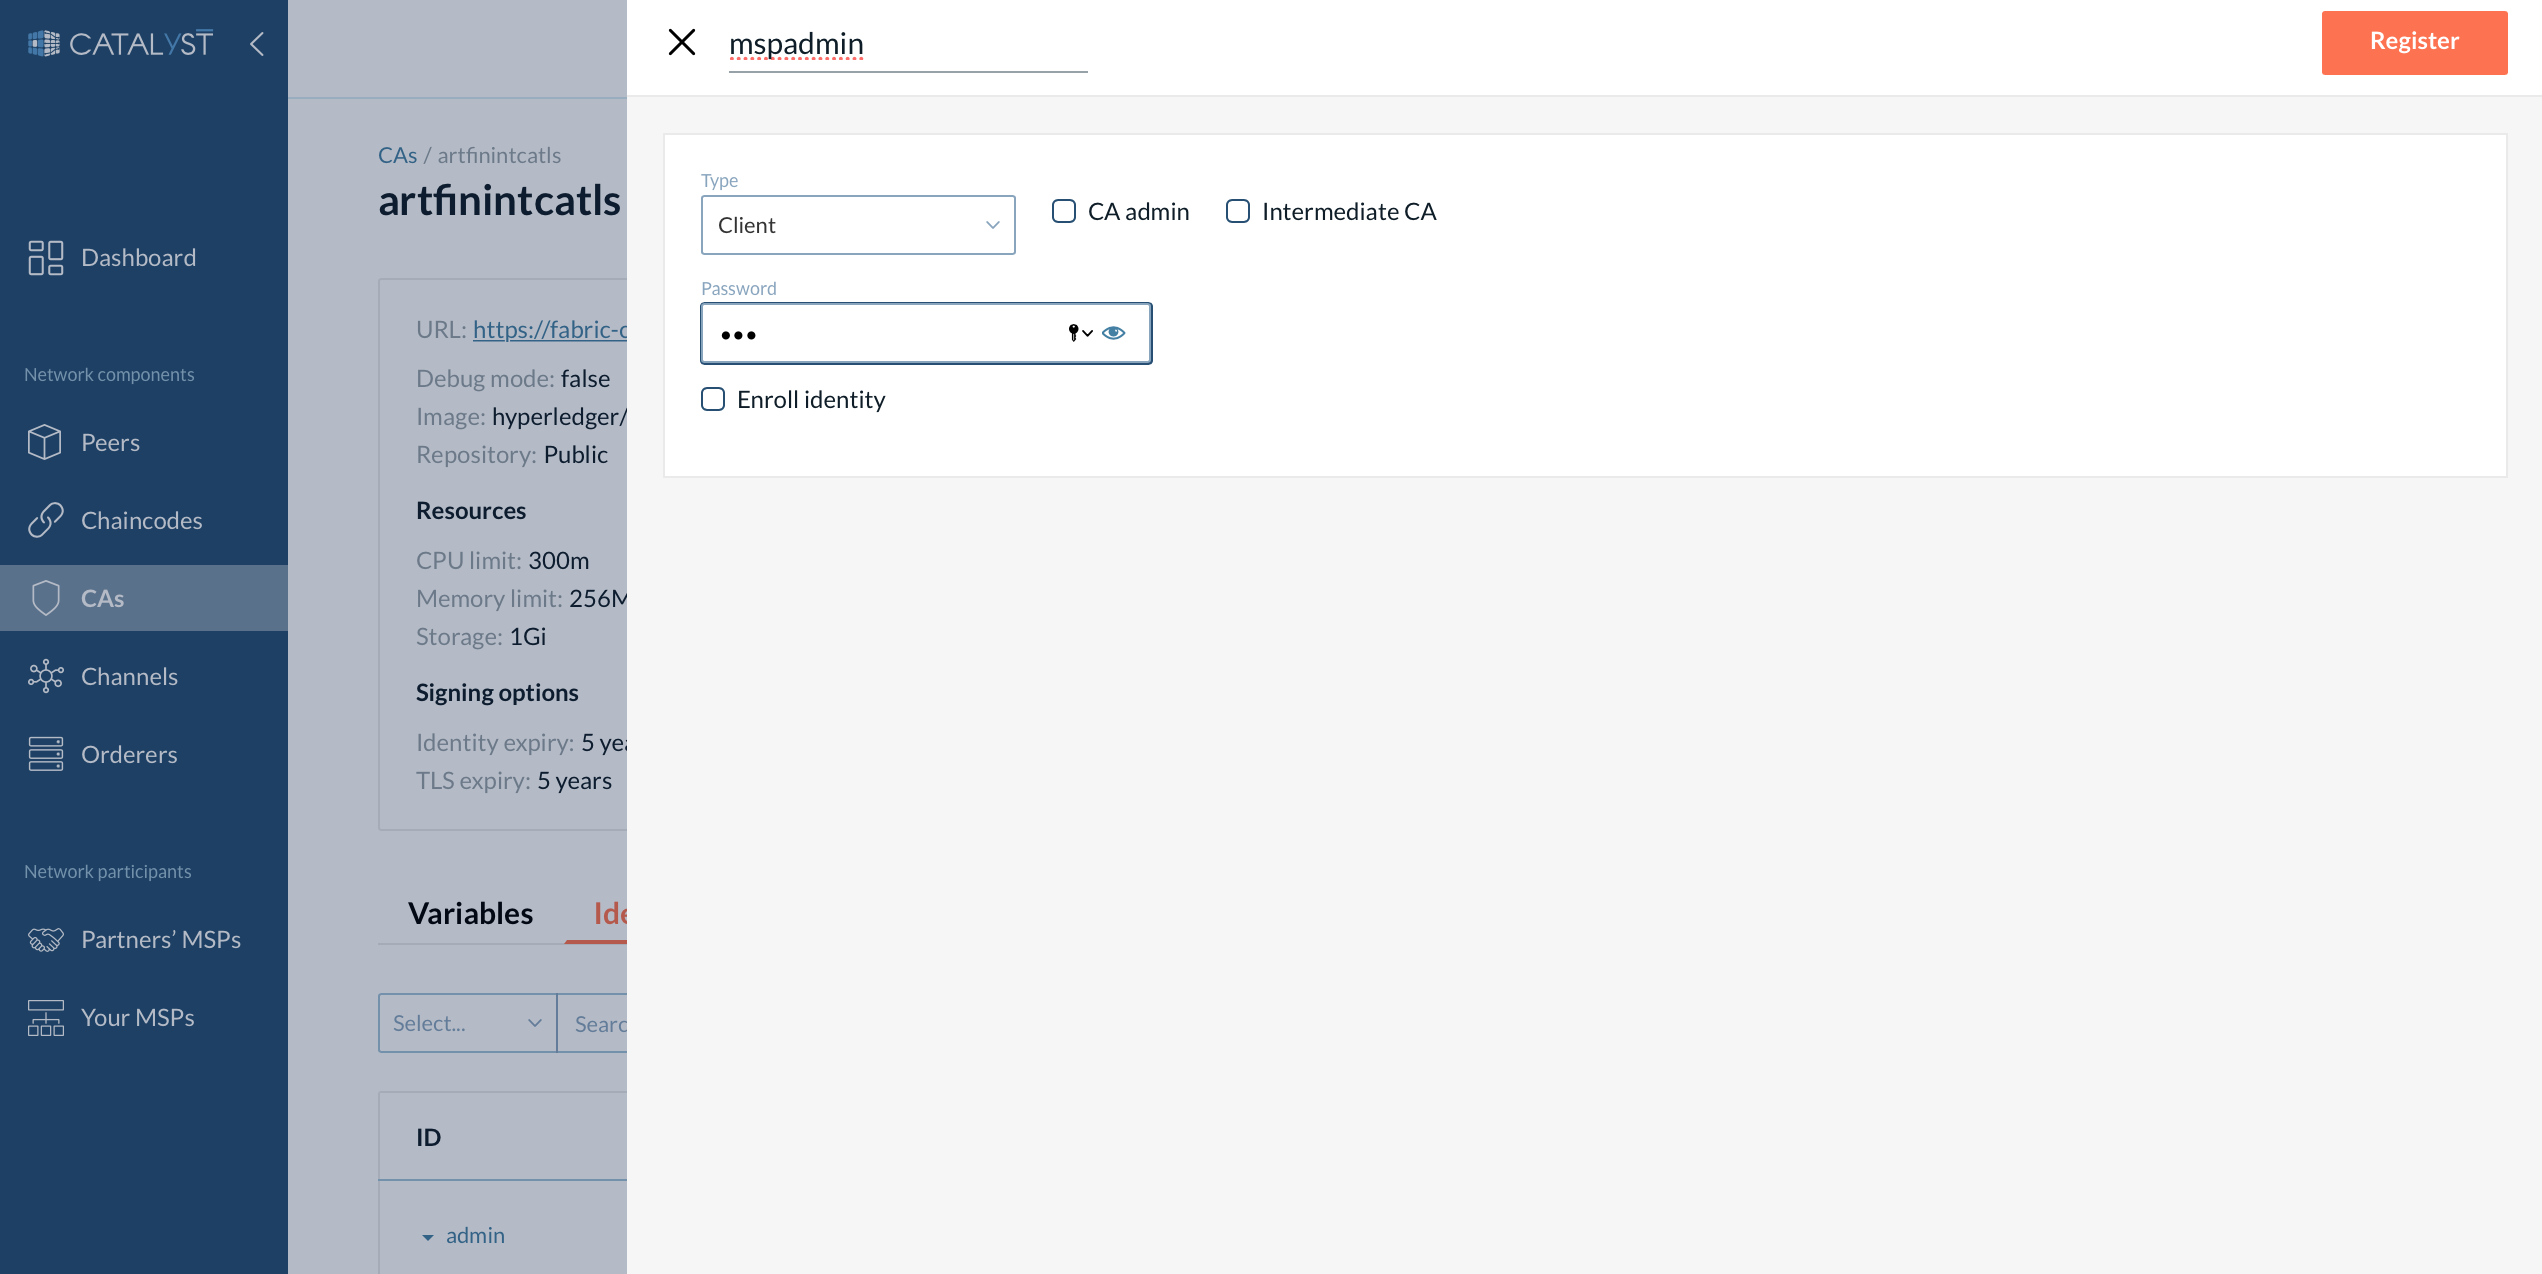
Go to the CA you want to use for signing the intermediate certificate, then open the Identities tab, click “Add identity”.
-
Provide the same name as you gave to the intermediate CA.
-
Choose the “Client” type and select “Intermediate CA”.
-
Then click the “Register” button.
-
-
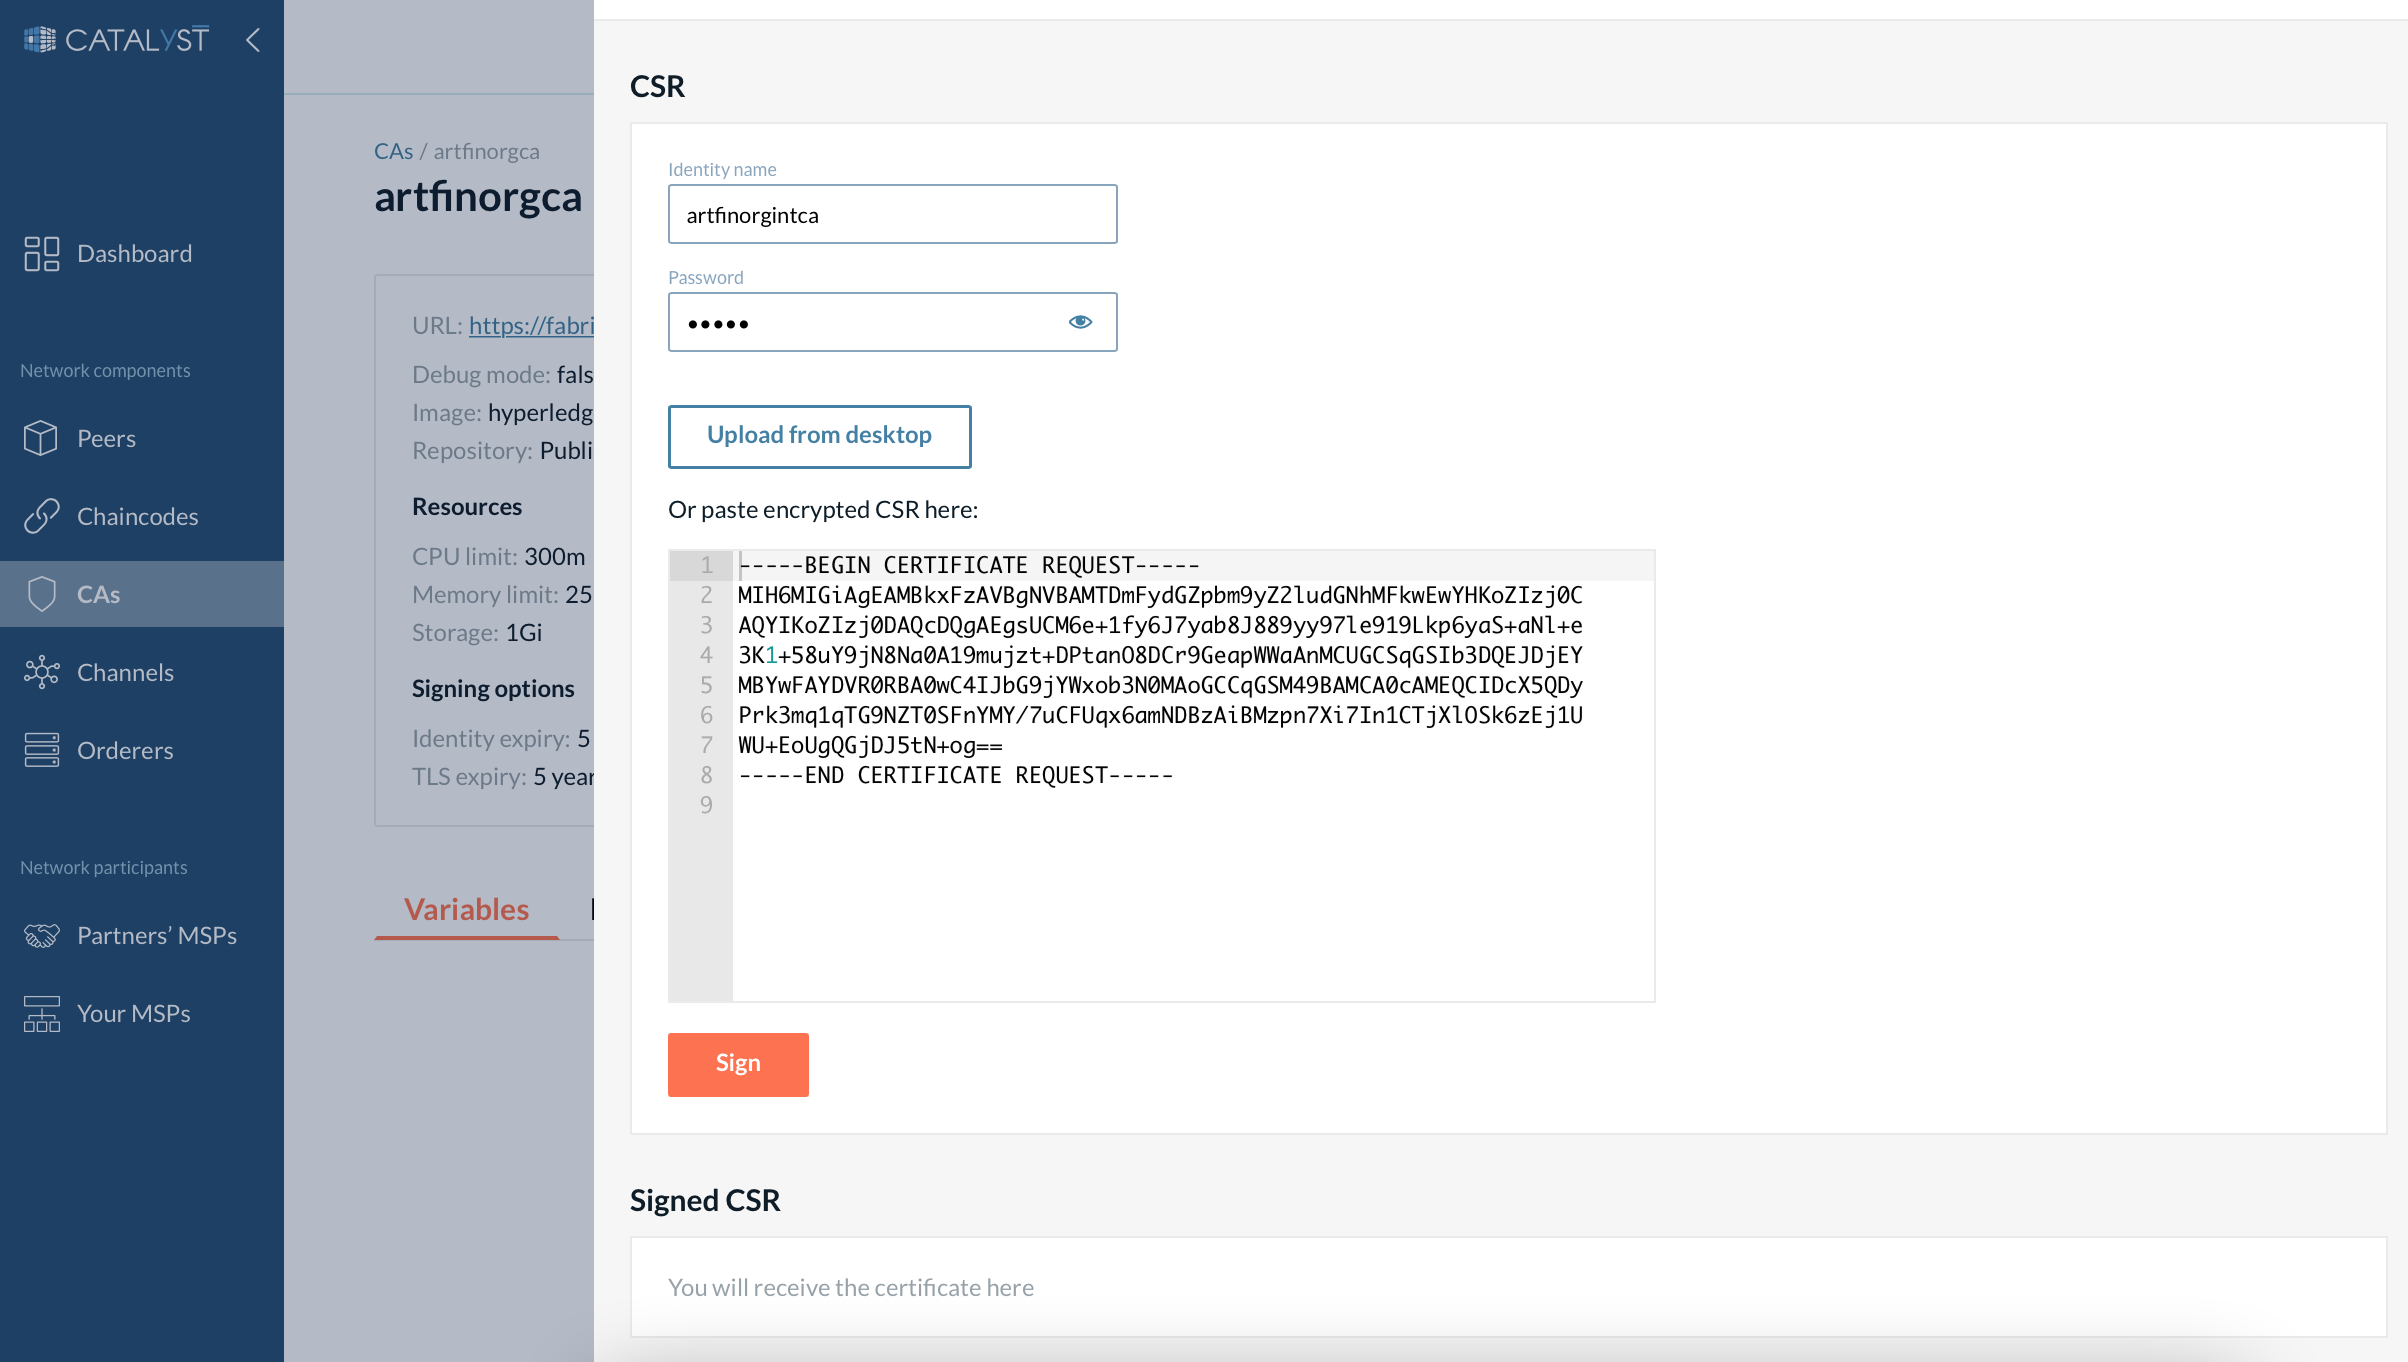
3. Enroll the identity (sign the CSR). Click the “Sign CSR” button.
-
Provide the identity name and the password you used for the identity registration.
-
Upload or paste the previously copied/downloaded CSR.
-
Then click “Sign CSR”. The certificate will appear in the Signed CSR section.
-
Copy or download the certificate.
-
-
4. Copy the parent CA’s certificate (you will need it for the next step).
-
5. Upload the certificate to the intermediate CA.
-
Open the “Manage CSR” window from the intermediate CA page.
-
Upload or paste the certificate previously saved.
-
Add the previously copied certificate of the CA you used for signing the intermediate certificate.
-
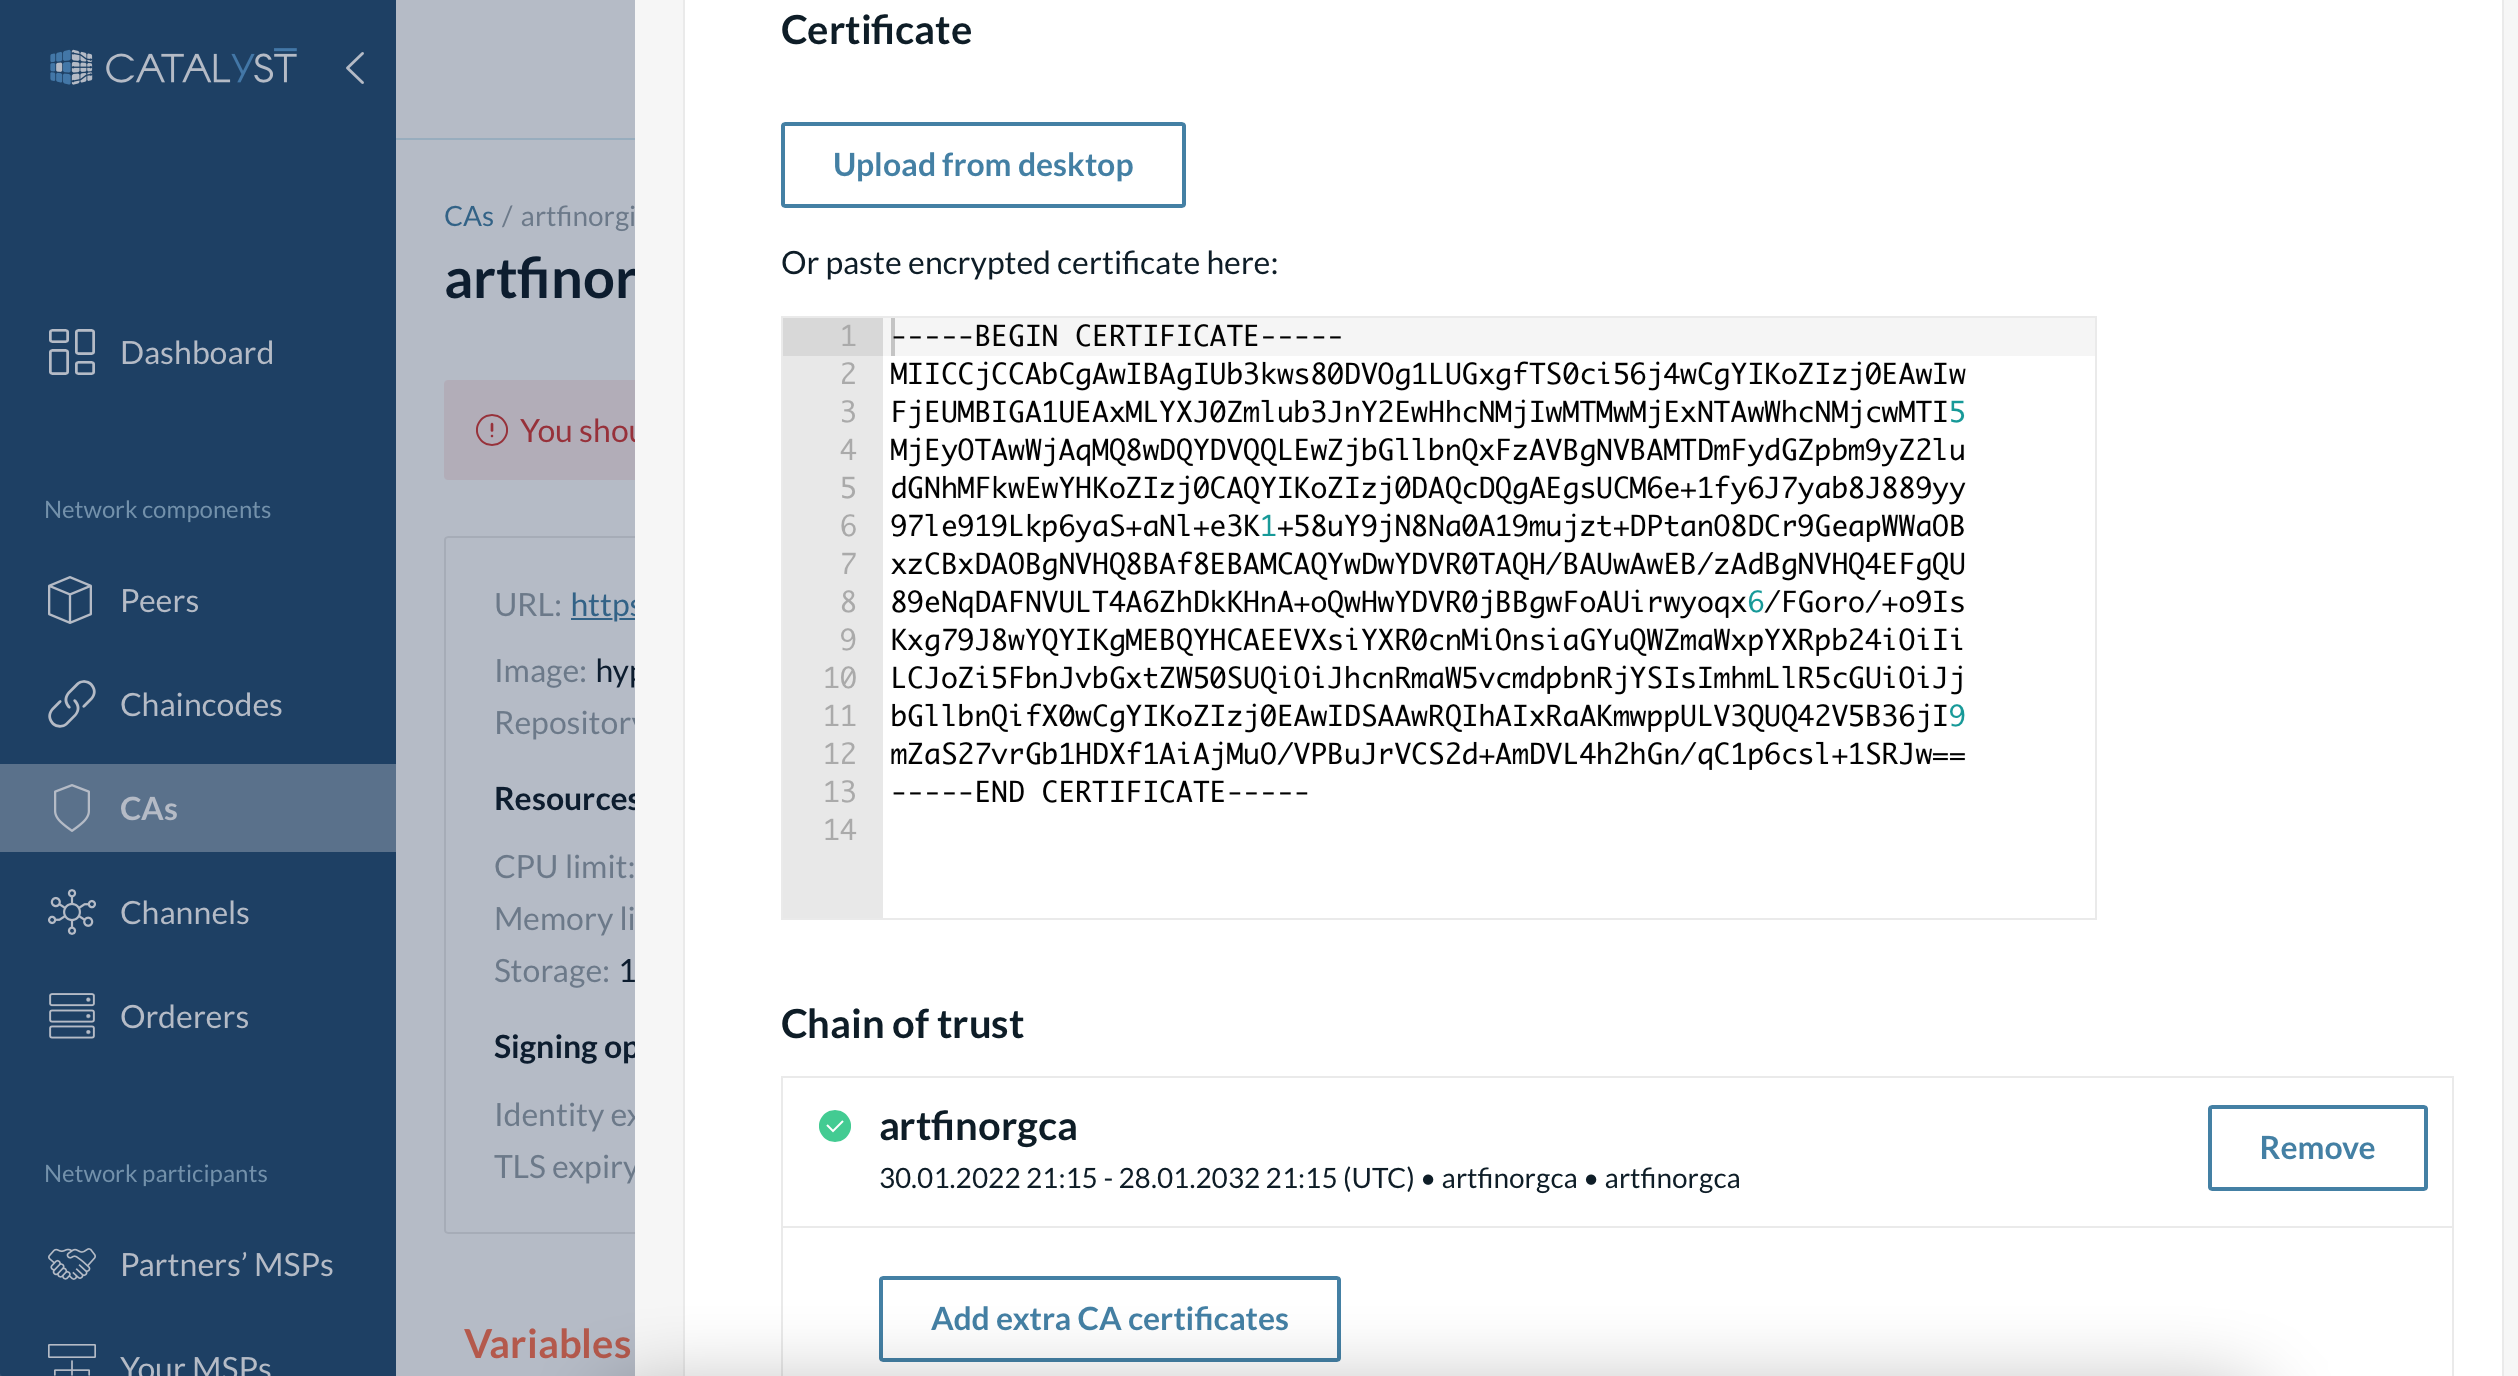
| If the parent CA was also an intermediate CA, you need to add all the intermediate certificates and the root certificate of the chain of trust. |
| If you want to sign your intermediate certificate by an external CA, skip 2 and 3 steps and follow the signing procedure of the CA you want to use instead. |
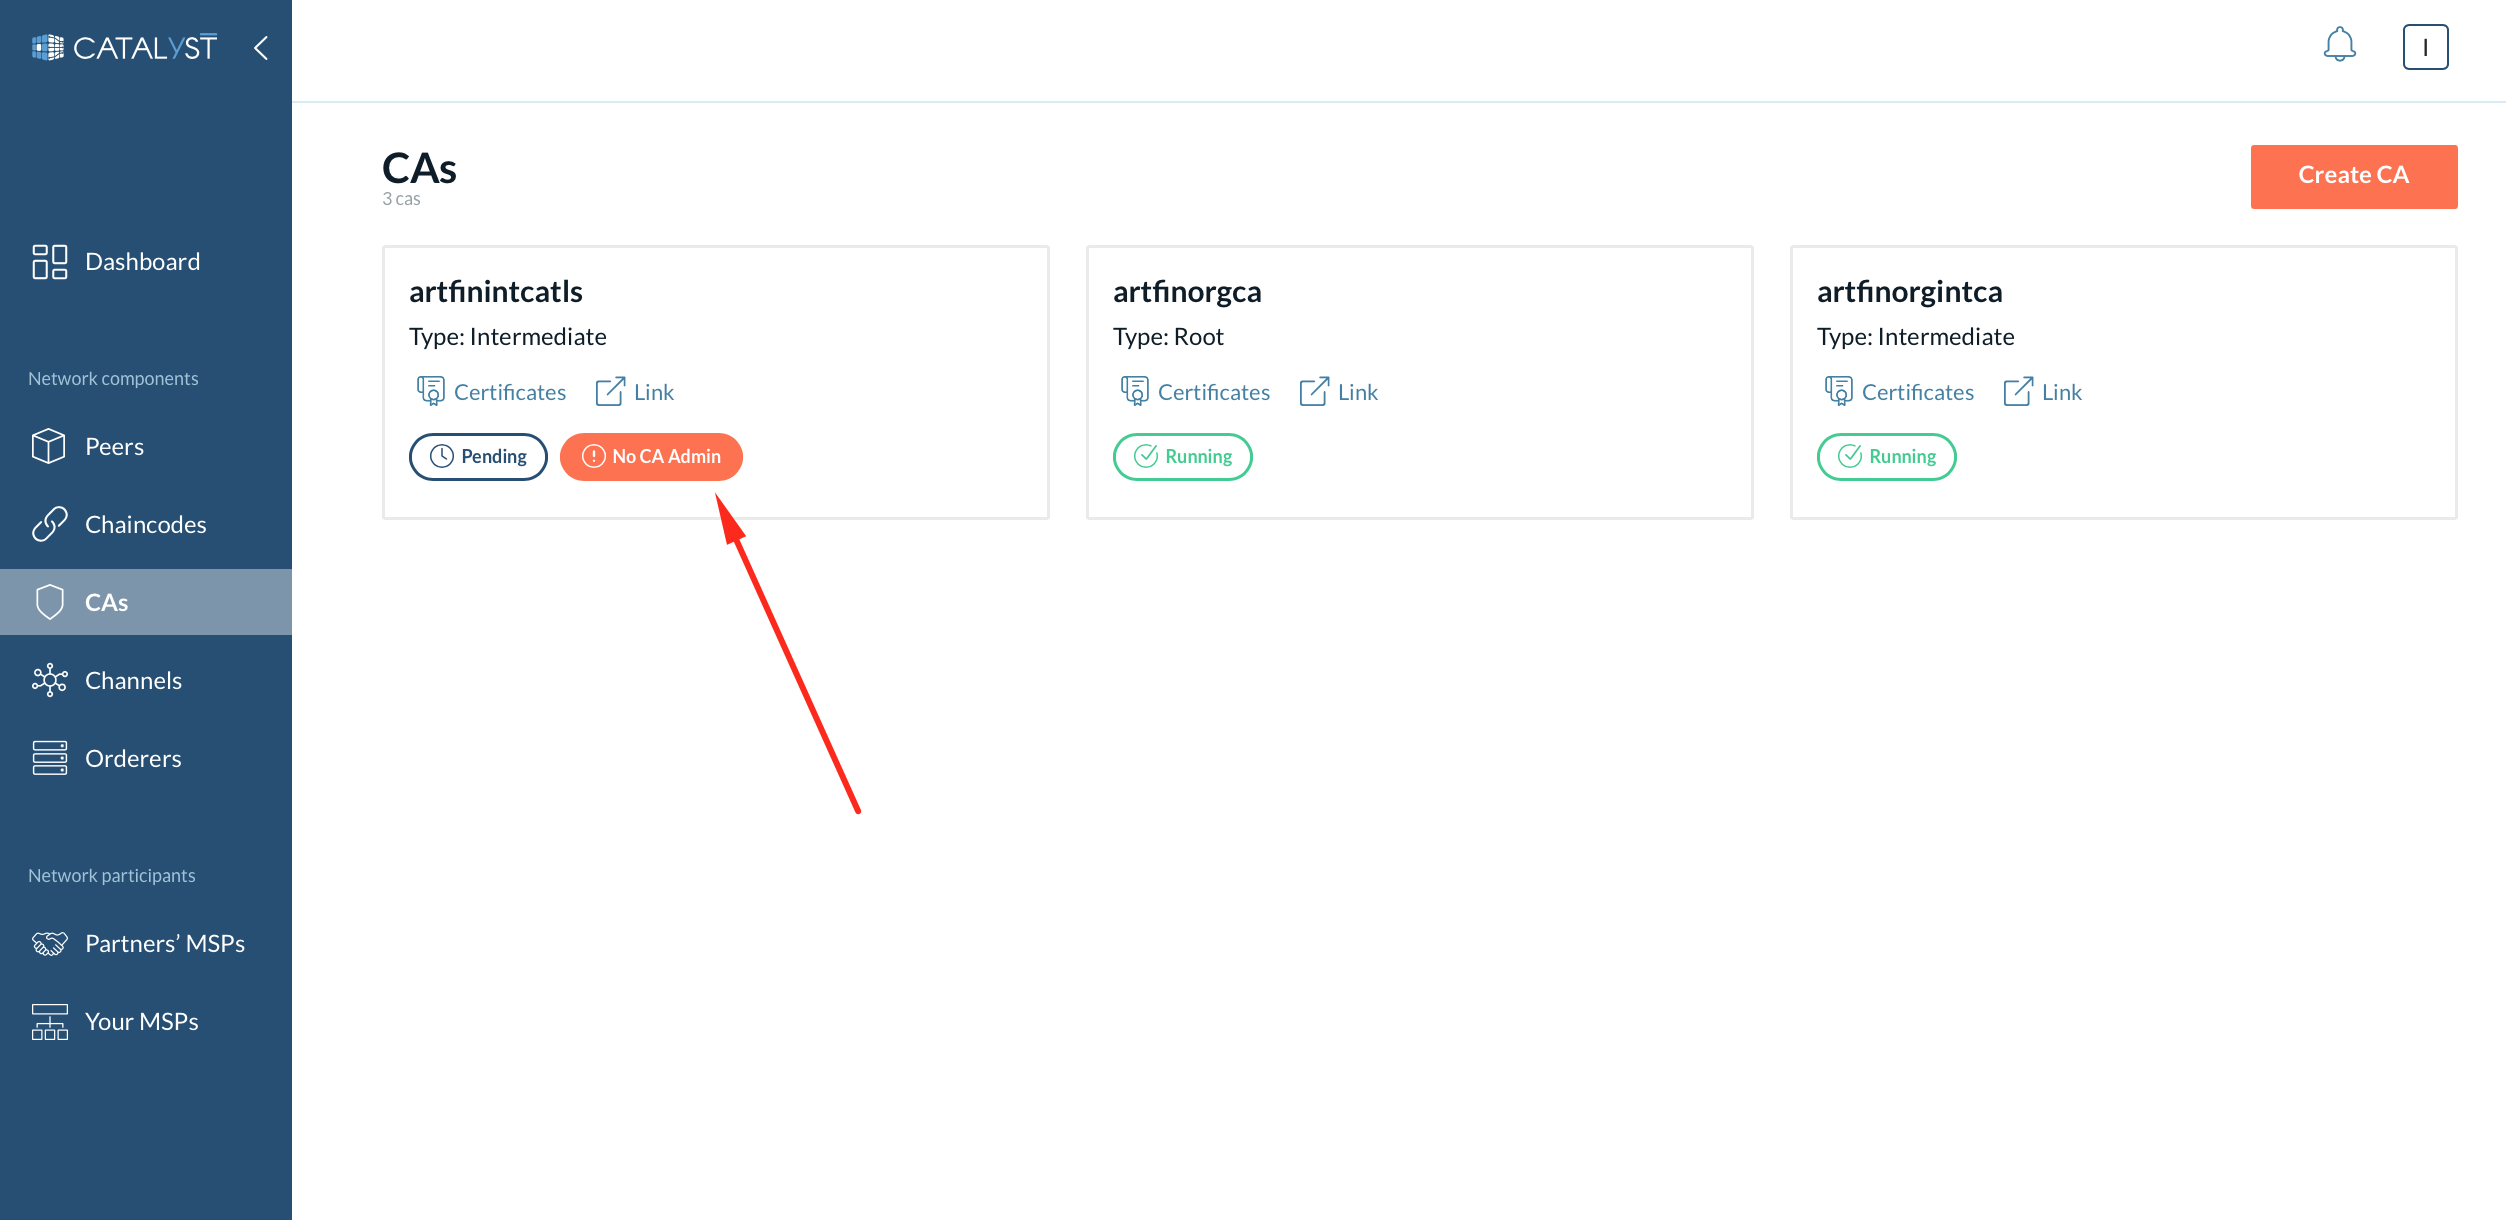
When your intermediate CA gets a certificate, you will see the “Running” status and the “No CA admin” button. It means your CA is ready to enroll the CA admin as described further.
How do I enroll an admin identity?
Even though the node is up and running, you need to enroll the CA admin identity with the credentials you provided before during the CA creation. You can check the CA admin enrollment status by the “No CA admin” label. When no CA admin is enrolled, you cannot see and manage identities by the CA.
To be able to operate identities with a particular CA, you need to enroll a CA admin identity, which was registered during the CA creation process:
-
Go to the CA page and click the “No CA admin” button on the particular CA. Or click on the particular CA, then click on the “Enroll CA admin” button.
-
Provide the same credentials (CA admin ID and password) as you entered during the CA creation process and submit the process.
After the successful enrollment of the CA admin identity, you will see and operate identities: register, enroll and delete identities.
What characteristics do CAs have?
Under the CAs tab, you can view the existing CAs of your organization along with the following characteristics:
-
Name
-
Type (root/intermediate)
-
Certificates link
-
Link icon
-
The “No CA admin” label if the admin is not enrolled
-
Status
|
The CA node can exist in any of the following five states at any point in time:
|
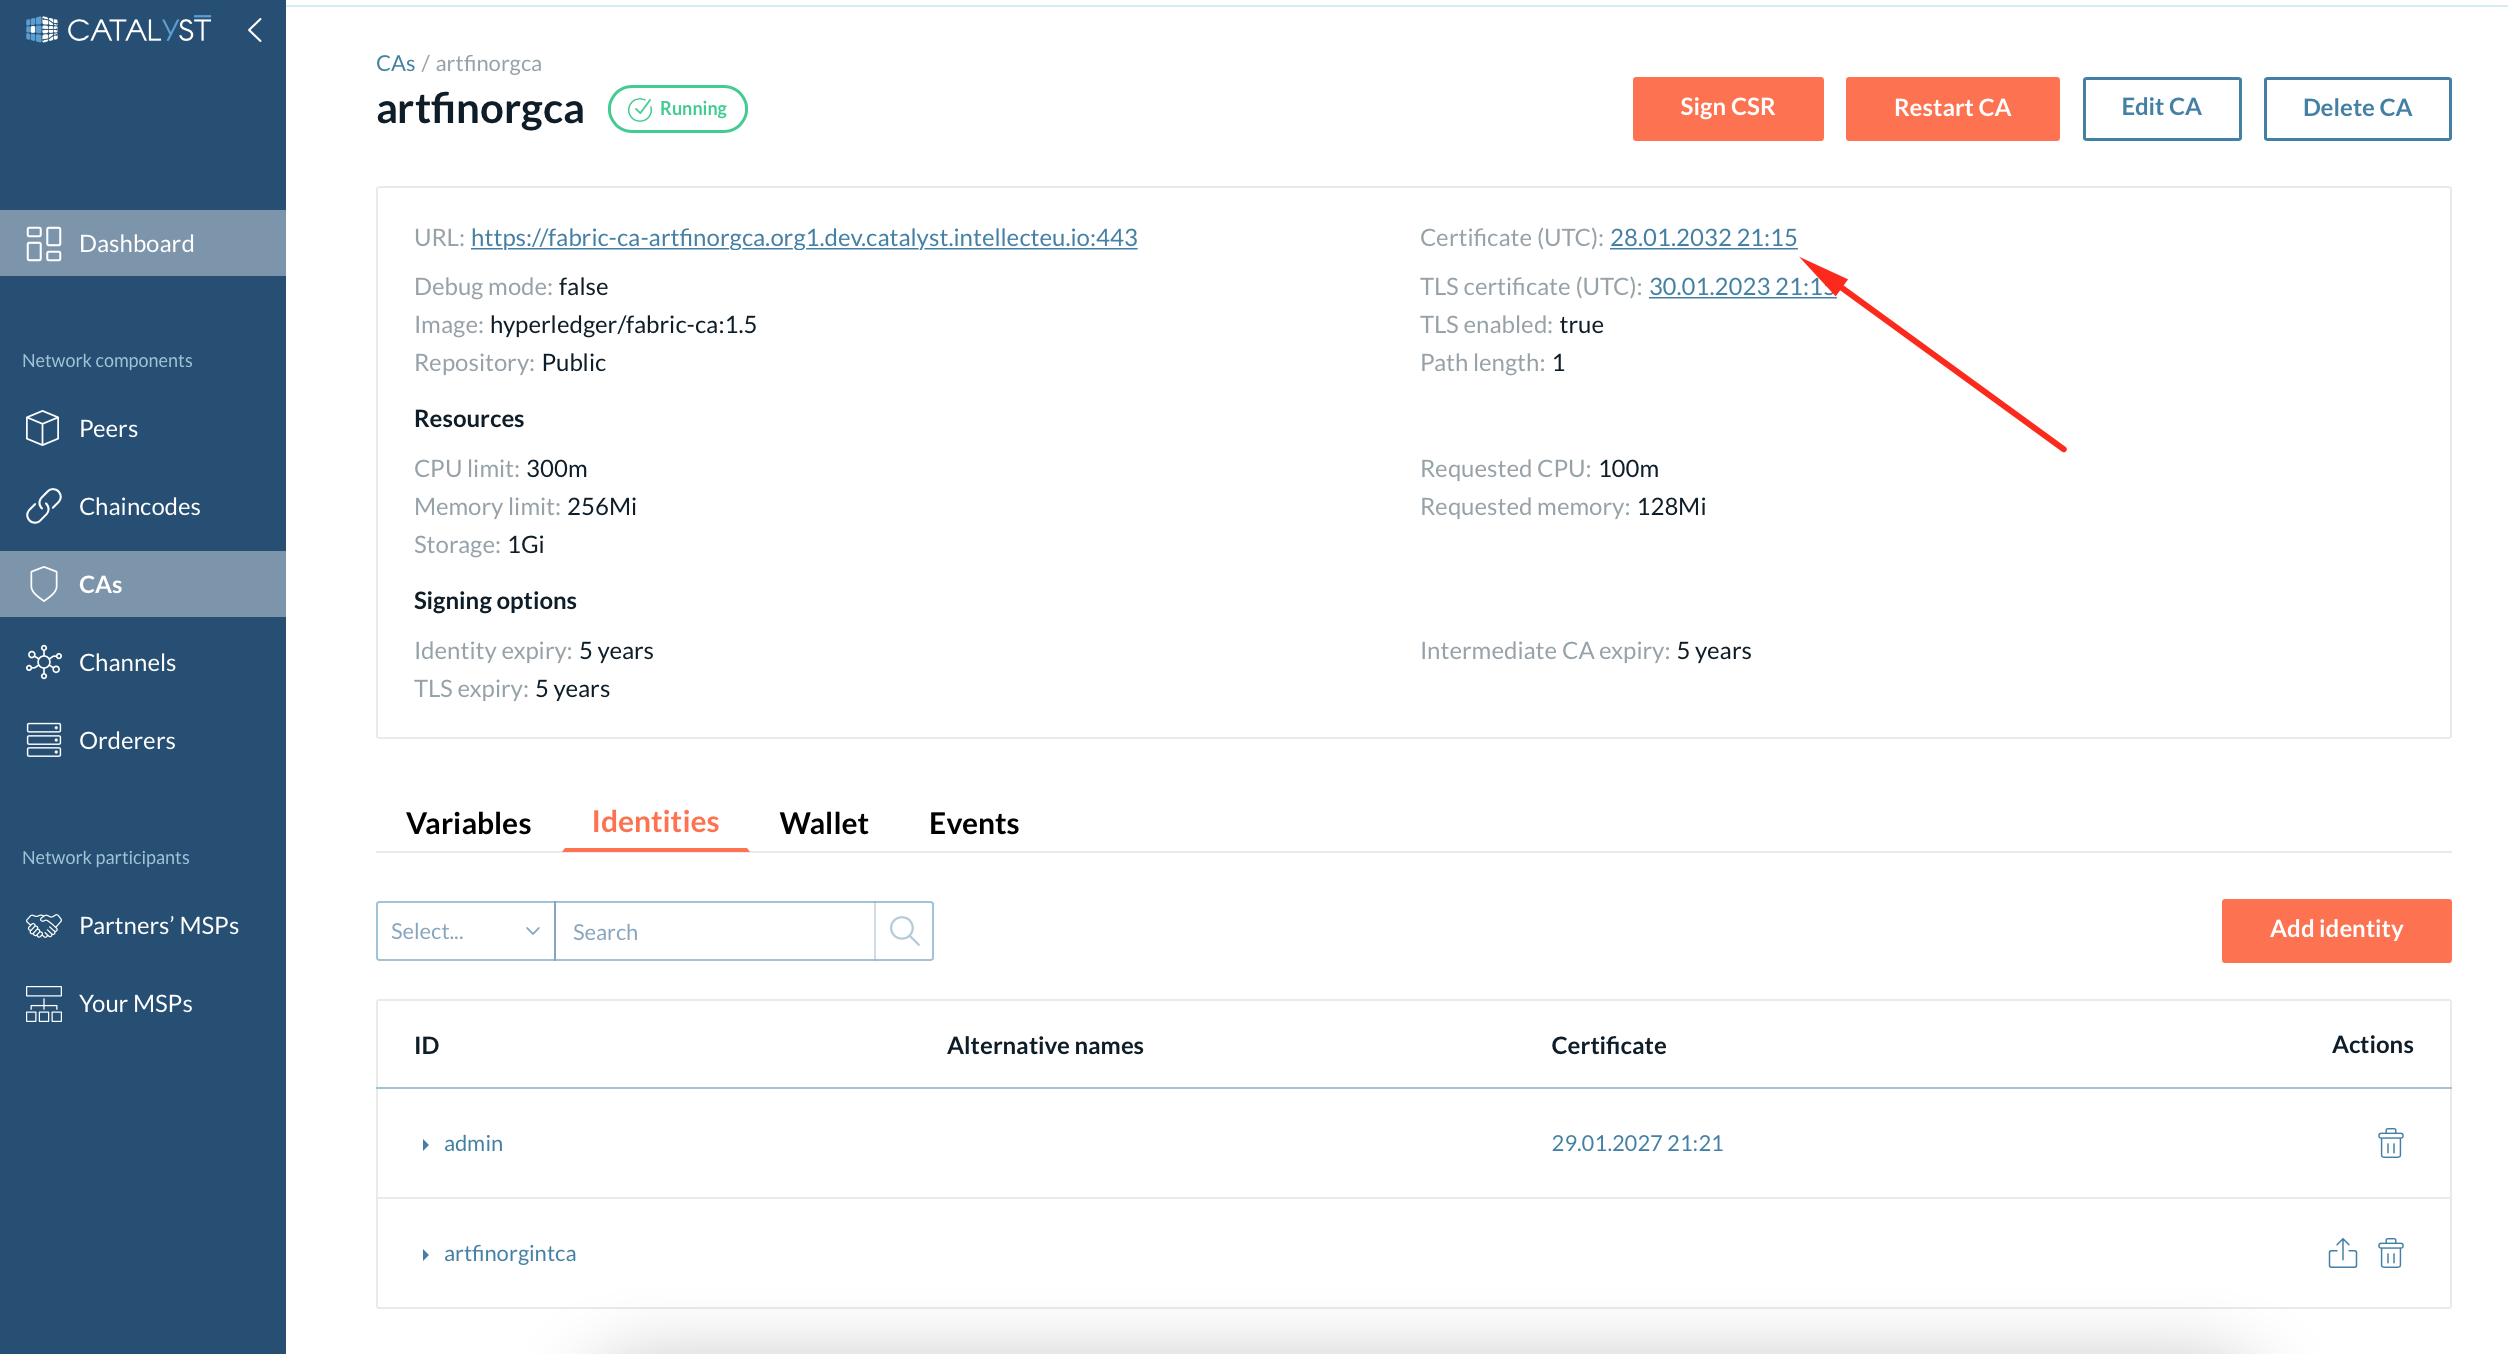
If you click on any CA, you will see a new window where the details of that particular CA are displayed. The details window is divided into five sections.
General information
In this section, you can view the details about the CA such as URL, certificates, signing options, etc.
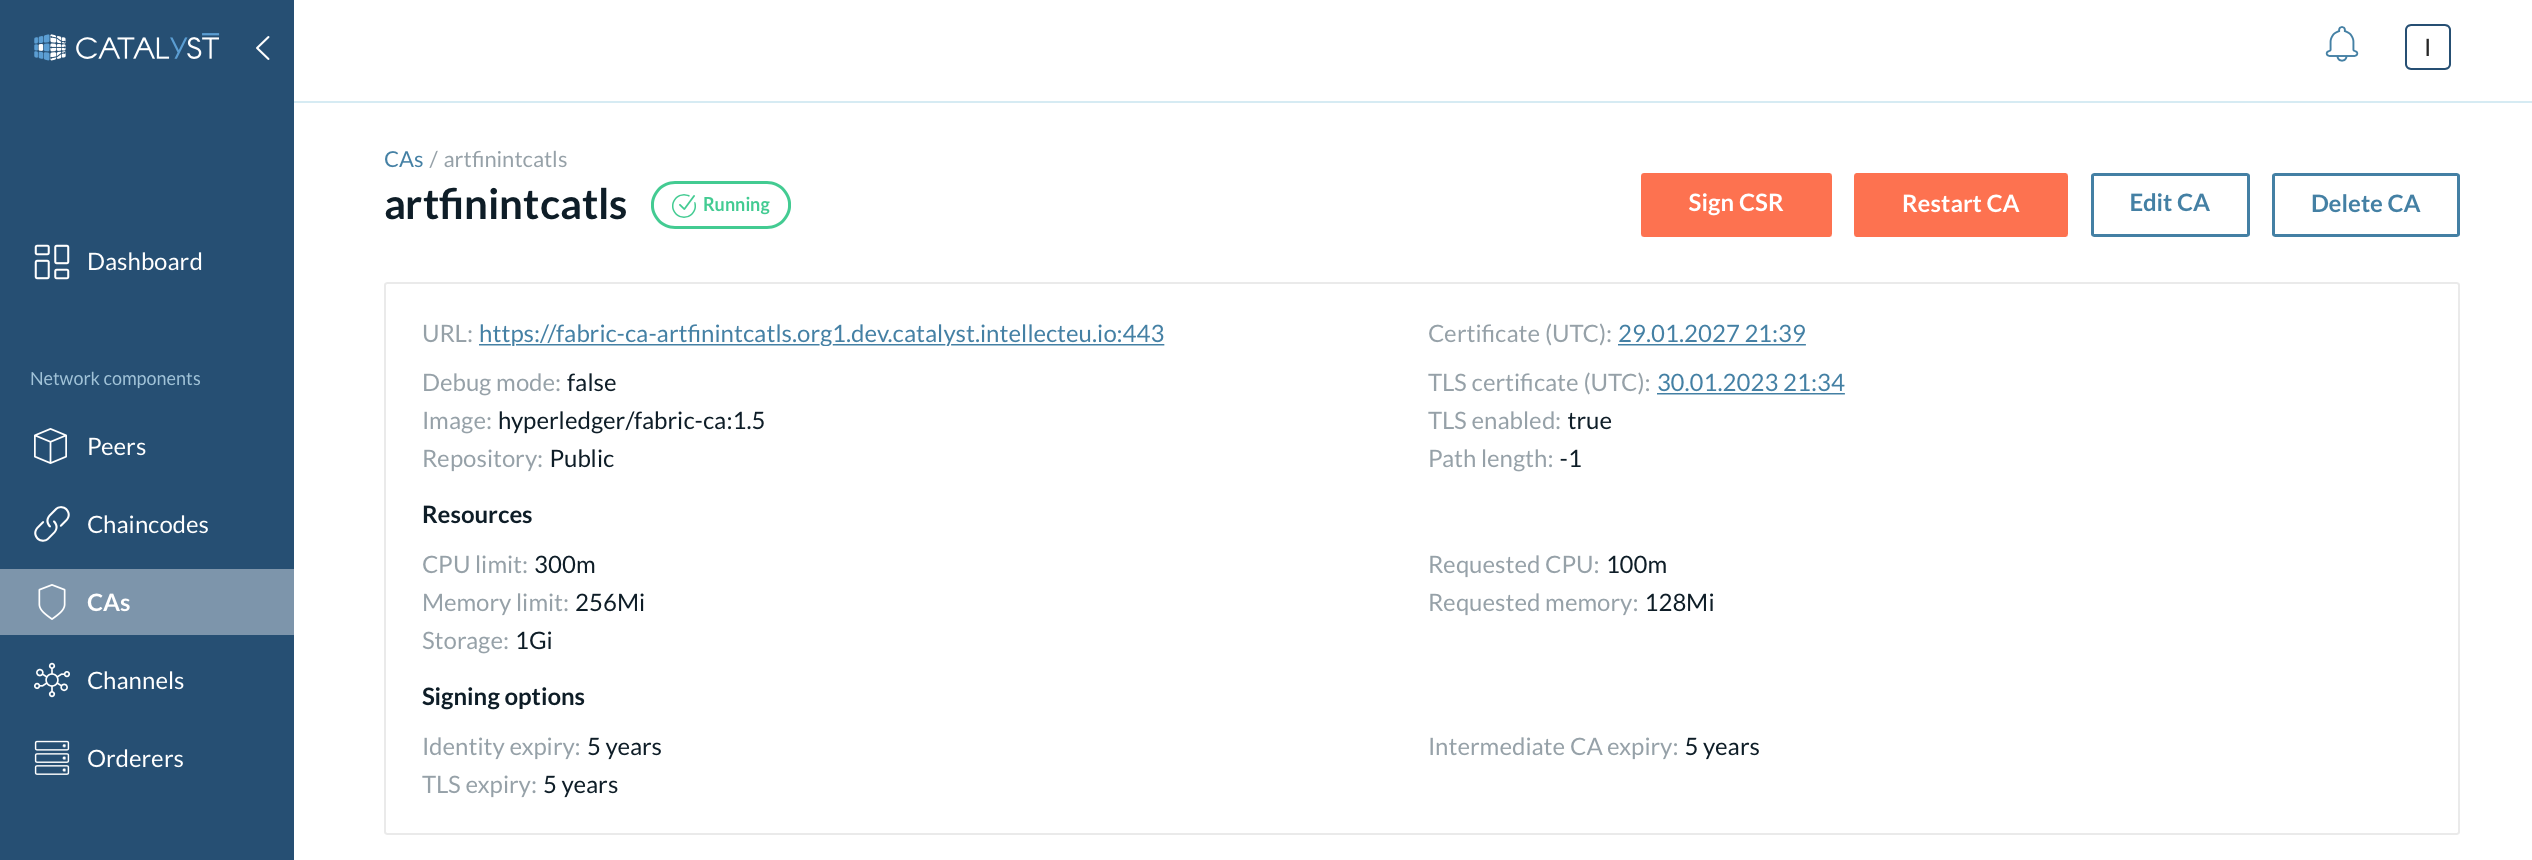
| You can view a particular certificate by clicking on the link with the certificate date. |
Here you can also see actions that can be performed on that CA:
-
Restart CA
-
Delete CA
-
Edit CA (you can change CA image, resource allocation, add/remove environment variables, modify signing options and enable/disable debug mode).

Identities
This section displays the list of all identities that a particular CA has issued on the network. You can also add a new identity here.
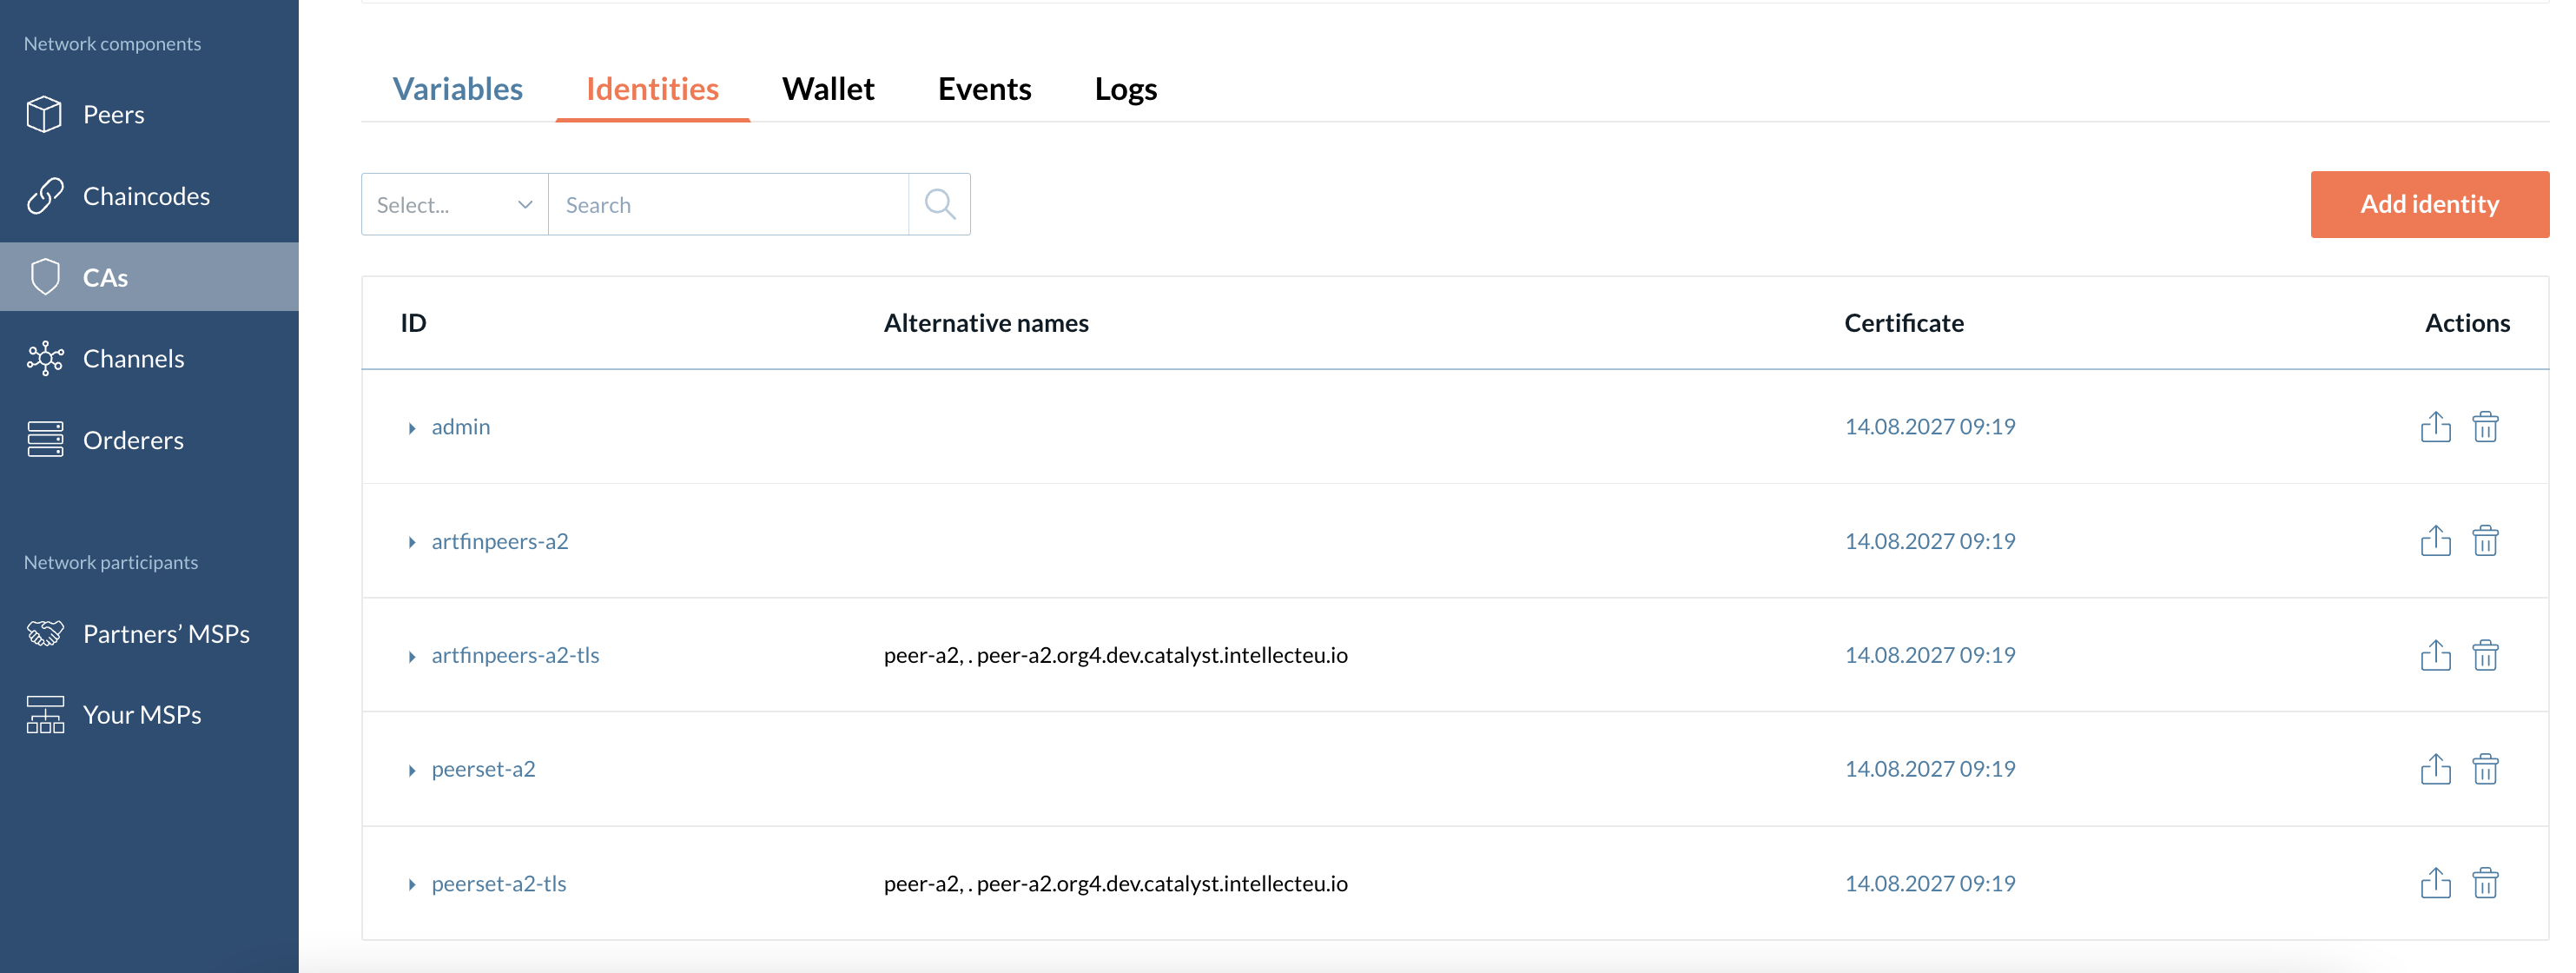
The information about these identities is displayed in the following columns:
-
ID.
-
Type - Displays all the identity’s attributes.
-
Alternative names - Displays subject alternative names listed in TLS certificates.
-
Certificates validity period.
-
Delete the identity icon - Deletes the identity.
| Delete your identities carefully, especially if it is a CA admin identity in the wallet. If you delete your admin identity you will lose access to the CA’s identities management. |
You can also add (register or/and enroll) a new identity under a particular CA in this section.
| You can view the identity certificate by clicking the particular validity value in the "Certificate" column. |
Wallet
A wallet contains a CA admin identity that Catalyst Blockchain Manager uses to register and enroll identities by the particular CA within the network. You need a wallet identity for a CA to be fully functioning. This identity is automatically assigned to a wallet after enrolling.

| Suppose you delete the CA admin identity from the wallet. In that case, you will not be able to operate identities until you enroll the admin identity as described above in the section. |
| You cannot add another identity to the wallet. Only that identity that was registered during the CA is added to the wallet automatically by Catalyst Blockchain Manager. |
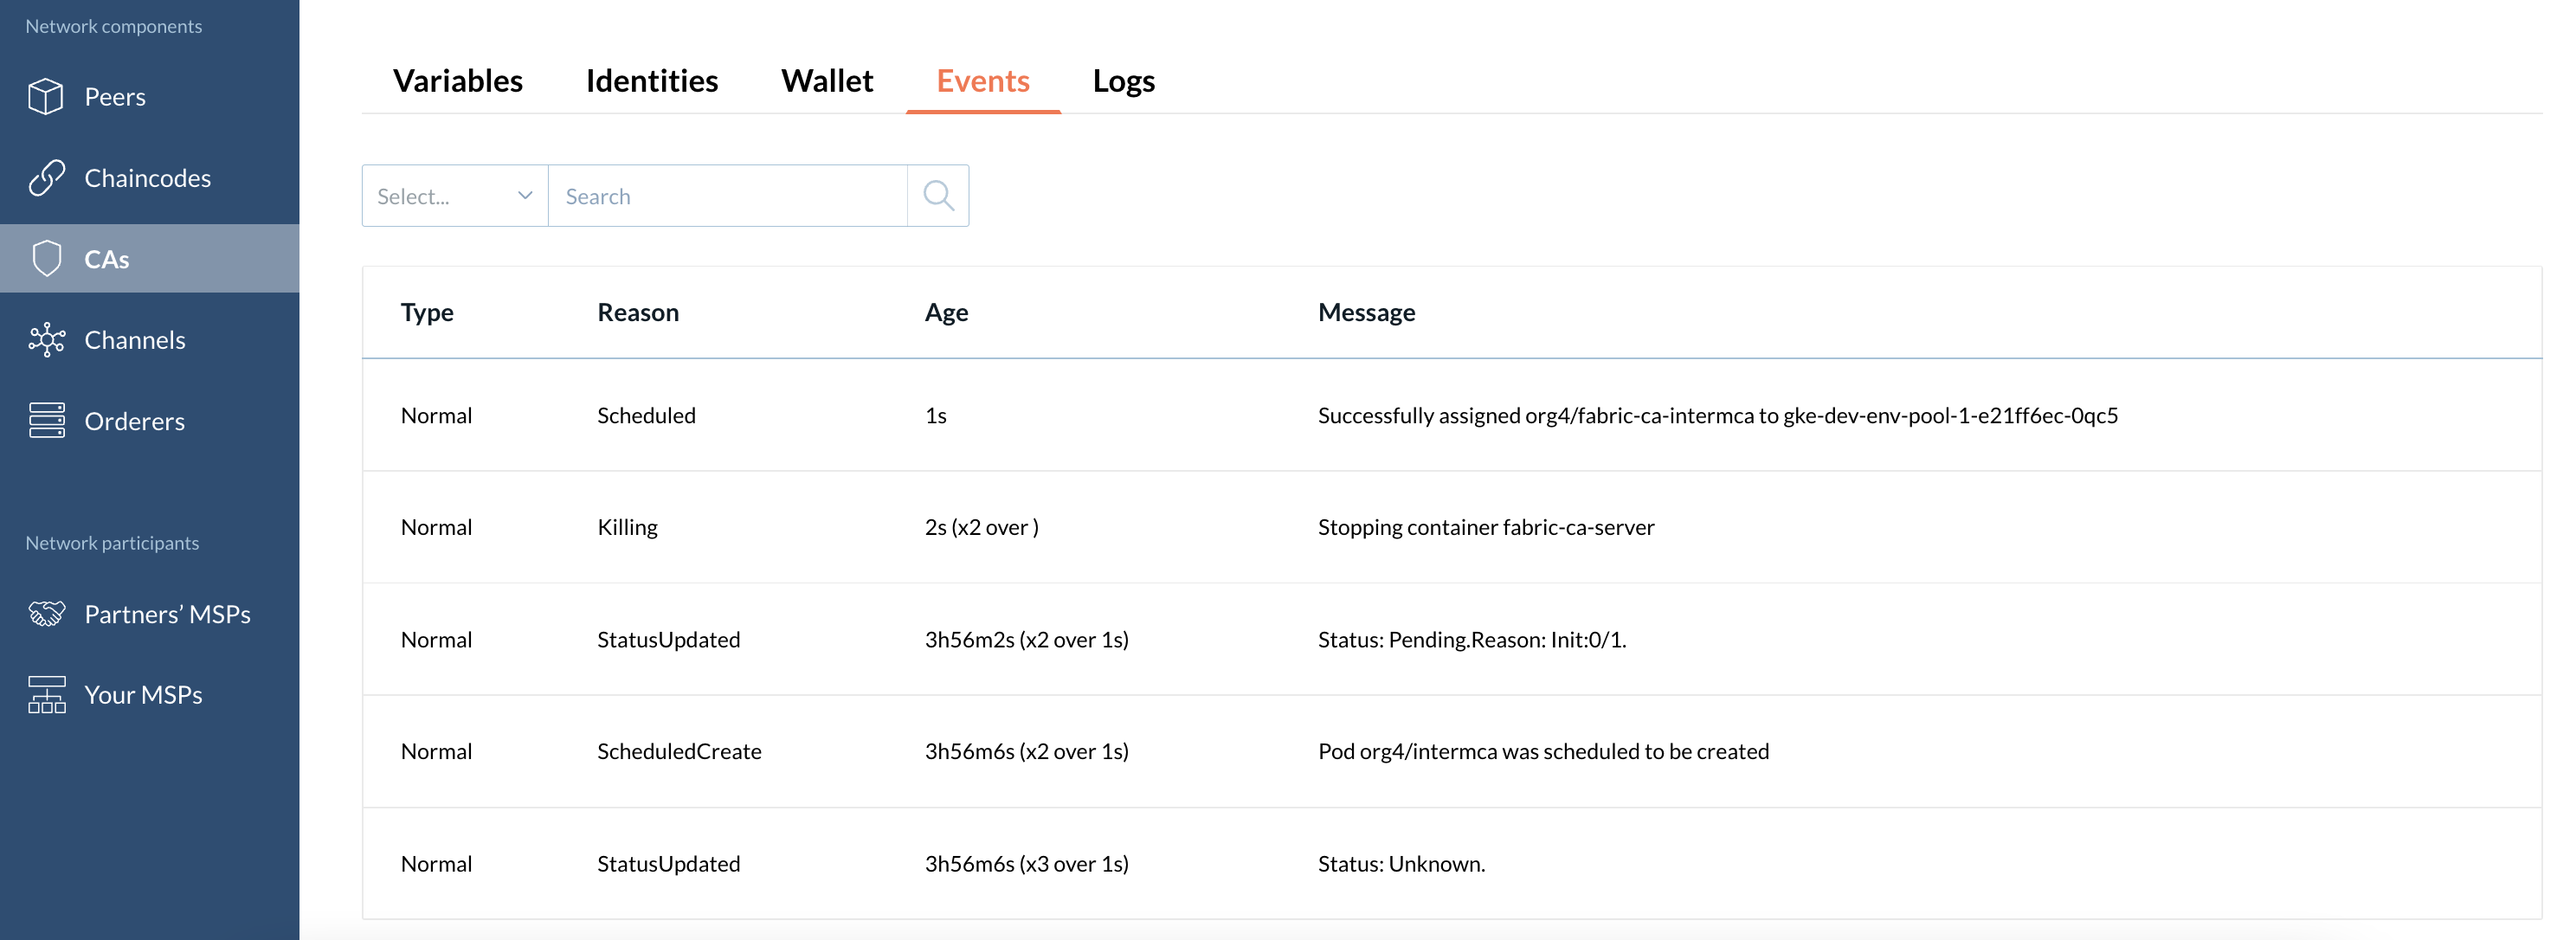
Events
This tab displays events with a particular CA node.
Logs
This tab displays logs of a particular CA.
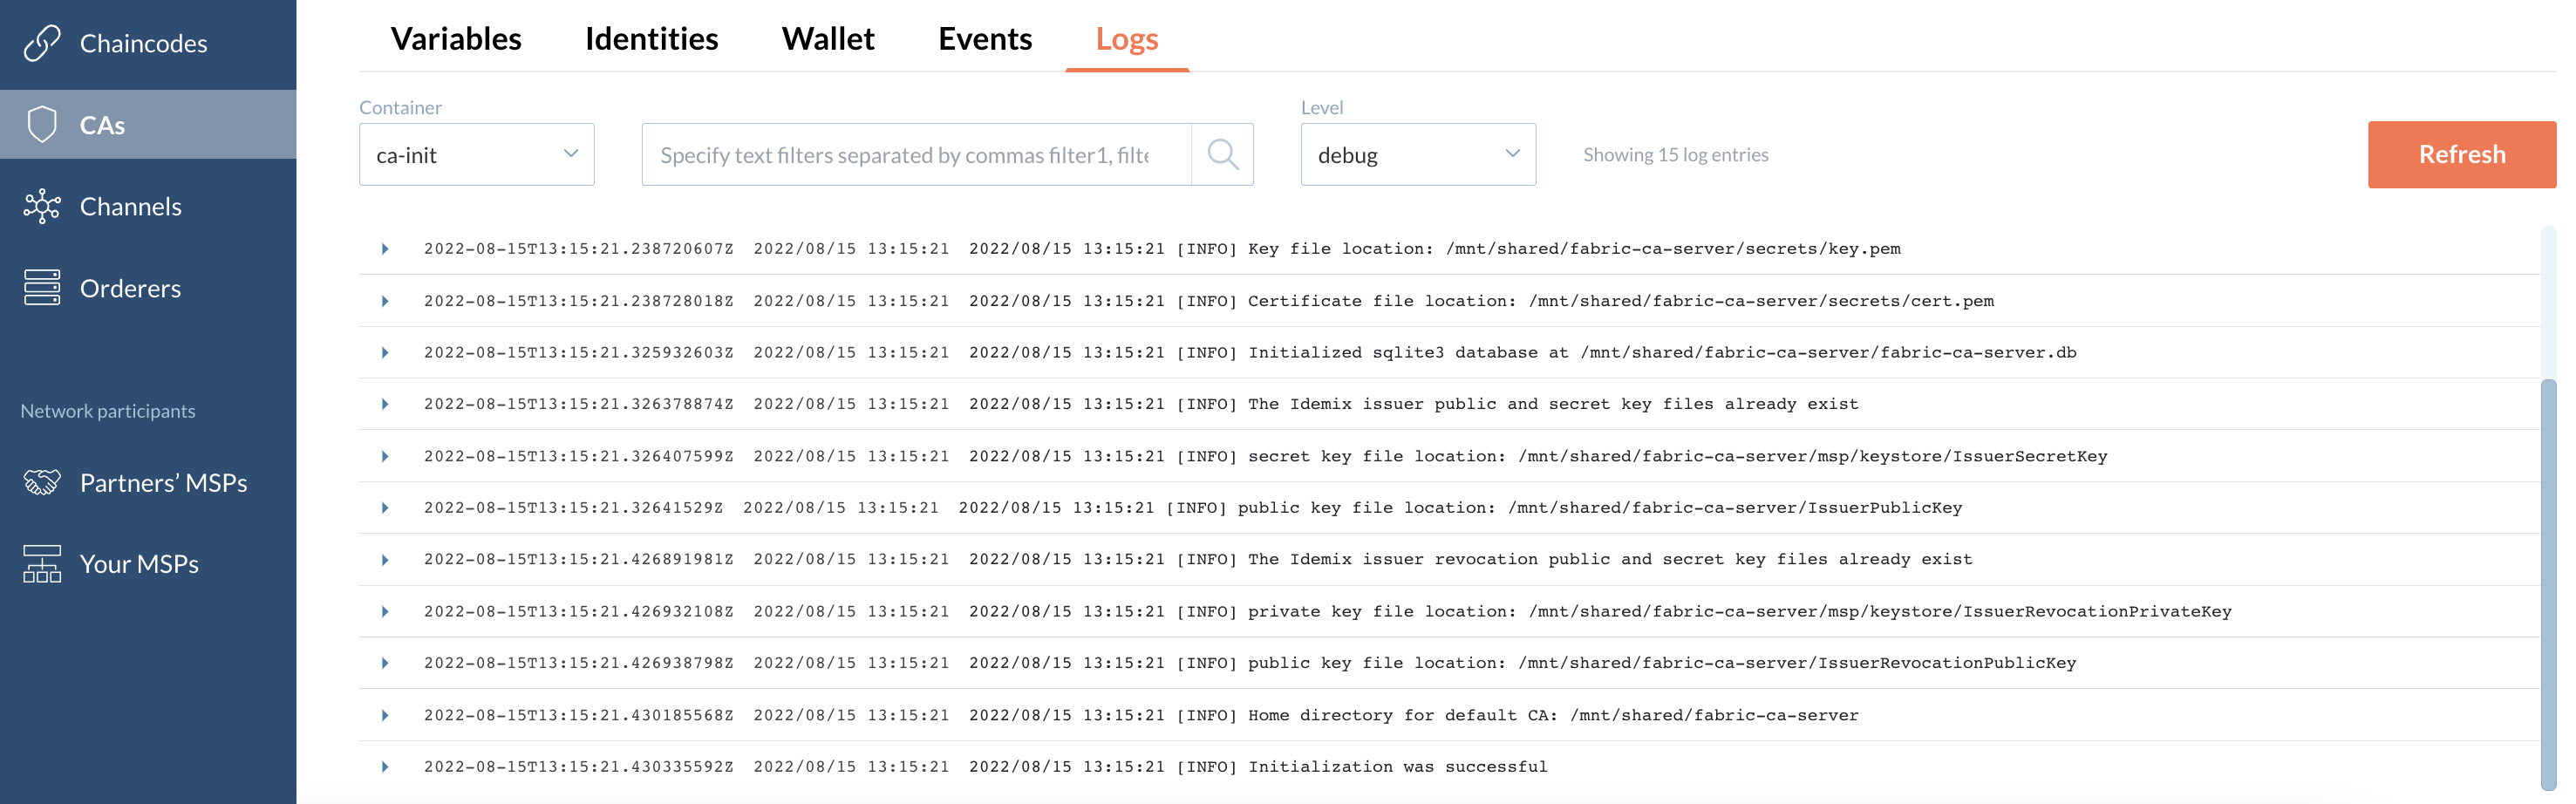
You can filter logs by text and/or level.
| Scroll down to see the newest logs. |
How to create an identity?
The process of creating an identity consists of registering an identity and enrolling an identity. You can read more about registering and enrolling identities in the official Hyperledger Fabric documentation here.
While registering and enrolling an identity are included in creating almost all entities in the network, there is an option to register or/and enroll an identity separately. For example, this option is needed to register the client application or register a CA admin identity for further enrolling on the business application side.
| Suppose you want to register and/or enroll identities using Hyperledger Fabric SDK instead of the Catalyst Blockchain Manager UI. In that case, you need to first register a CA admin identity using the UI and then enroll this identity on your business application side. You will register and enroll new identities with the particular CA using this CA admin identity. |
You can also enroll an identity and then select this identity while creating a peer or ordering node instead of creating a new identity.
To register or/and enroll an identity, you should do the following:
-
Go to the CAs tab and click on CA, which you want to use for registering.
-
Go to the “Identities” tab.
-
Click on the “Add identity” button.
-
Provide the name and password for the identity.
-
Select a type of identity (client, peer, or orderer).
| Be sure you select an appropriate identity type to create an identity for a peer or an orderer. |
-
Select “CA Admin” if you want an identity to operate the CA (register and enroll other identities).
-
Select "Intermediate CA" if you register an identity for the intermediate CA.
-
Select “Enroll identity” if needed.
|
You can always enroll a registered identity later using the Enroll identity icon. You can see registered identities along with enrolled identities in the identities list. Registered identities have an “Enroll identity” icon and a disabled “Certificate” icon. |