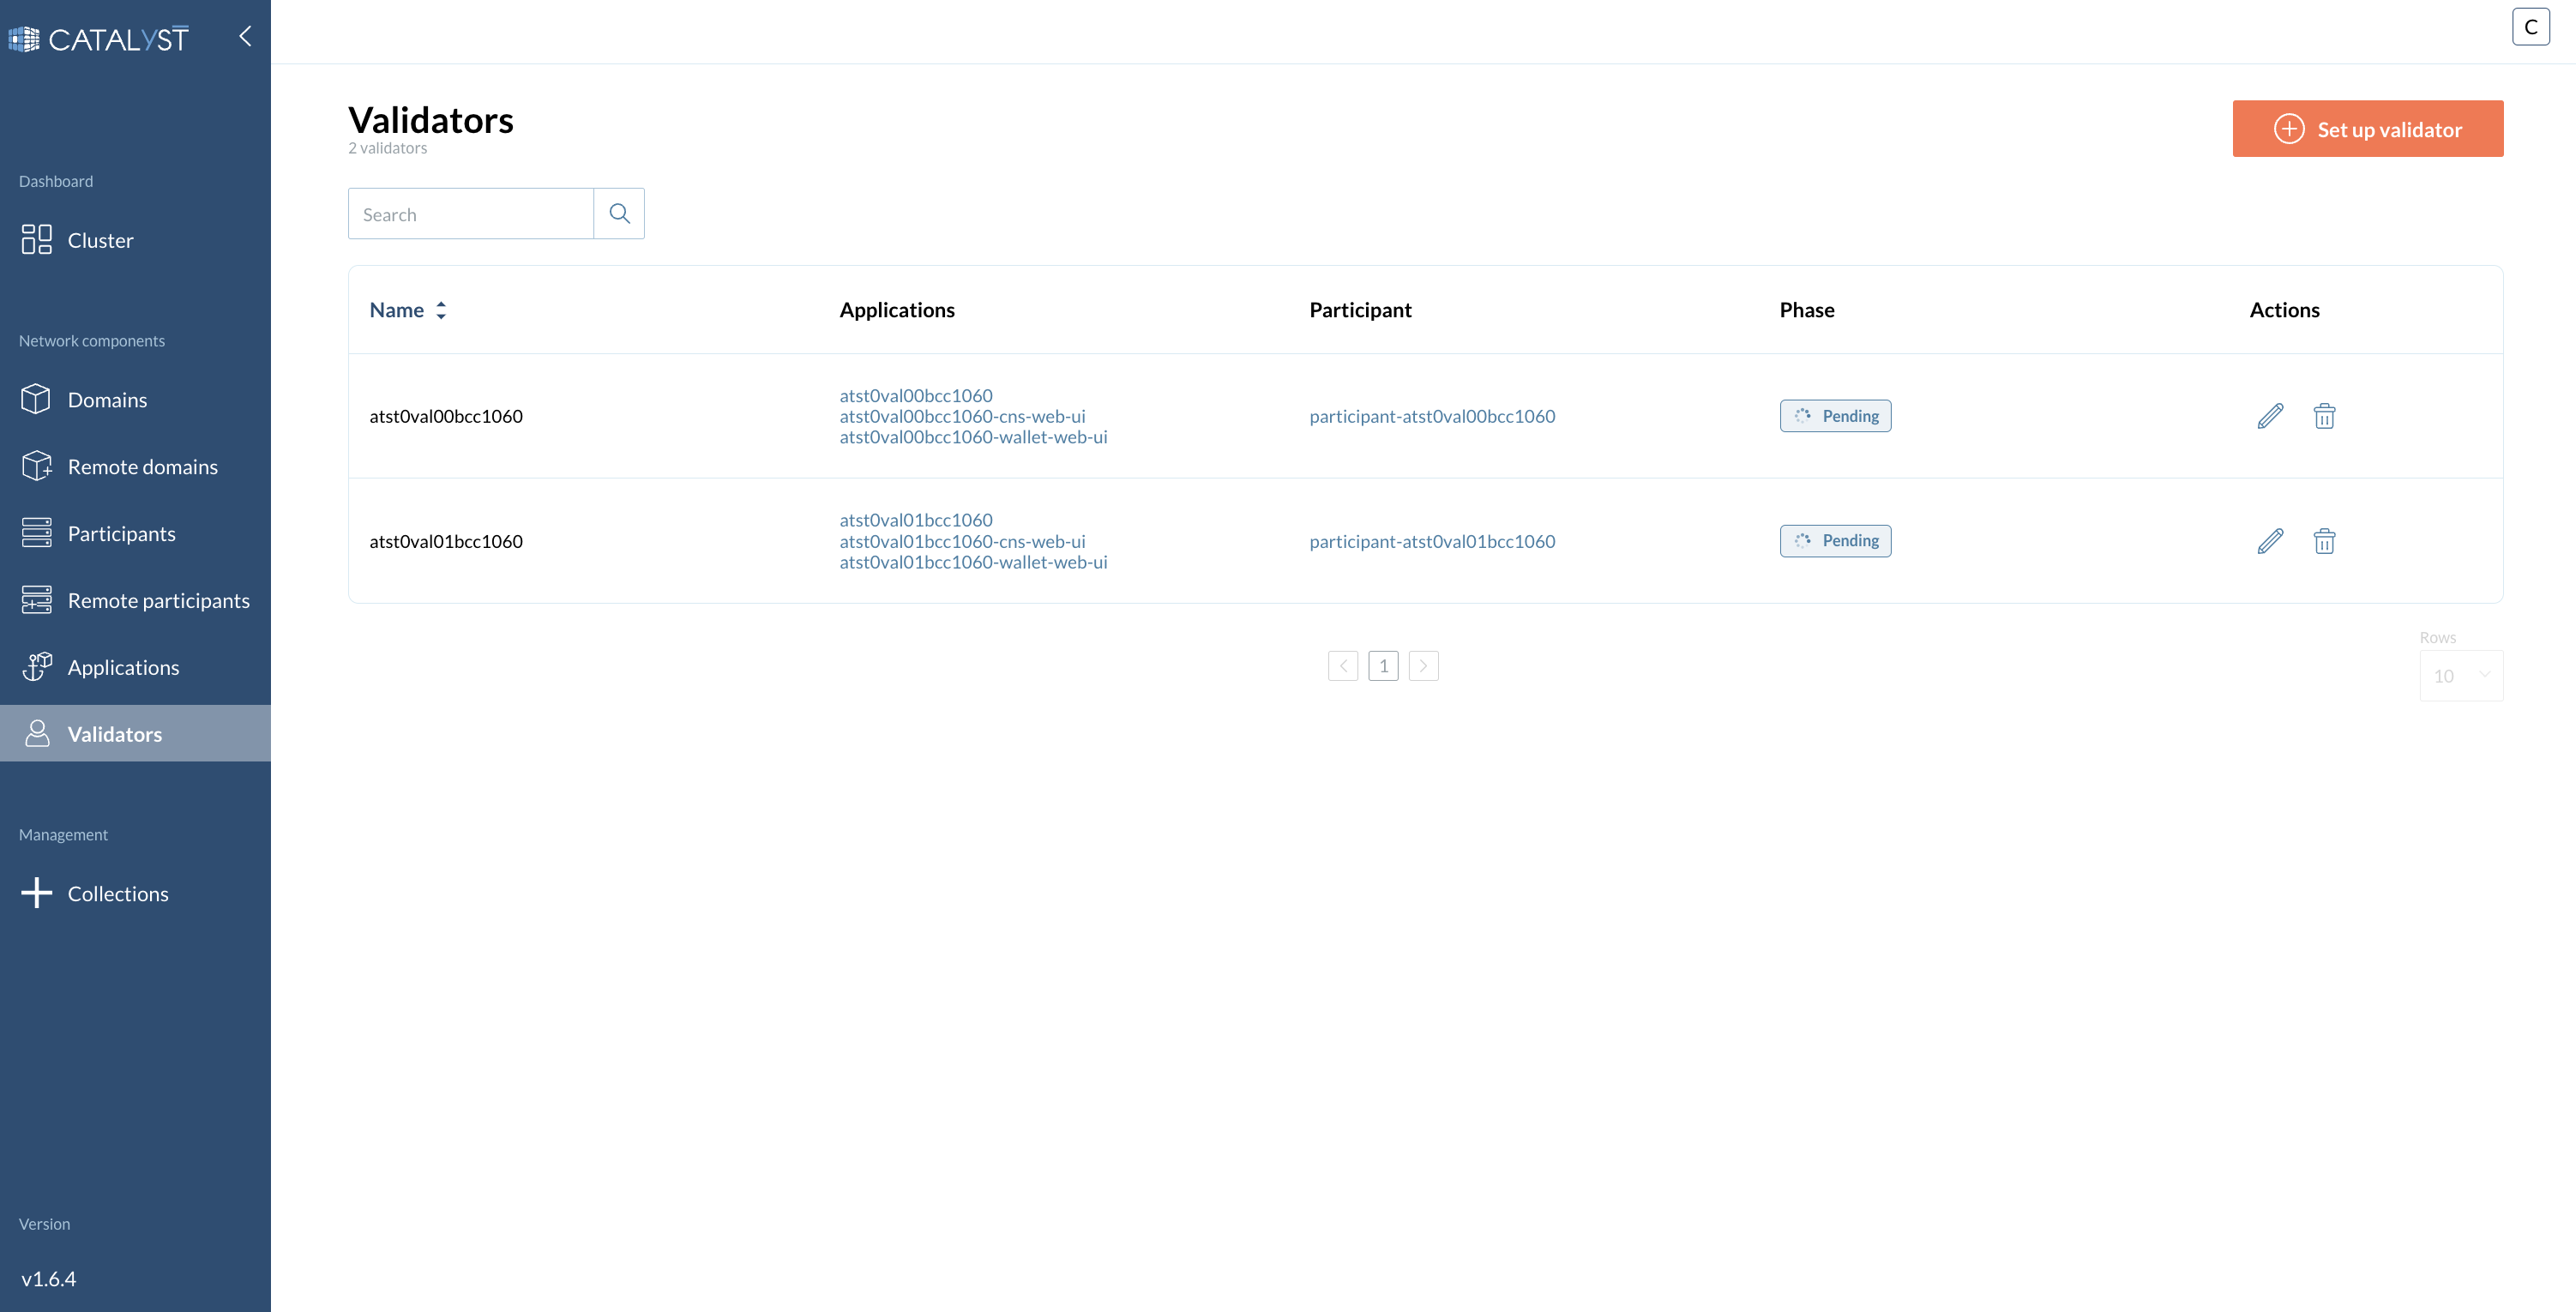
Validators
Validator Management
Validators can be deployed on Catalyst and connected to the Canton Network.
Throughout this user guide, we explain how to configure your validator, including the required information fields and their meanings.
|
For further details, refer to the collapsible "More Info" sections. |
How do I set up a Validator?
To set up a Validator, go to the Validators tab and click on the “Set up validator” button to open a side window.
1 - Main settings configuration:
At the first step of the new Validator setup wizard, please provide the following information.
-
Name
-
Onboard secret
-
Image tag
-
Image repo
-
Image pull secret
-
Postgres user
-
Postgres password
-
Requested CPU
-
CPU limit
-
Requested memory
-
Memory limit
-
Replicas
More info about these fields
-
Name The identifier or label for the validator node.
-
Onboard secret pass phrase obtained form the super validator in order to join the network.
-
Image tag The specific version or tag of the container image to be used.
-
Image repo The repository where the container image is stored.
-
Image pull secret Credentials required to pull the container image from a private registry. (secret docker-registry)
-
Postgres user Username for the Postgres database used by the validator.
-
Postgres password Password for the Postgres database user.
-
Requested CPU The minimum amount of CPU resources requested for the validator node.
-
CPU limit The maximum amount of CPU resources the validator node is allowed to use.
-
Requested memory The minimum amount of memory requested for the validator node.
-
Memory limit The maximum amount of memory the validator node is allowed to use.
-
Replicas The number of instances of the validator node to run.
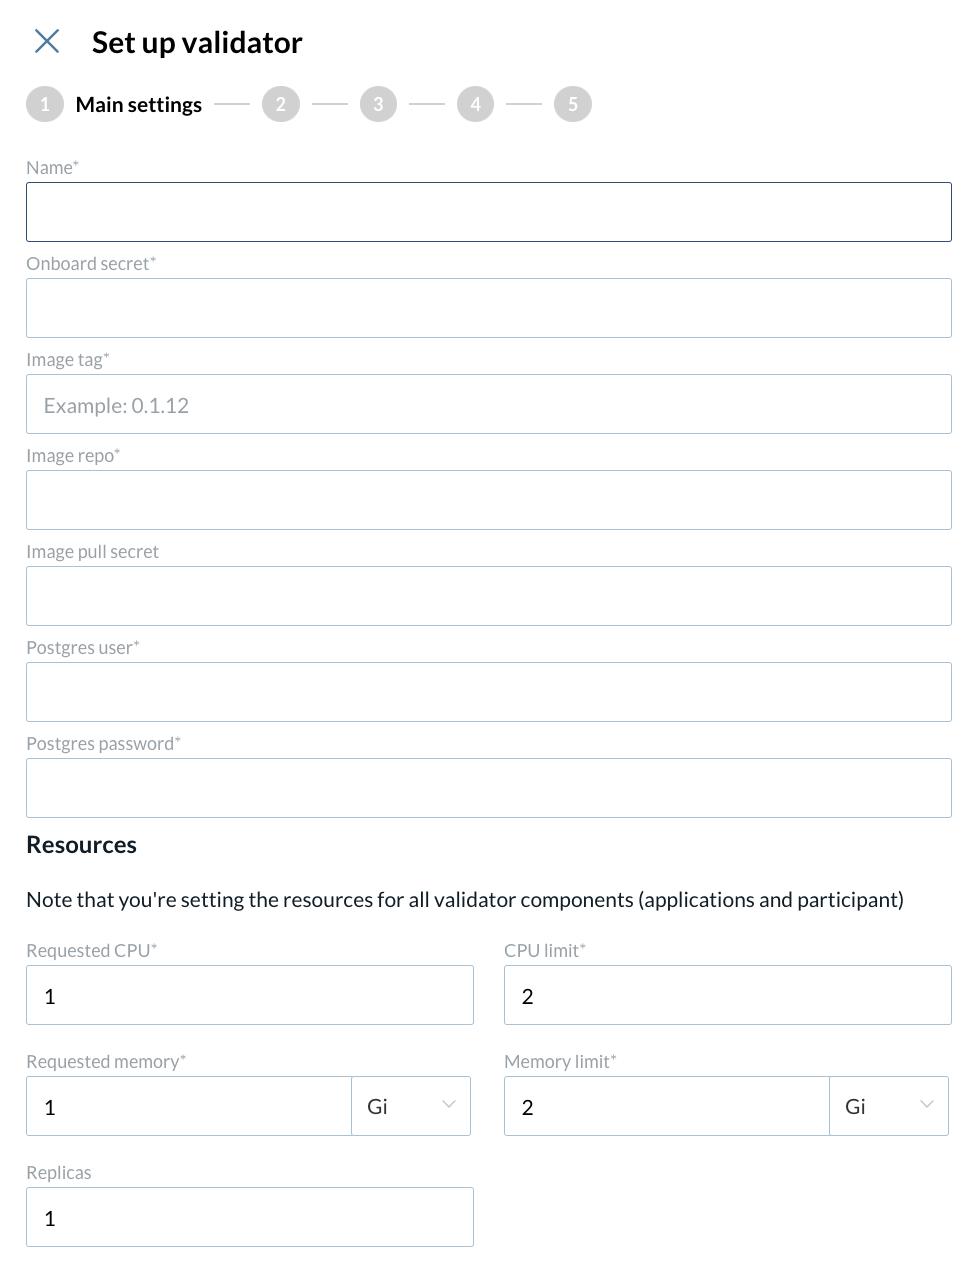
| An onboarding secret should be requested from your sponsoring SV in order to join the network. |
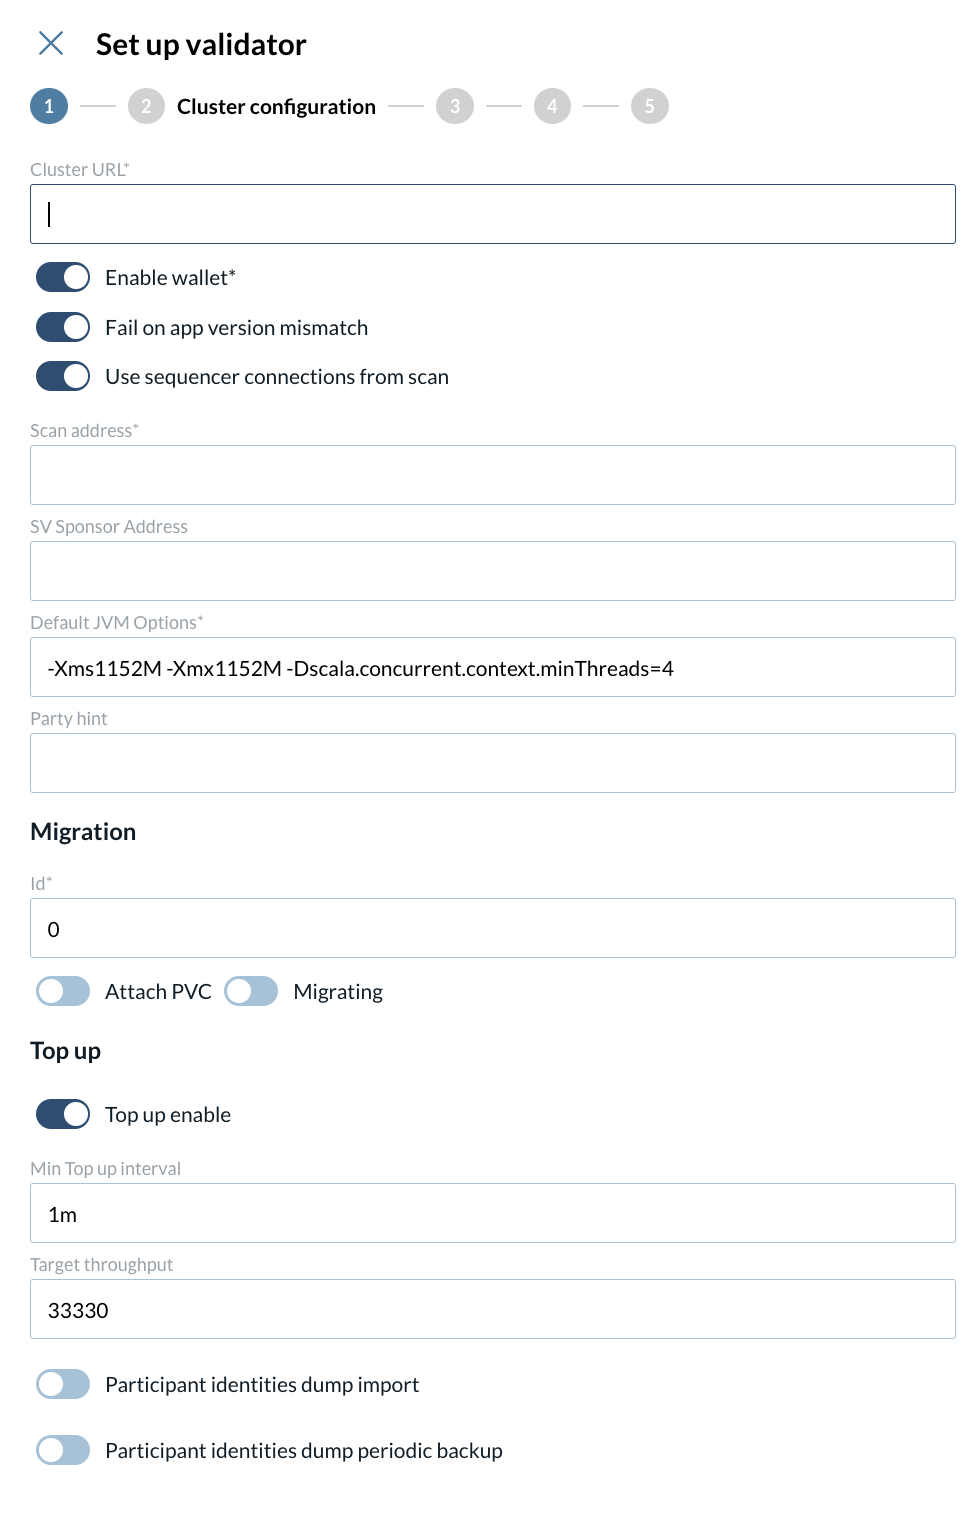
2 - Set up your cluster configuration
At the second step of your validator config, start by inserting the Cluster URL.
2.1 - Enable or disable each of the following fields:
-
Enable wallet
-
Fail on app version mismatch
-
Use sequencer connections from scan
2.2 - Fill in the remaining fields:
-
Cluster URL
-
Enable wallet
-
Fail on app version mismatch
-
Scan address
-
SV Sponsor Address
-
Party hint
-
Default JVM Options
-
Migration
-
Id
-
Attach PVC
-
Migrating
-
-
Top up
-
Enable
-
Top up min interval
-
Target throughput
-
2.3 - Enable or disable:
-
Participant identities dump import
-
Participant identities dump periodic backup
More info about these fields
-
Cluster URL The URL of the Kubernetes cluster where the validator node is deployed. clusterUrl value is used for looking up directory entries in the scan UI.
-
Enable wallet Turn this on to deploy a wallet UI with your validator.
-
Fail on app version mismatch If enabled, the deployment will fail if there is a mismatch between the validator and network application versions.
-
Scan address The address used for scanning and retrieving validator-related data.
-
SV Sponsor Address The URL of the SV app of the super validator sponsoring you. Typically provided by your SV sponsor and starts with "https://sv.sv-N" (N being a number).
-
Party hint Used as a prefix for the Party ID of your validator’s administrator. Must follow the format: <organization>-<function>-<enumerator>, e.g., myCompany-myWallet-1.
-
Default JVM Options Default configuration options for the Java Virtual Machine (JVM) running the validator.
-
Migration
-
Id Used to track database migrations. The migration ID starts at 0 for the initial deployment and increments by 1 with each migration.
-
Attach PVC Option to attach a Persistent Volume Claim (PVC) for data persistence during migration. Creates a Volume to store migration dumps (recommended).
-
Migrating Set to true when upgrading the validator to trigger the migration process.
-
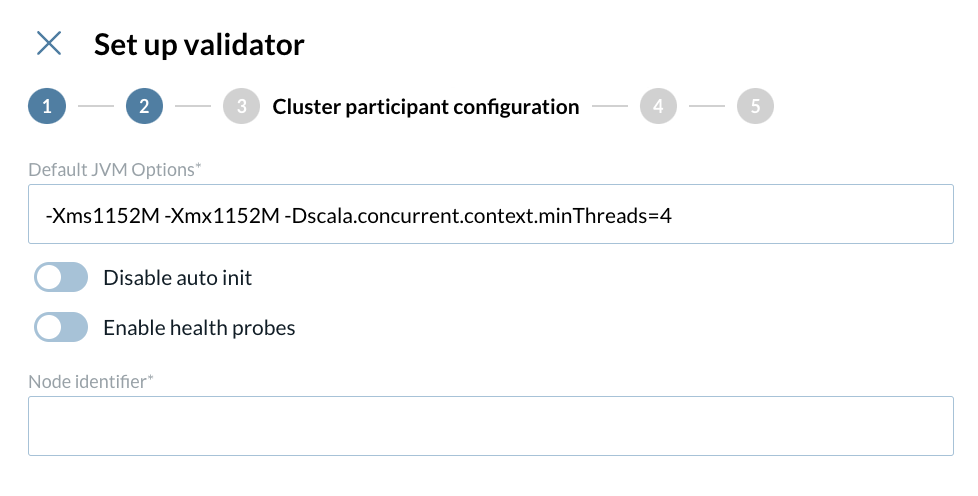
3 - Set up your cluster participant configuration
-
Insert your default JVM configurations
-
Enable or disable
-
Auto init
-
Enable health probes
-
-
Insert your Node Identifier
More info about these fields
-
Node identifier A unique identifier for the validator node within the network.
-
Disable auto init Prevents the validator from automatically starting after deployment, allowing for pre-run actions to be performed before initialization.
-
Enable health probes Turns on health checks to monitor the validator’s status and ensure it is functioning properly.
-
Default JVM Options Default configuration options for the Java Virtual Machine (JVM) running the validator.
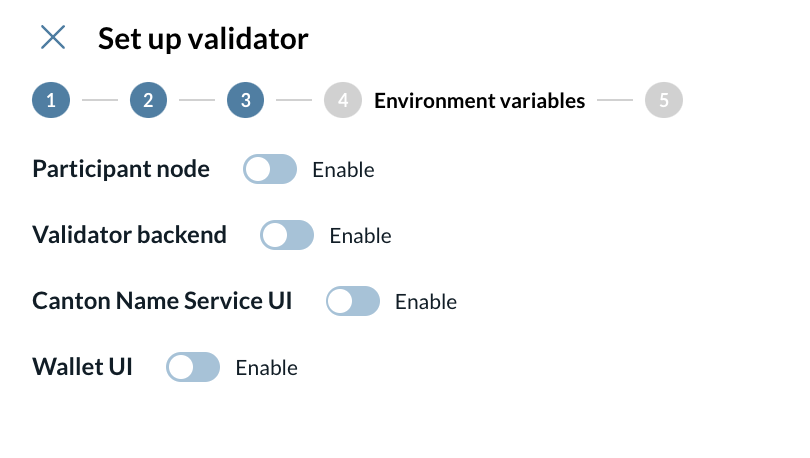
4 - Config environment variables
On this screen, you can override the values of the environment variables created during the wizard configuration for the following components:
-
Participant node
-
Validator backend
-
Canton Name Service UI
-
Wallet UI
More info about these fields
-
Participant node The node that interacts with the Canton ledger on behalf of participants.
-
Validator backend The backend service responsible for validating and processing transactions within the network.
-
Canton Name Service UI The user interface for managing and viewing Canton network names and identifiers.
-
Wallet UI User interface for interacting with the wallet associated with your validator.
|
This is a very specific configuration, if you are not sure about this step, please contact IntellectEU. |
5 - Summary
Review your Validator configuration. Once you have confirmed the settings, click the Confirm button to finalize and proceed with the deployment.
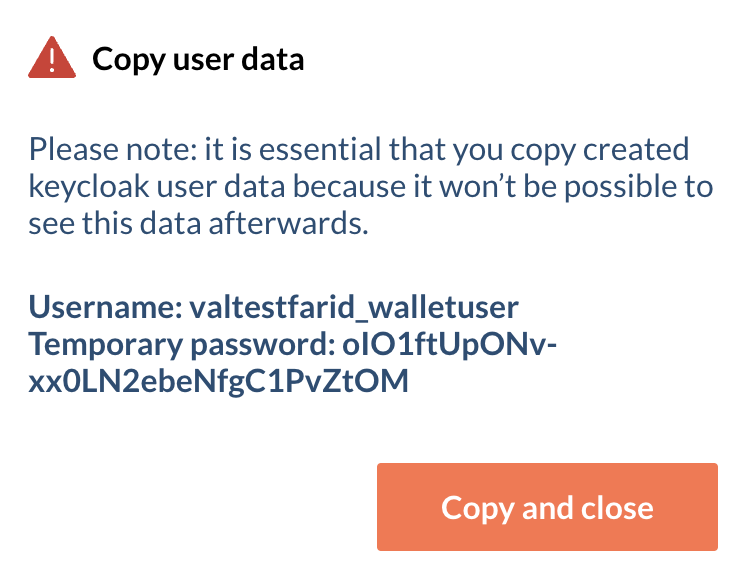
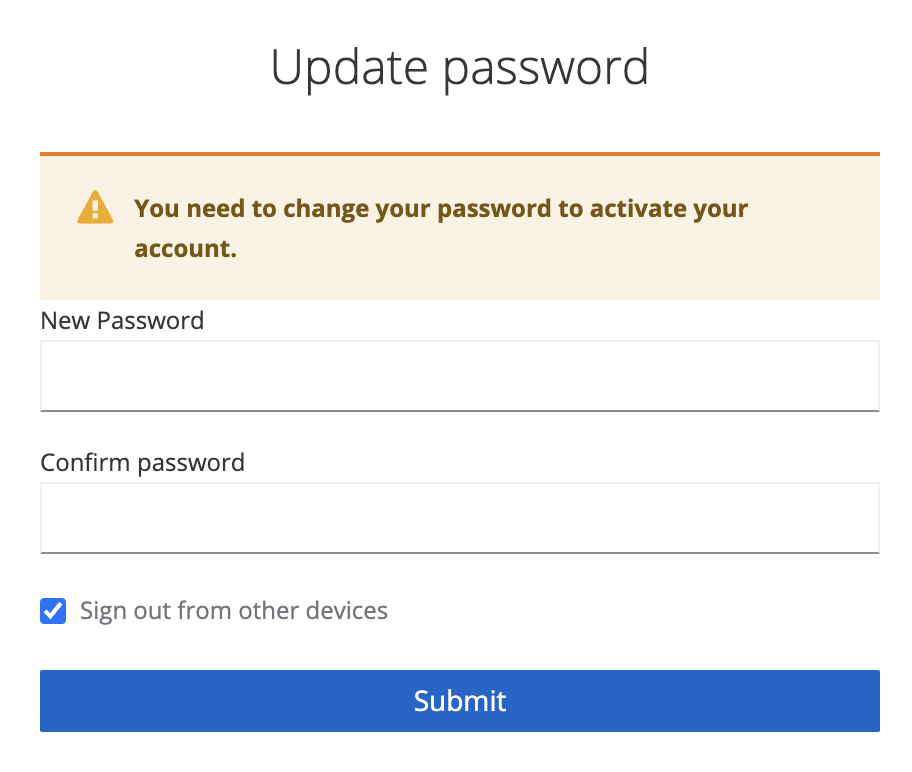
6 - Create a permanent password on keycloack
To access the wallet UI, you must first define a new password and confirm it on keycloak. Save the credentials displayed on the pop-up window.
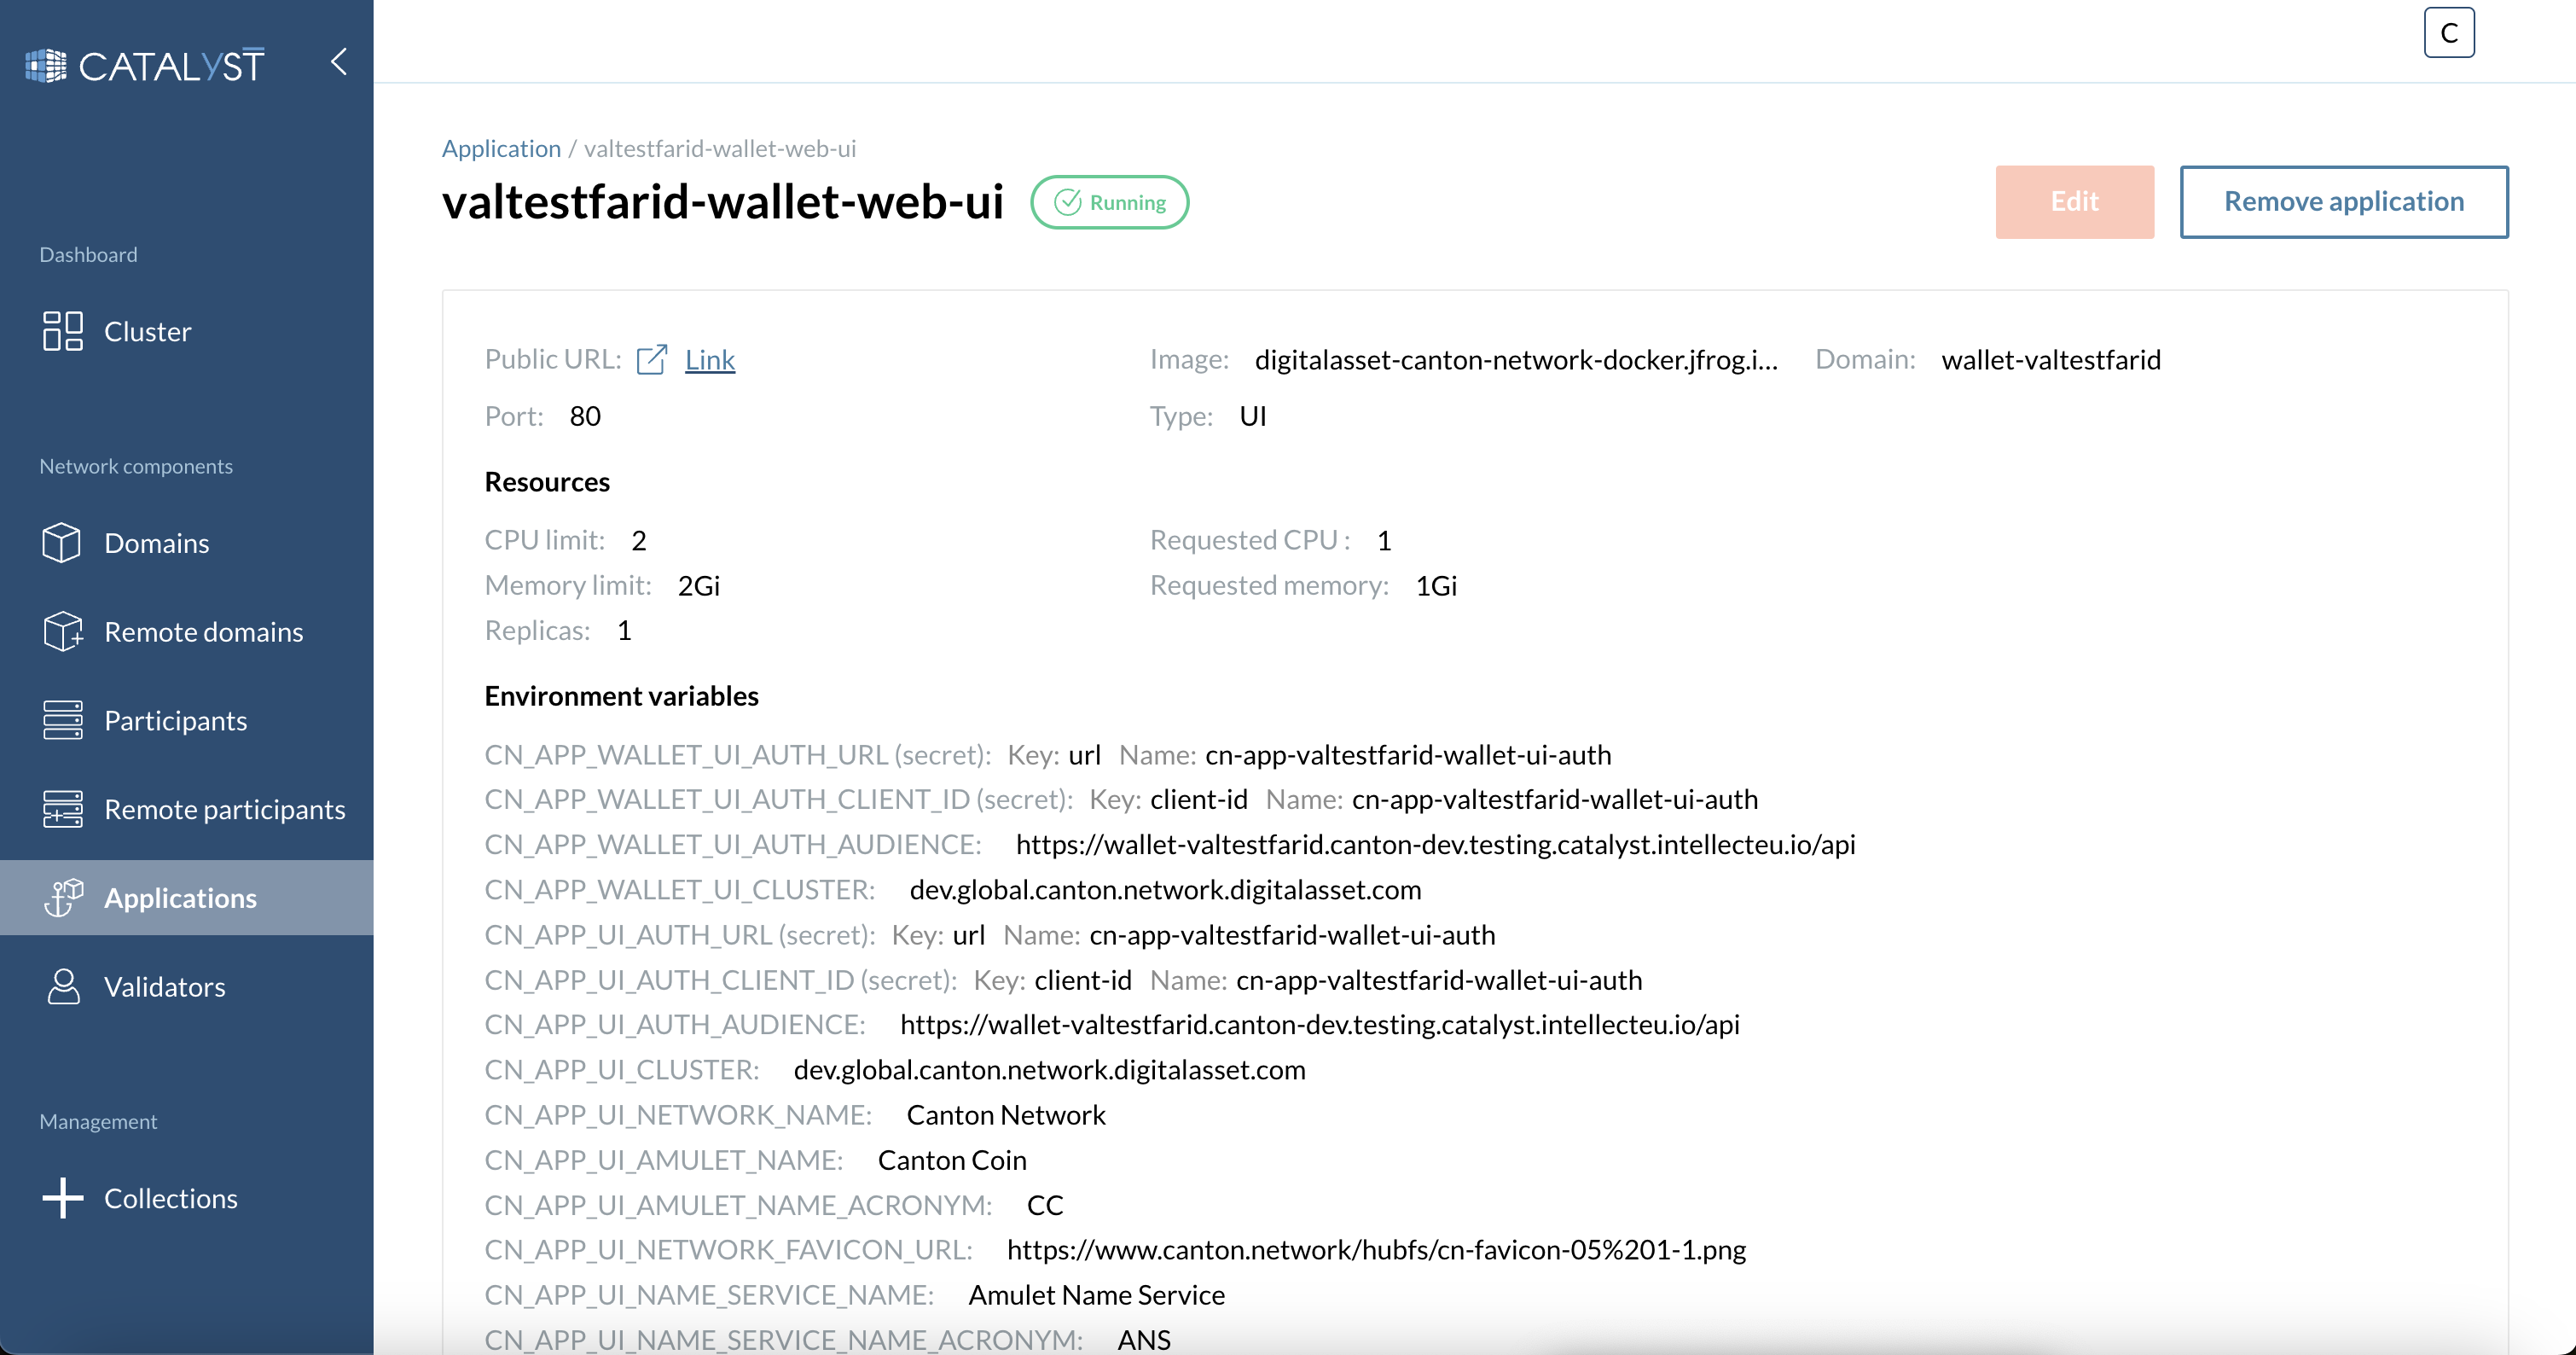
Once your node is up and running, click on the last link that contains the text wallet-web-ui. Then click on the link at the top left part of the screen.
A pop-up will be shown asking you to re-autenticate. Close your session by clicking on the log out button.
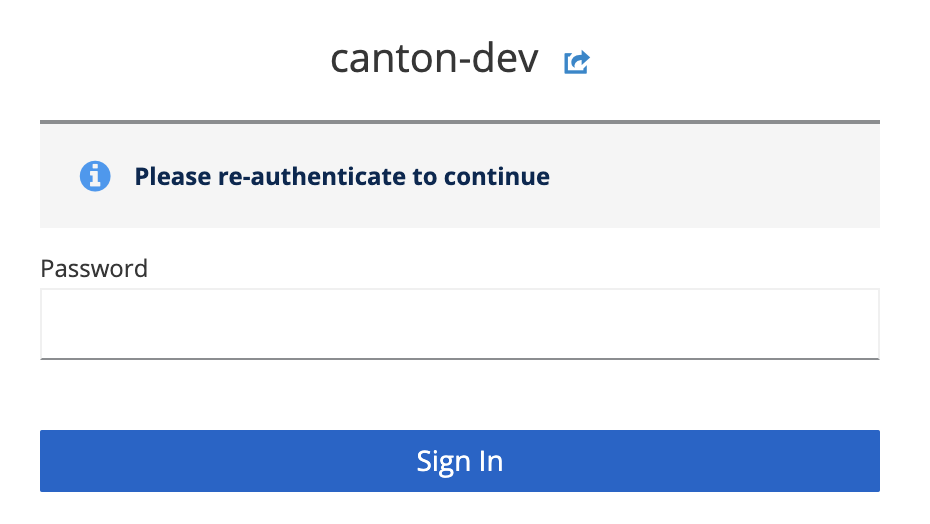
Now insert the temporary credentials saved on the previous step to autenticate yourslelf.
Finally, define a new password and click submit. Once this has been done you will be forwarded to the wallet ui console of your new Validator.
Backup and recovery
Catalyst Blockchain Manager enables Backup and recovery.
Throughout this user guide, we explain how to back up the Parties of your Validator and how to restore from them. This prevents your Canton Coins to be lost.
How to create a new Identity Dump?
|
When deleting the old deployment be sure to set the Delete all resources false as displayed below. 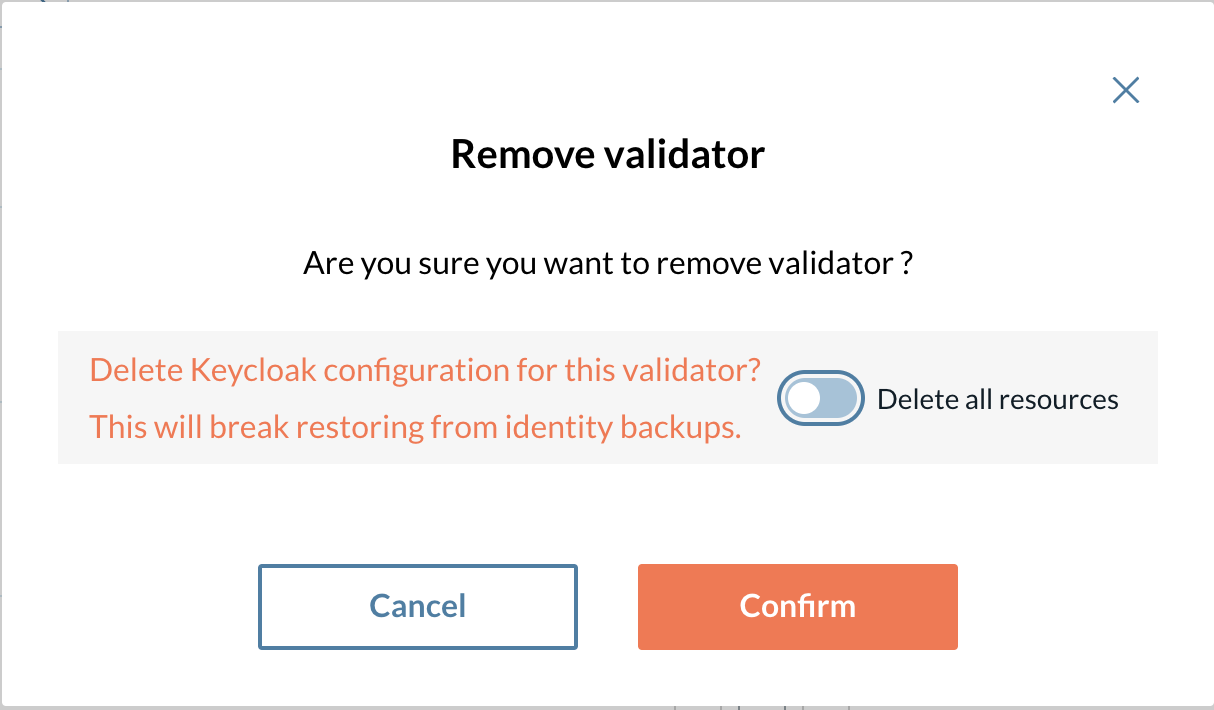
Figure 11. Validator Removal
|
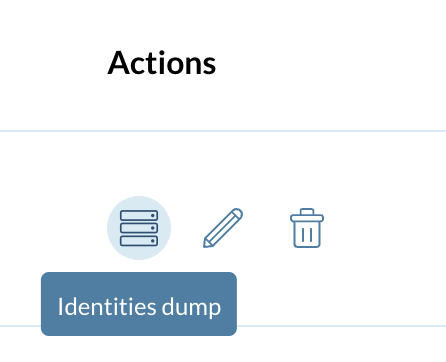
To set up a new Dump go to the Validators tab to see all your Validators.
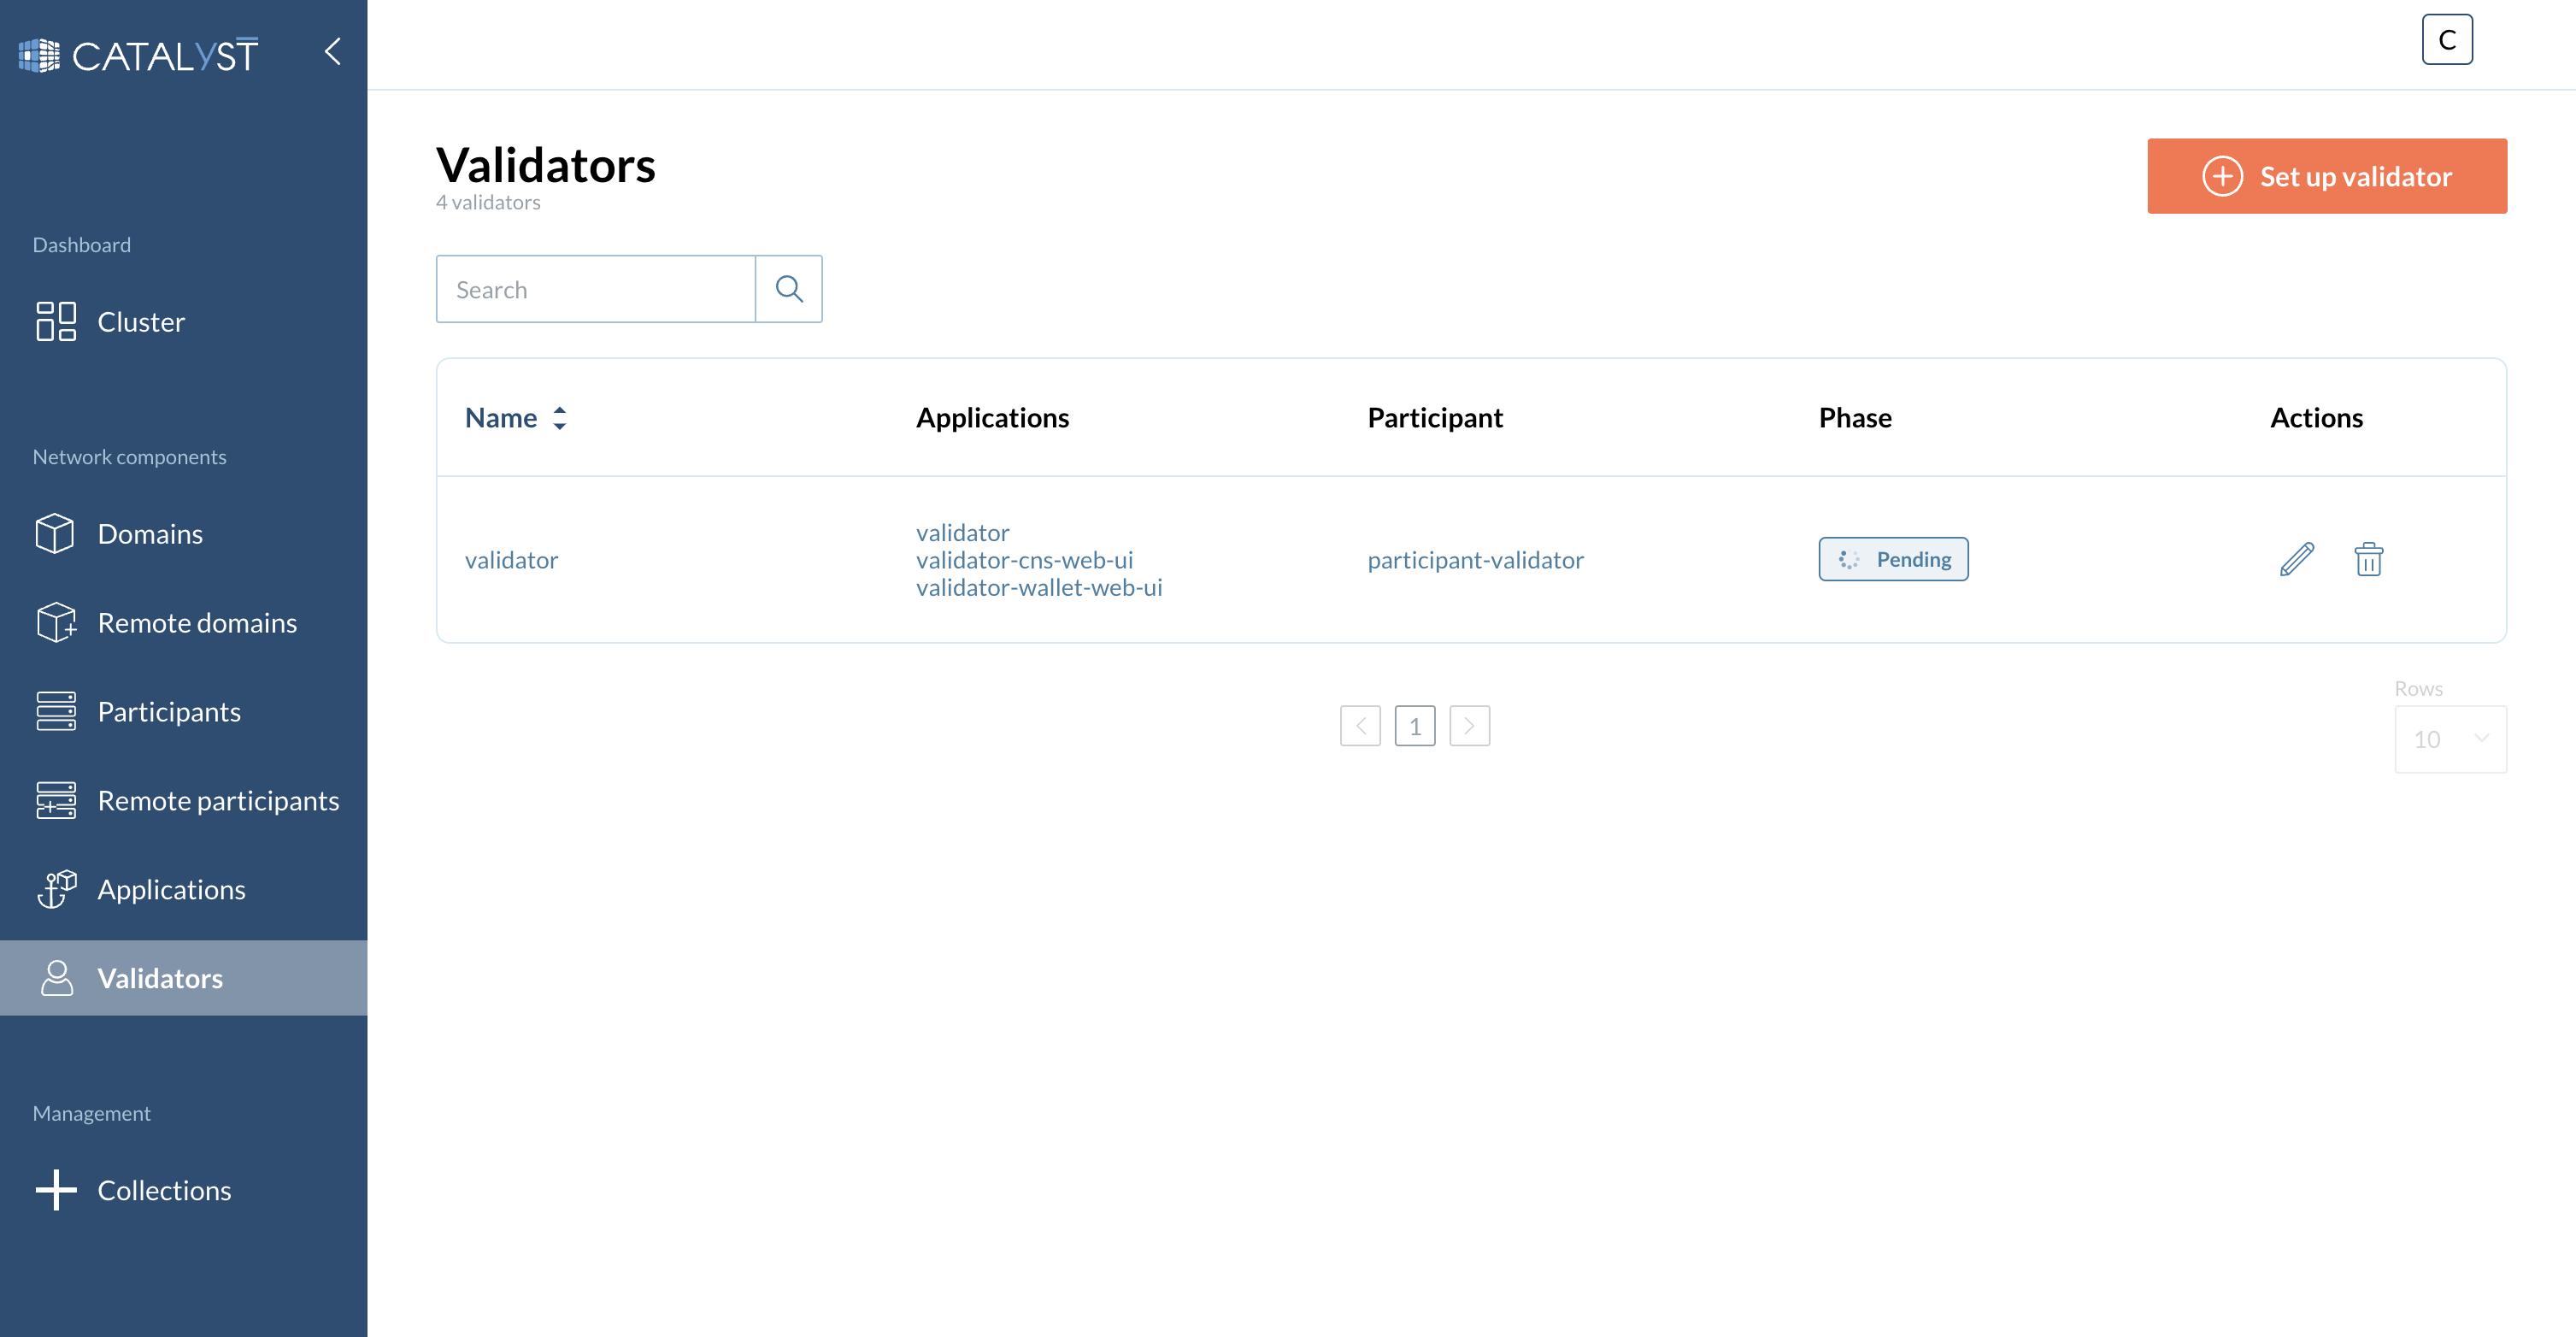
Once at your validators menu, click on the dump icon of the validator you pretend to back up as displayed in the image below
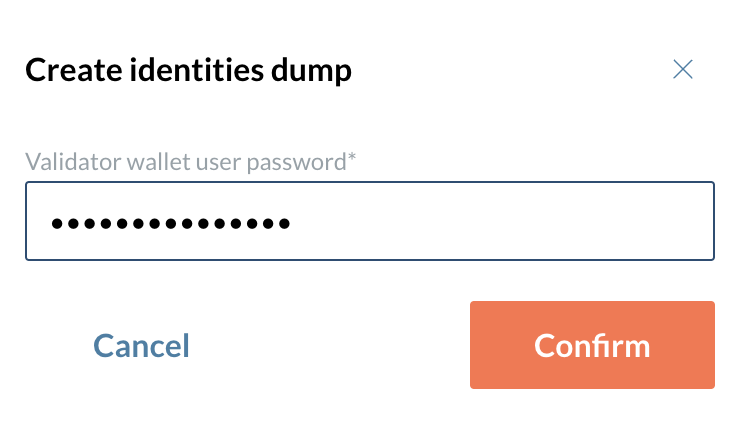
A pop-up is show, asking you to provide your Validator wallet user password you stored when creating your validator.
How to restore a validator from an Identity Dump?
At your validators menu click on the “Set up validator” button to open a side window.
Enable the option to Restore participant identities.

Select your Identity Dump, and provide a new ID following the naming rules.
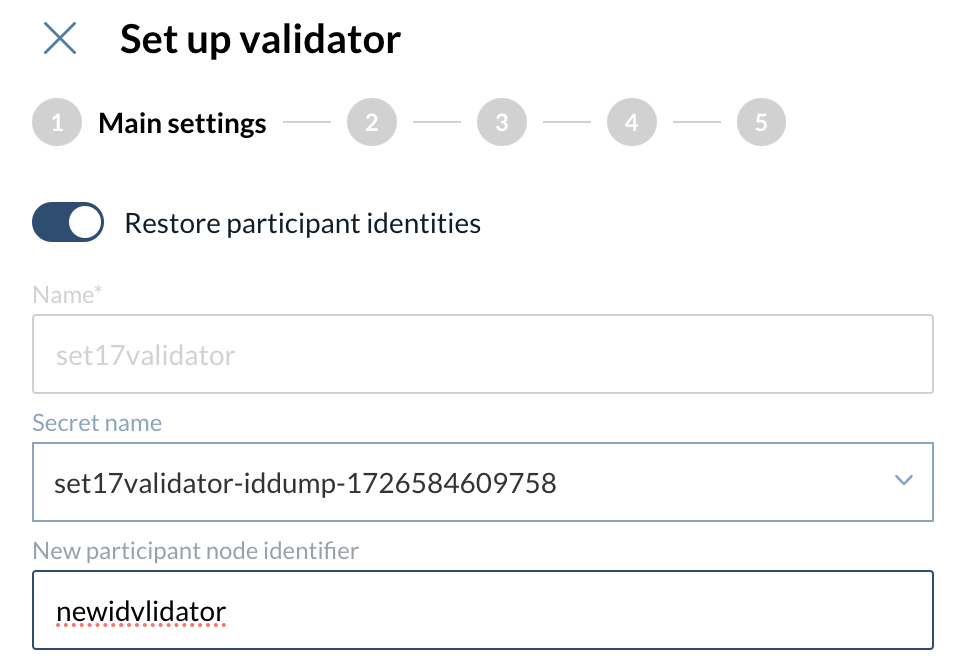
Proceed to create your validator as for a new one.
|
The fields used to config the network access must be identical to the ones created on the Validator you are trying to restore. |
|
Please check the Validator Management section to get more details on how to set a new validator |